Go With The Flow.. Watercolour Basics Series
The secret to revolutionising your watercolours!
Do you feel frustrated when you sit down to paint in watercolours, struggle with it for ages and yet again, the end result is just a muddy, murky opaque painting with thick unwanted streaks?
Or conversely, do you end up with a water colour painting that’s so wishy washy and pale that it just lacks any life at all, and you wonder why you ever started it?
Did you know that by altering the consistency of your watercolour paint you can create many different effects?
Well here’s where I may be able to help!

From the ethereal beauty of a transparent rose petal; the vibrant impact of colours in stained glass, to the dark depths of a moonless night, watercolour can do it all if you just know how watery or how thick your paint should be.
In my twenty years of being a professional watercolour artist, and teaching hundreds and hundreds of students (many of whom have been to other watercolour classes) almost no-oneI come across seems to have been taught anything about paint consistency in watercolour.
It’s my mission to help people discover their passion for painting and drawing, and to help them learn easy ways to paint in watercolour. To make things easier to understand I often use comparisons with cooking and baking when I teach watercolour. Just like your cake might turn out as flat as a pancake if the pre-baking consistency is too watery or too sludgy, (or when you want to thicken a sauce with cornflour and you add too much water too early to the dry powder and it just refuses to mix into a paste,) you need to know how to treat your paint in its raw state.
As boring as it may sound, a huge 50% of the time spent in doing a watercolour can often consist of the planning of it and the preparation of your materials. Some of the most amazingly spontaneous looking watercolours I’ve ever done have required way more time to preparethan actually paint.
So, what are the most important points to remember when you want to push your watercolour to the limit?
Well first of all, there are a couple of golden rules which apply whateverway you plan to use your watercolour, and these are:
· Water, water everywhere…
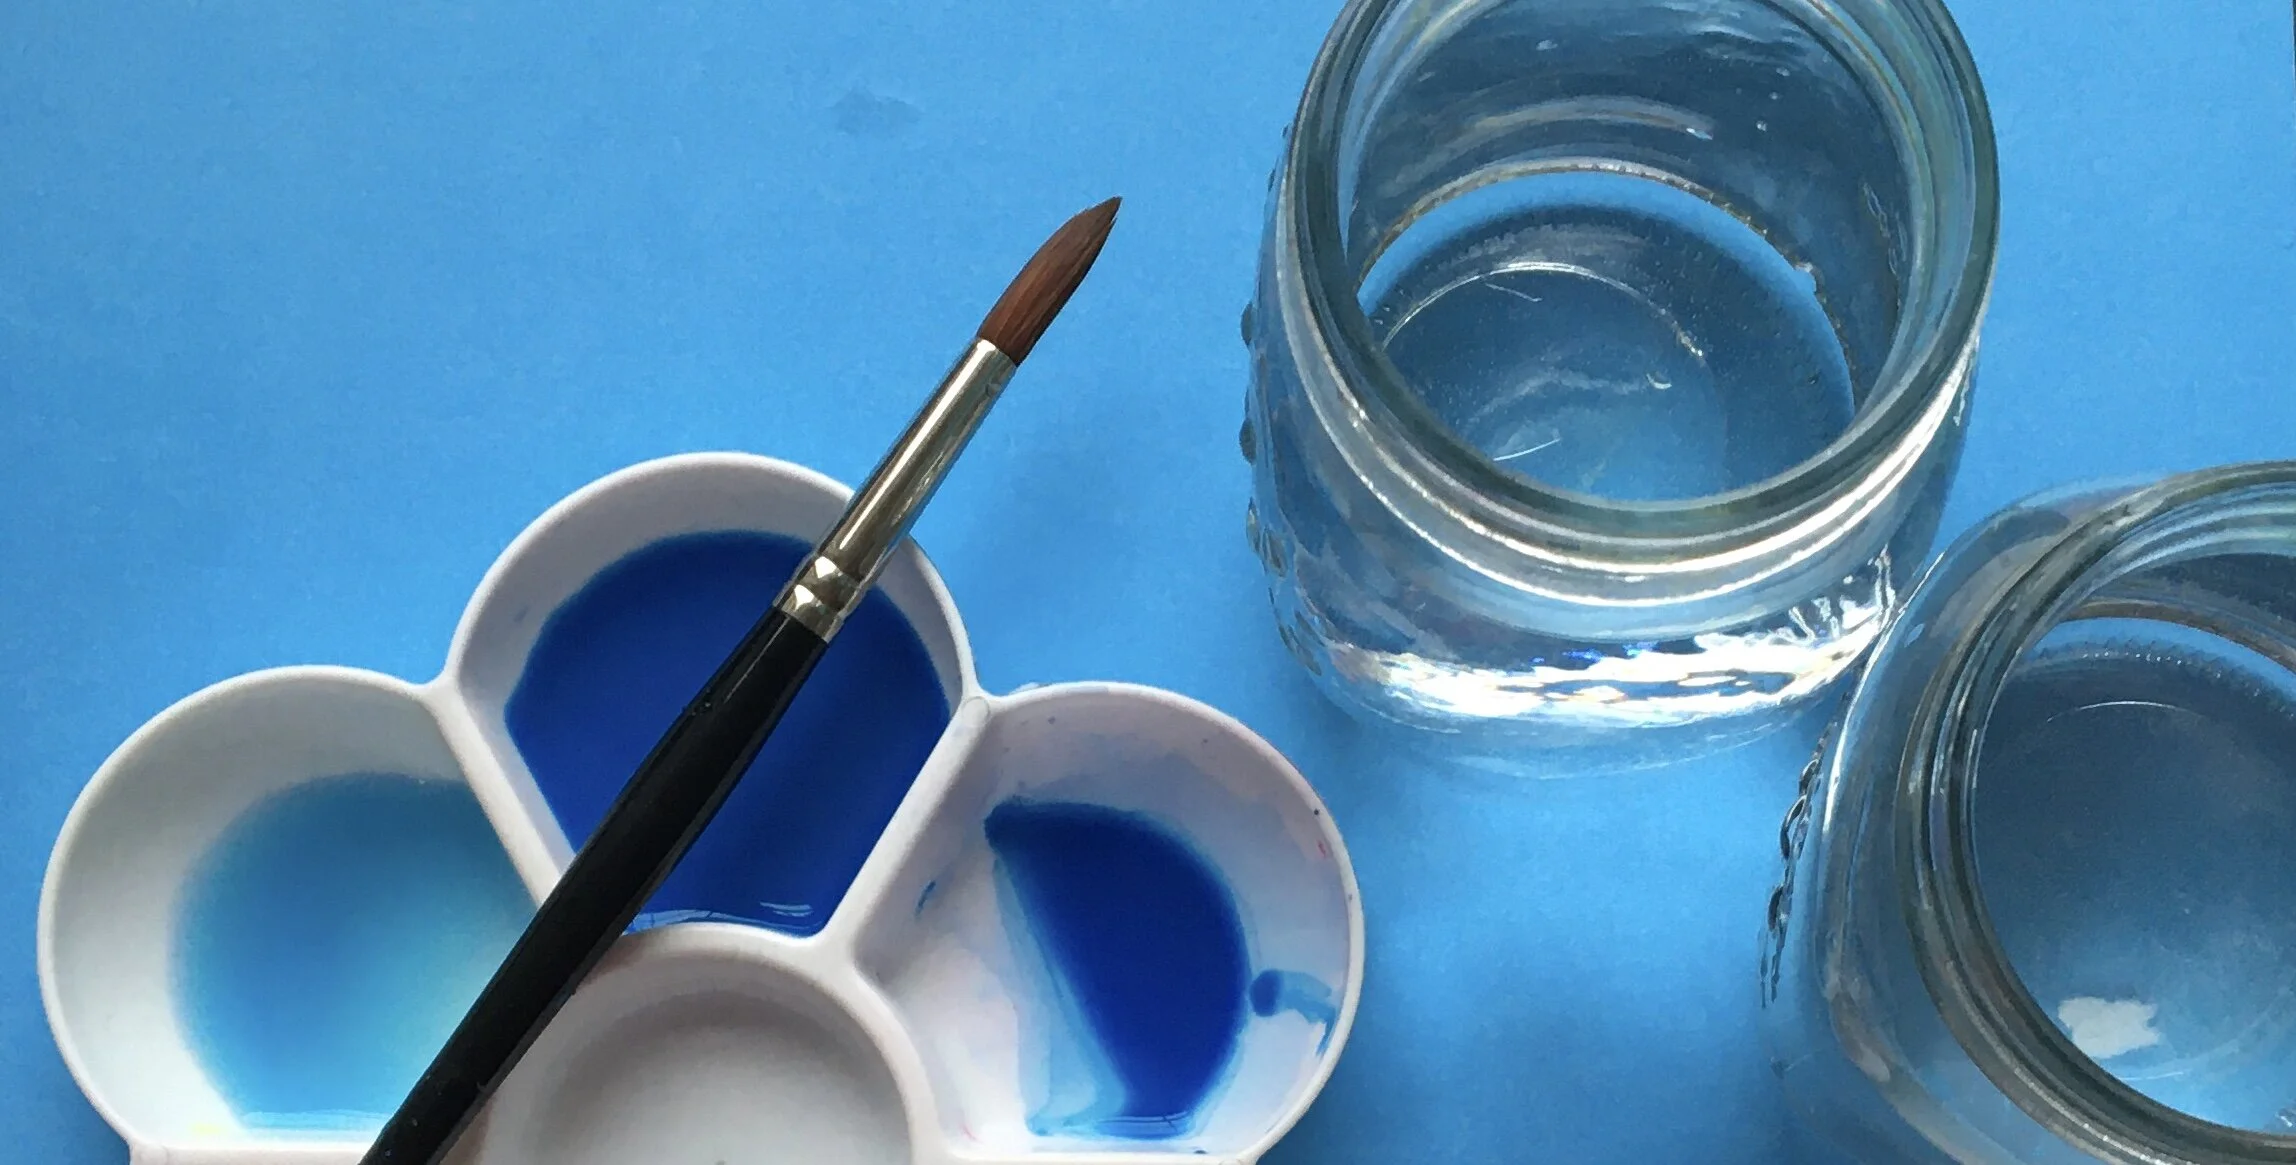
I always have a minimumof two jars of water (one to apply clean water to paint mixes and paper, and one for washing out my brush,) frequently replaced to make sure my colours stay clean and bright. You can’t paint vibrant transparent watercolours with water the consistency of old coffee!
Example: I’m currently working on a series of watercolour paintings of seals painted on wet paper in wet-in-wet technique, so I have four or fivejars of water on my table. There’s no time to be going off to change water when the paint on your paper might just have dried enough to make the next brush stroke a disaster!
· Clean is Key:
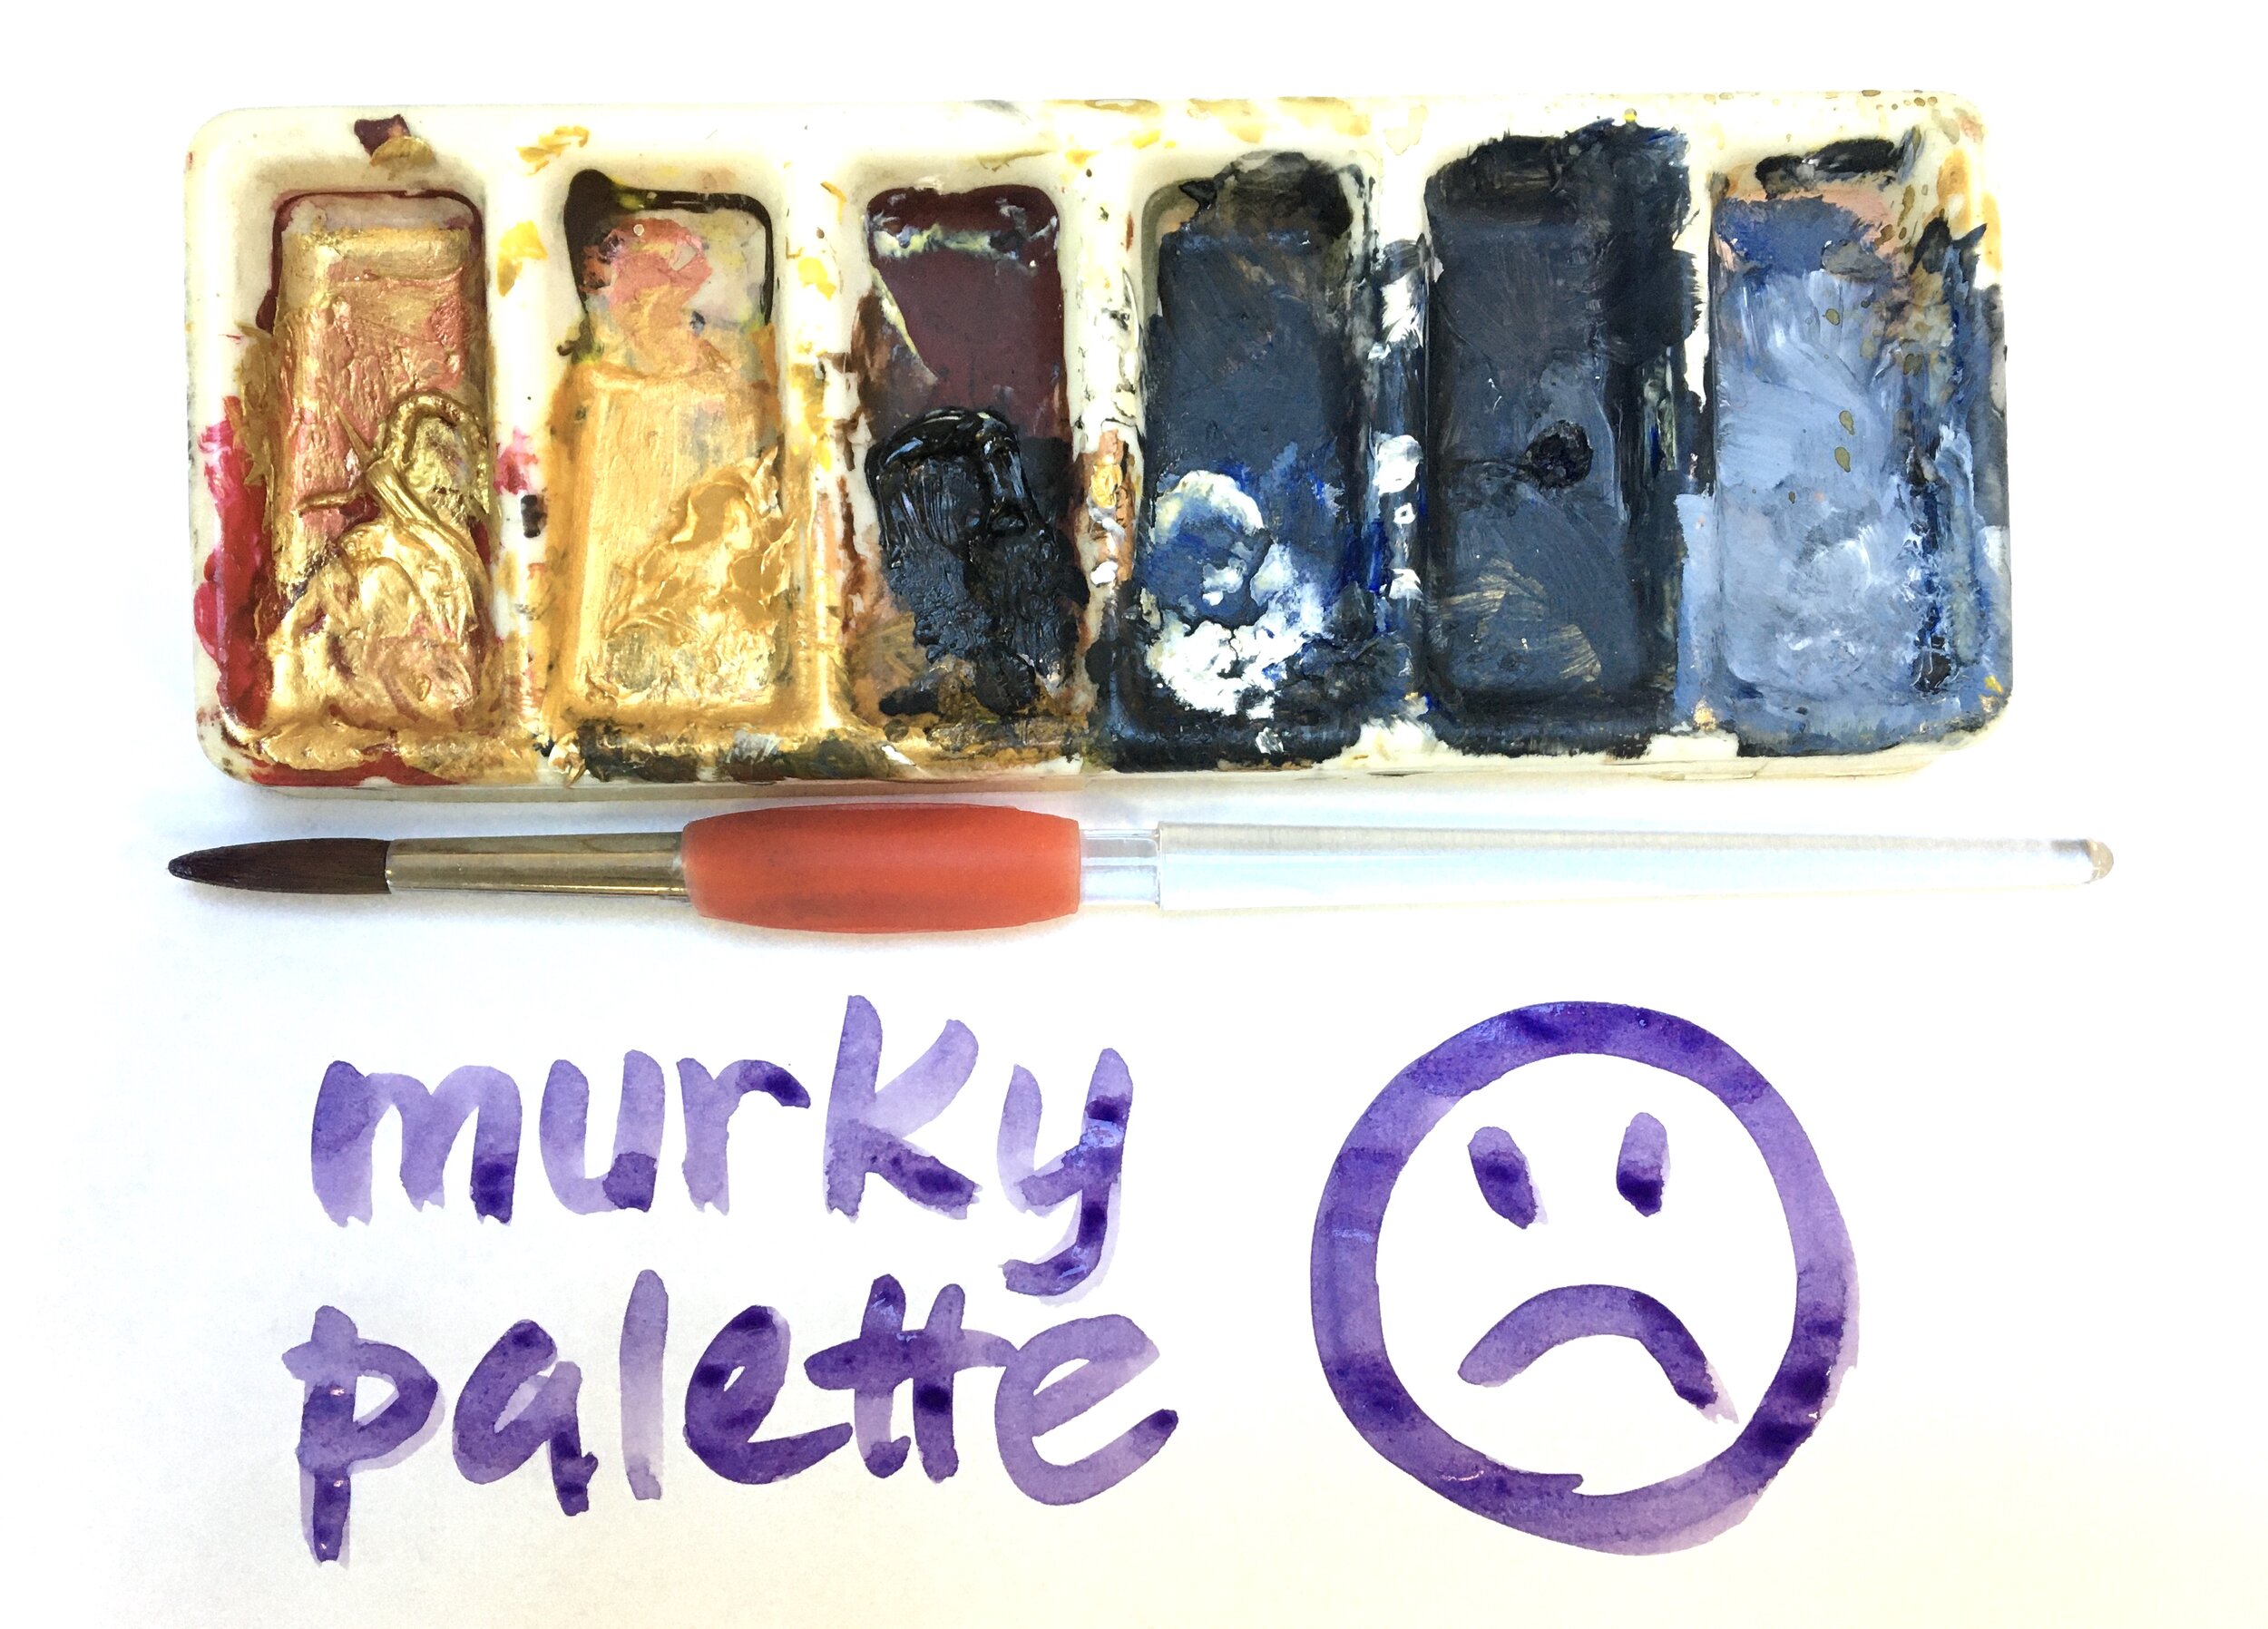
Unlike my attitude to cleaning at home (dust, what dust?!) my watercolour equipment has to be squeaky-clean before I start. As I provide all the materials in my watercolour workshops, I know that everything is spotless before we start, but my jaw drops sometimes when I see someone at a workshop or on a painting holiday when they bring out a watercolour palette that looks like it’s been dug out of the bottom of a dung heap. 😊
You can’t mix clean colours in a dirty palette, so get out that washing up liquid and sponge out and give your stuff a spring clean in order to prepare for your masterpiece.
· Mix It Up
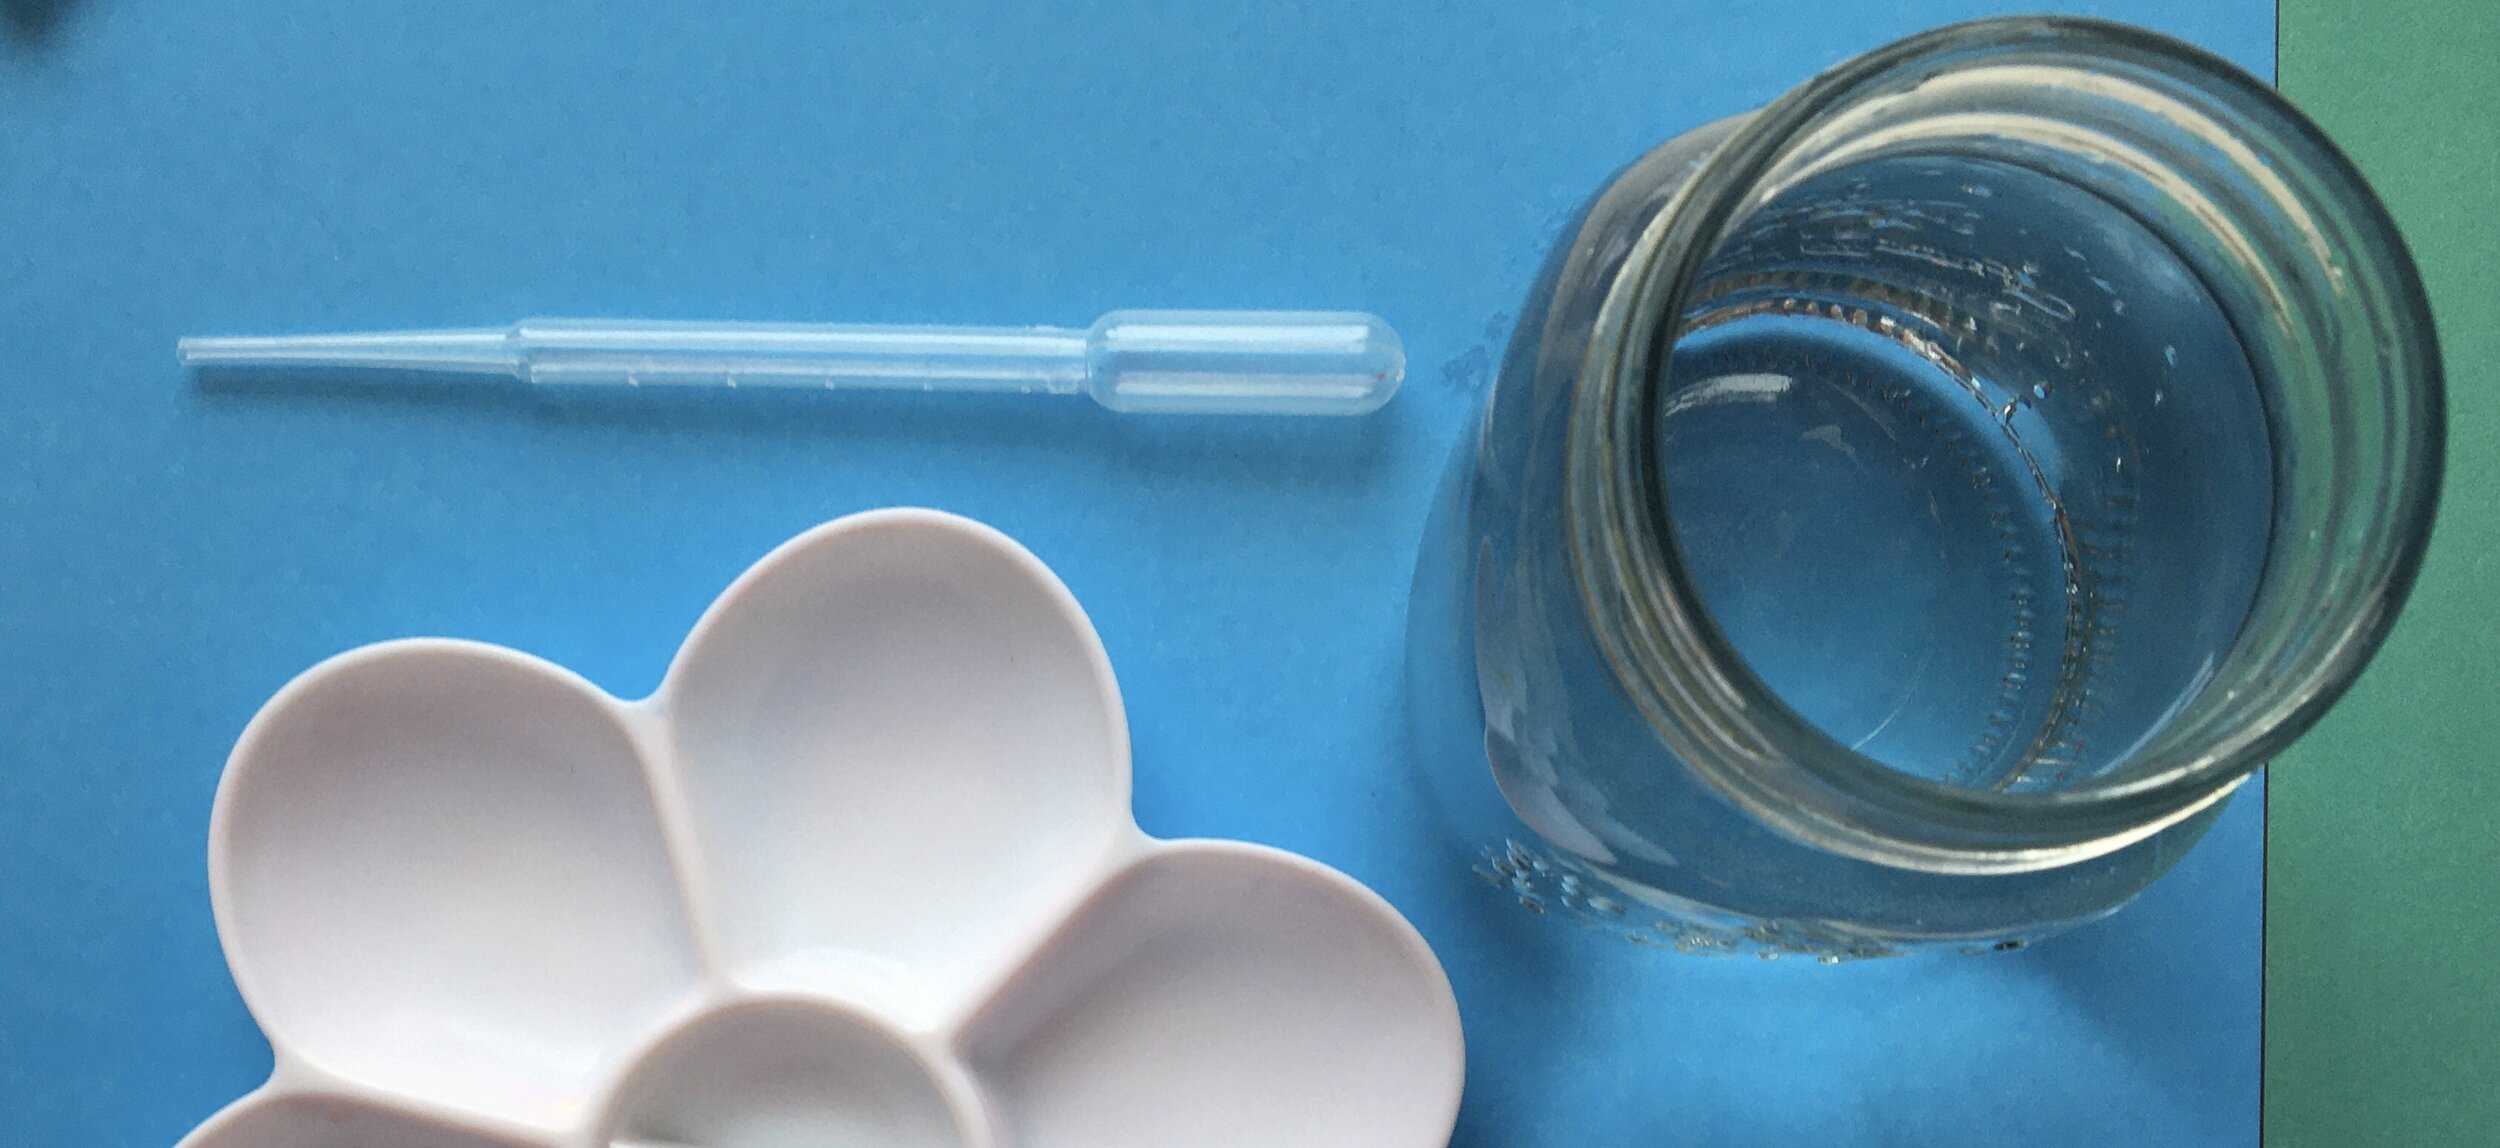
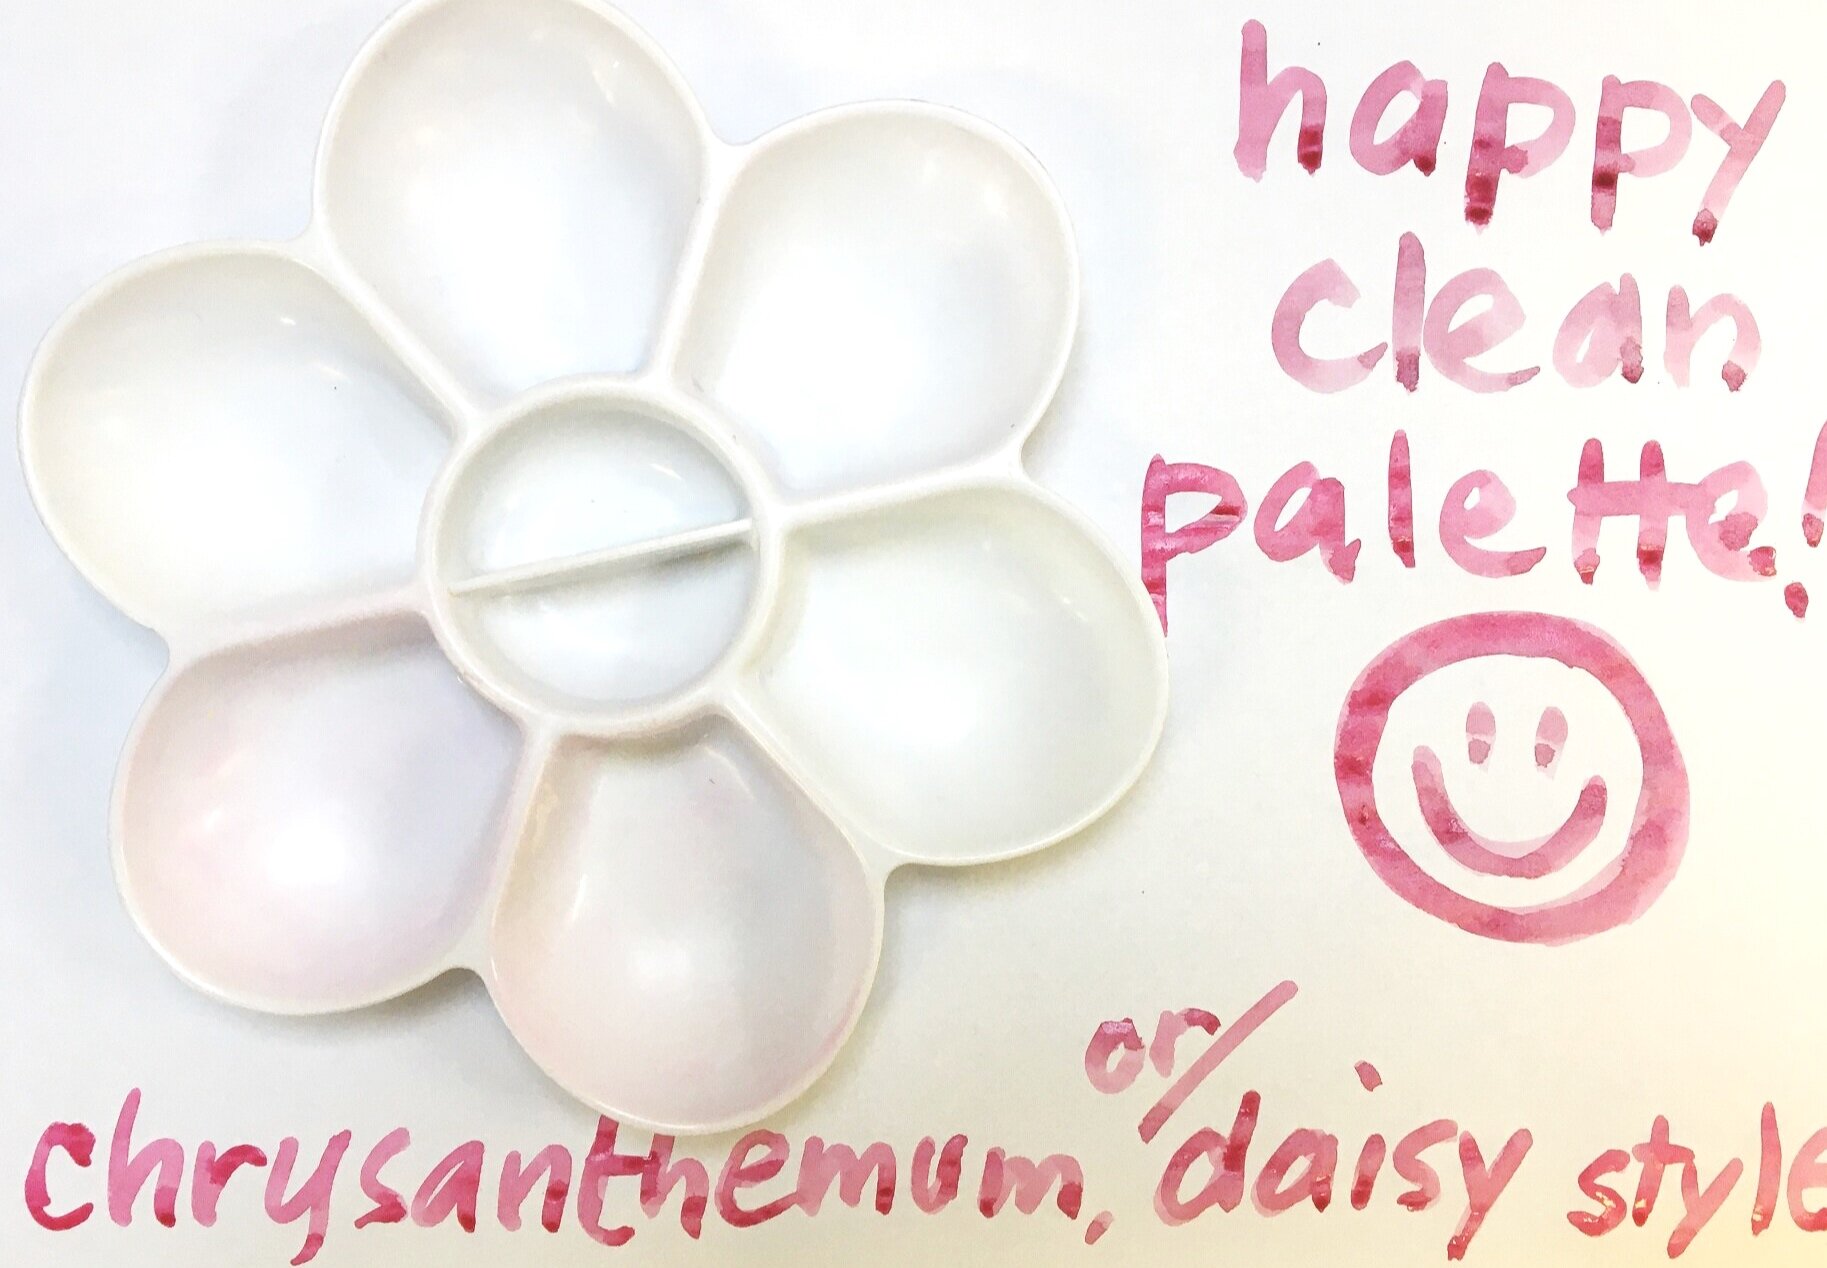
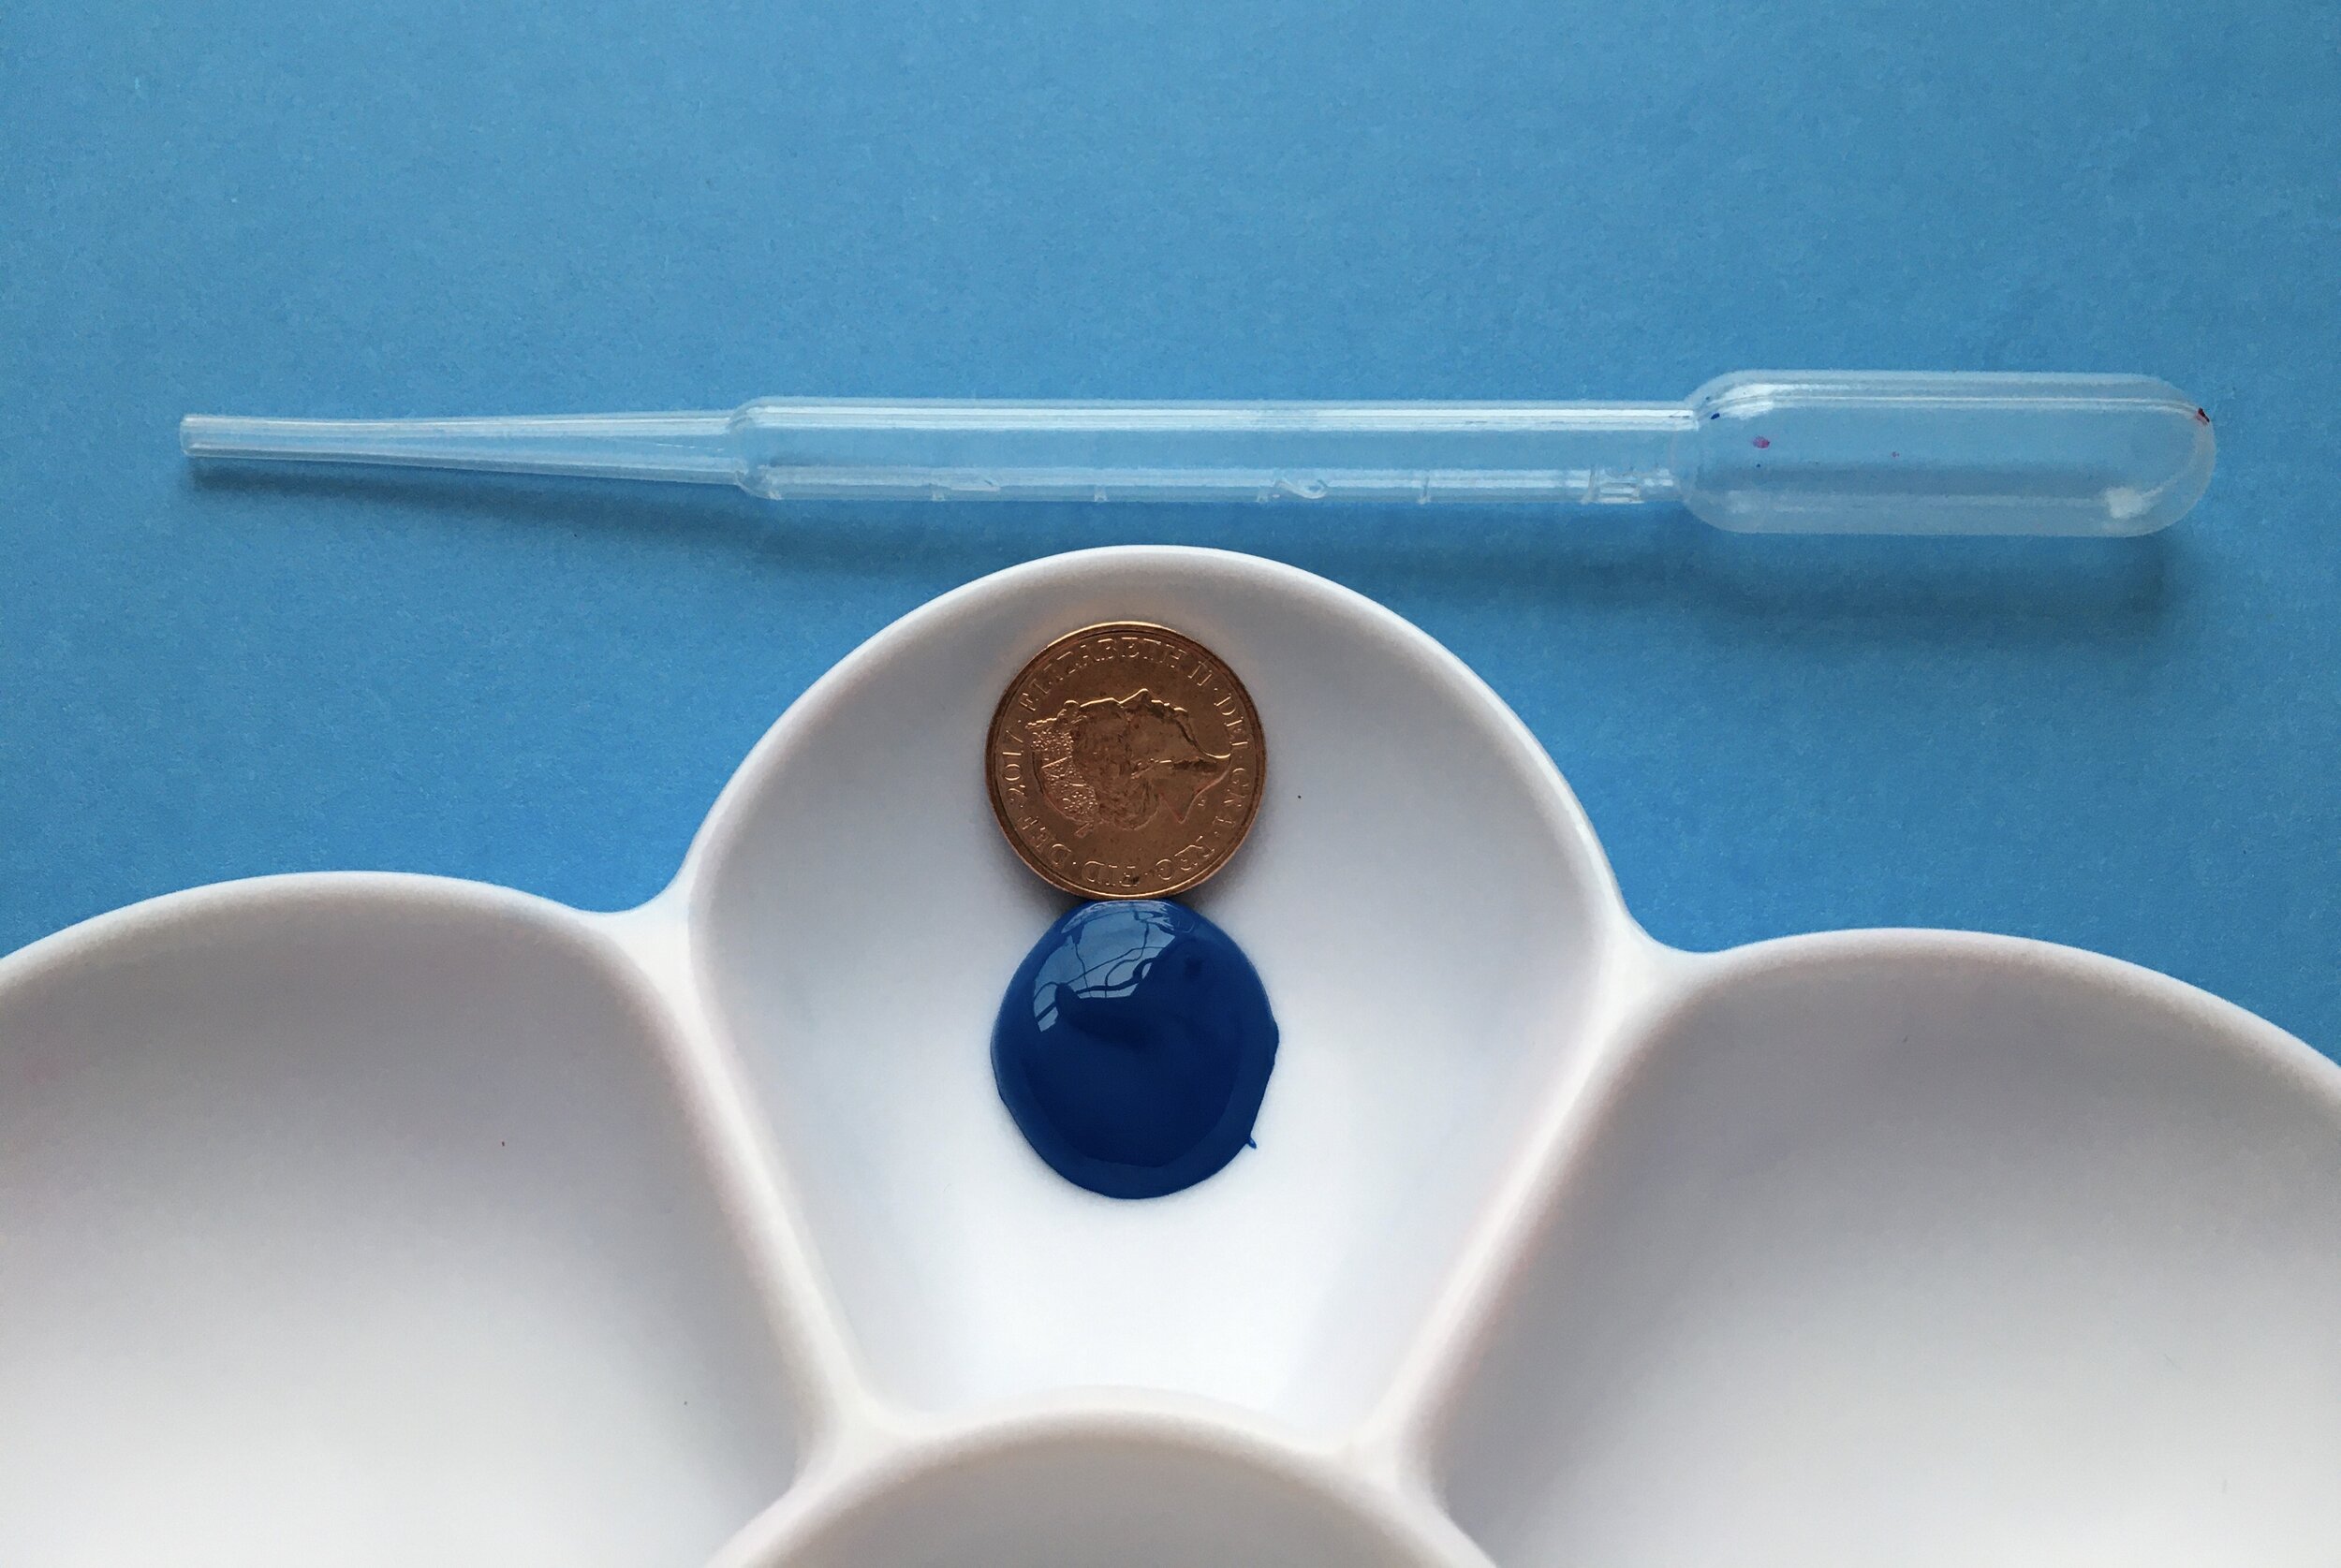
Use palettes with deep wellsto mix your colours.
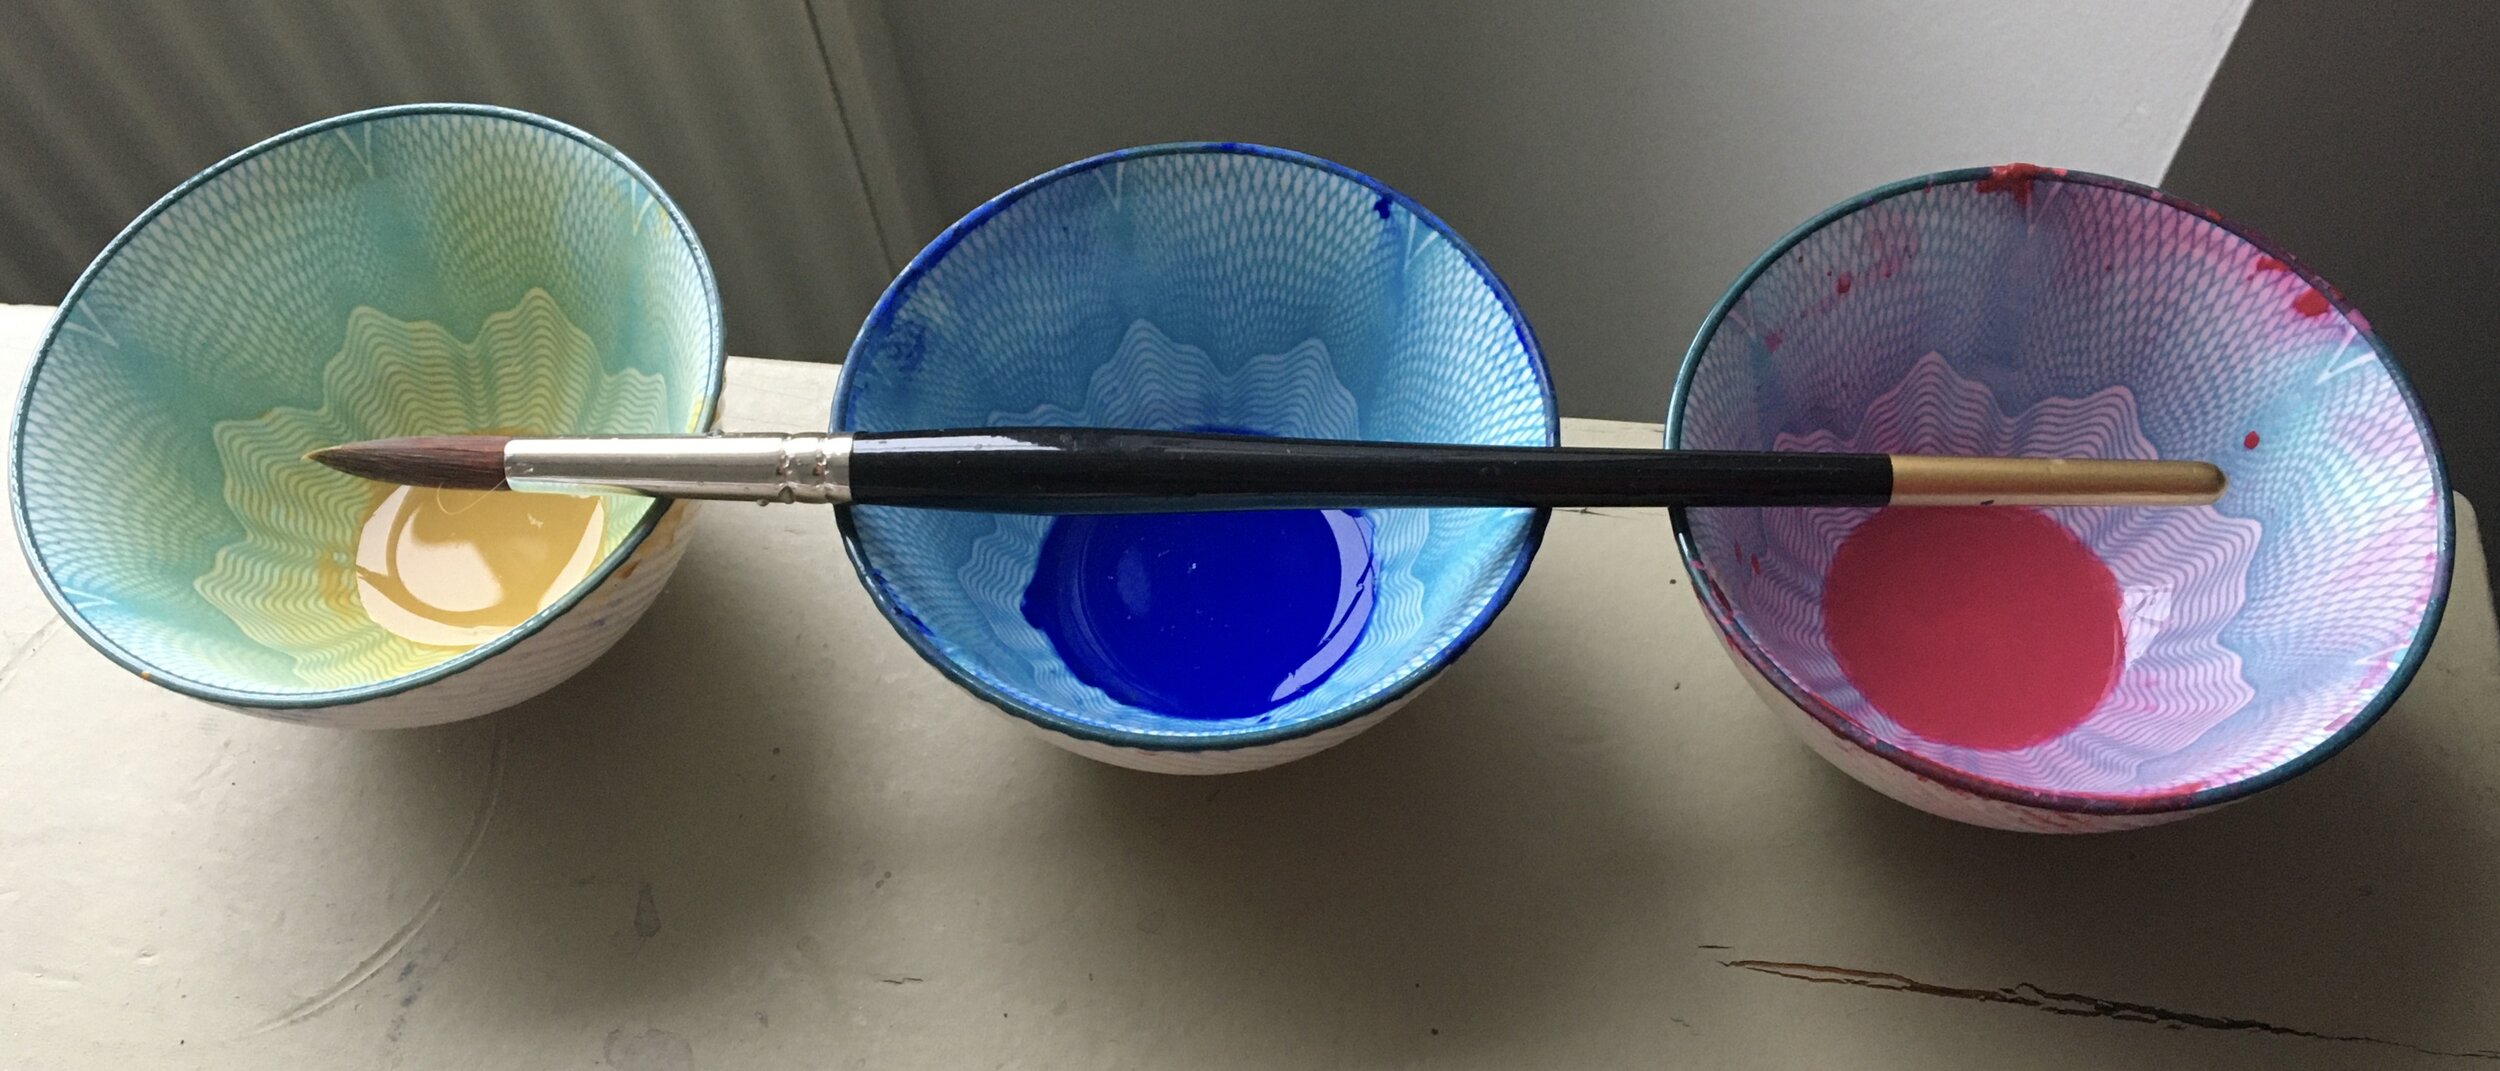
I tend to mix up really large quantities of my three or four core colours, from which I’ll eventually create all the other colours I’ll need,to my favourite consistency at the beginning of my painting session. This has the advantage that I don’t need to constantly be squeezing out small amounts throughout the session and then mixing them with water and trying to match the consistency each time. Once I have my core colours prepared I’ll eventually create all the other colours I’ll need, by combining them in the smaller wells of another palette. I use the flower shaped palettes called Daisy Wheel, or Crysanthemum style palettes for my large initial mixes of colour so I can mix up generous quantities of paint and can really dunk my brush in to get a good generous brush full to paint with.
(Incidentally, if I’m working on a painting that’s the size of a full sheet of watercolour paper I’ll mix up my core colours in teacups or yoghurt pots so I can create enough volume and depth to reallydunk my large brushes in.)
Now at this point you may be thinking that this method of mixing up huge quantities of paint up at the beginning of your painting session sounds very wasteful. Well, happily, it’s not wasteful in the least, and here’s why. Any unused paint (which hasn’t got dirty) by the end of the session can be covered with cling film if you’re planning to paint the following day. And if won’t be painting again for a while, you can just allow your core colours to air dry on the palette, and then mix them with water again the next time you paint, just as you would with blocks or pans of watercolour.
Okay, so now we’ve got those basics out of the way lets have a closer look at paint consistency…
Okay, so now we’ve got those basics out of the way lets have a closer look at paint consistency…
(Note: These tips mostly apply to tube watercolour. The little hard blocks (pans) of watercolour don’t really lend themselves to creating large volumes of colour unless they are super- expensive professional quality. Pans are great for working on location when you’re producing smaller scale quick watercolour sketches, but when I’m working indoors I almost always use tubes.)
The two extremes
No 8 and No 8A
To put it in a nutshell:
The higher the water content of your paint the faster and further it flows.
The thicker the paint, and the less water in it, the slower it will spread.
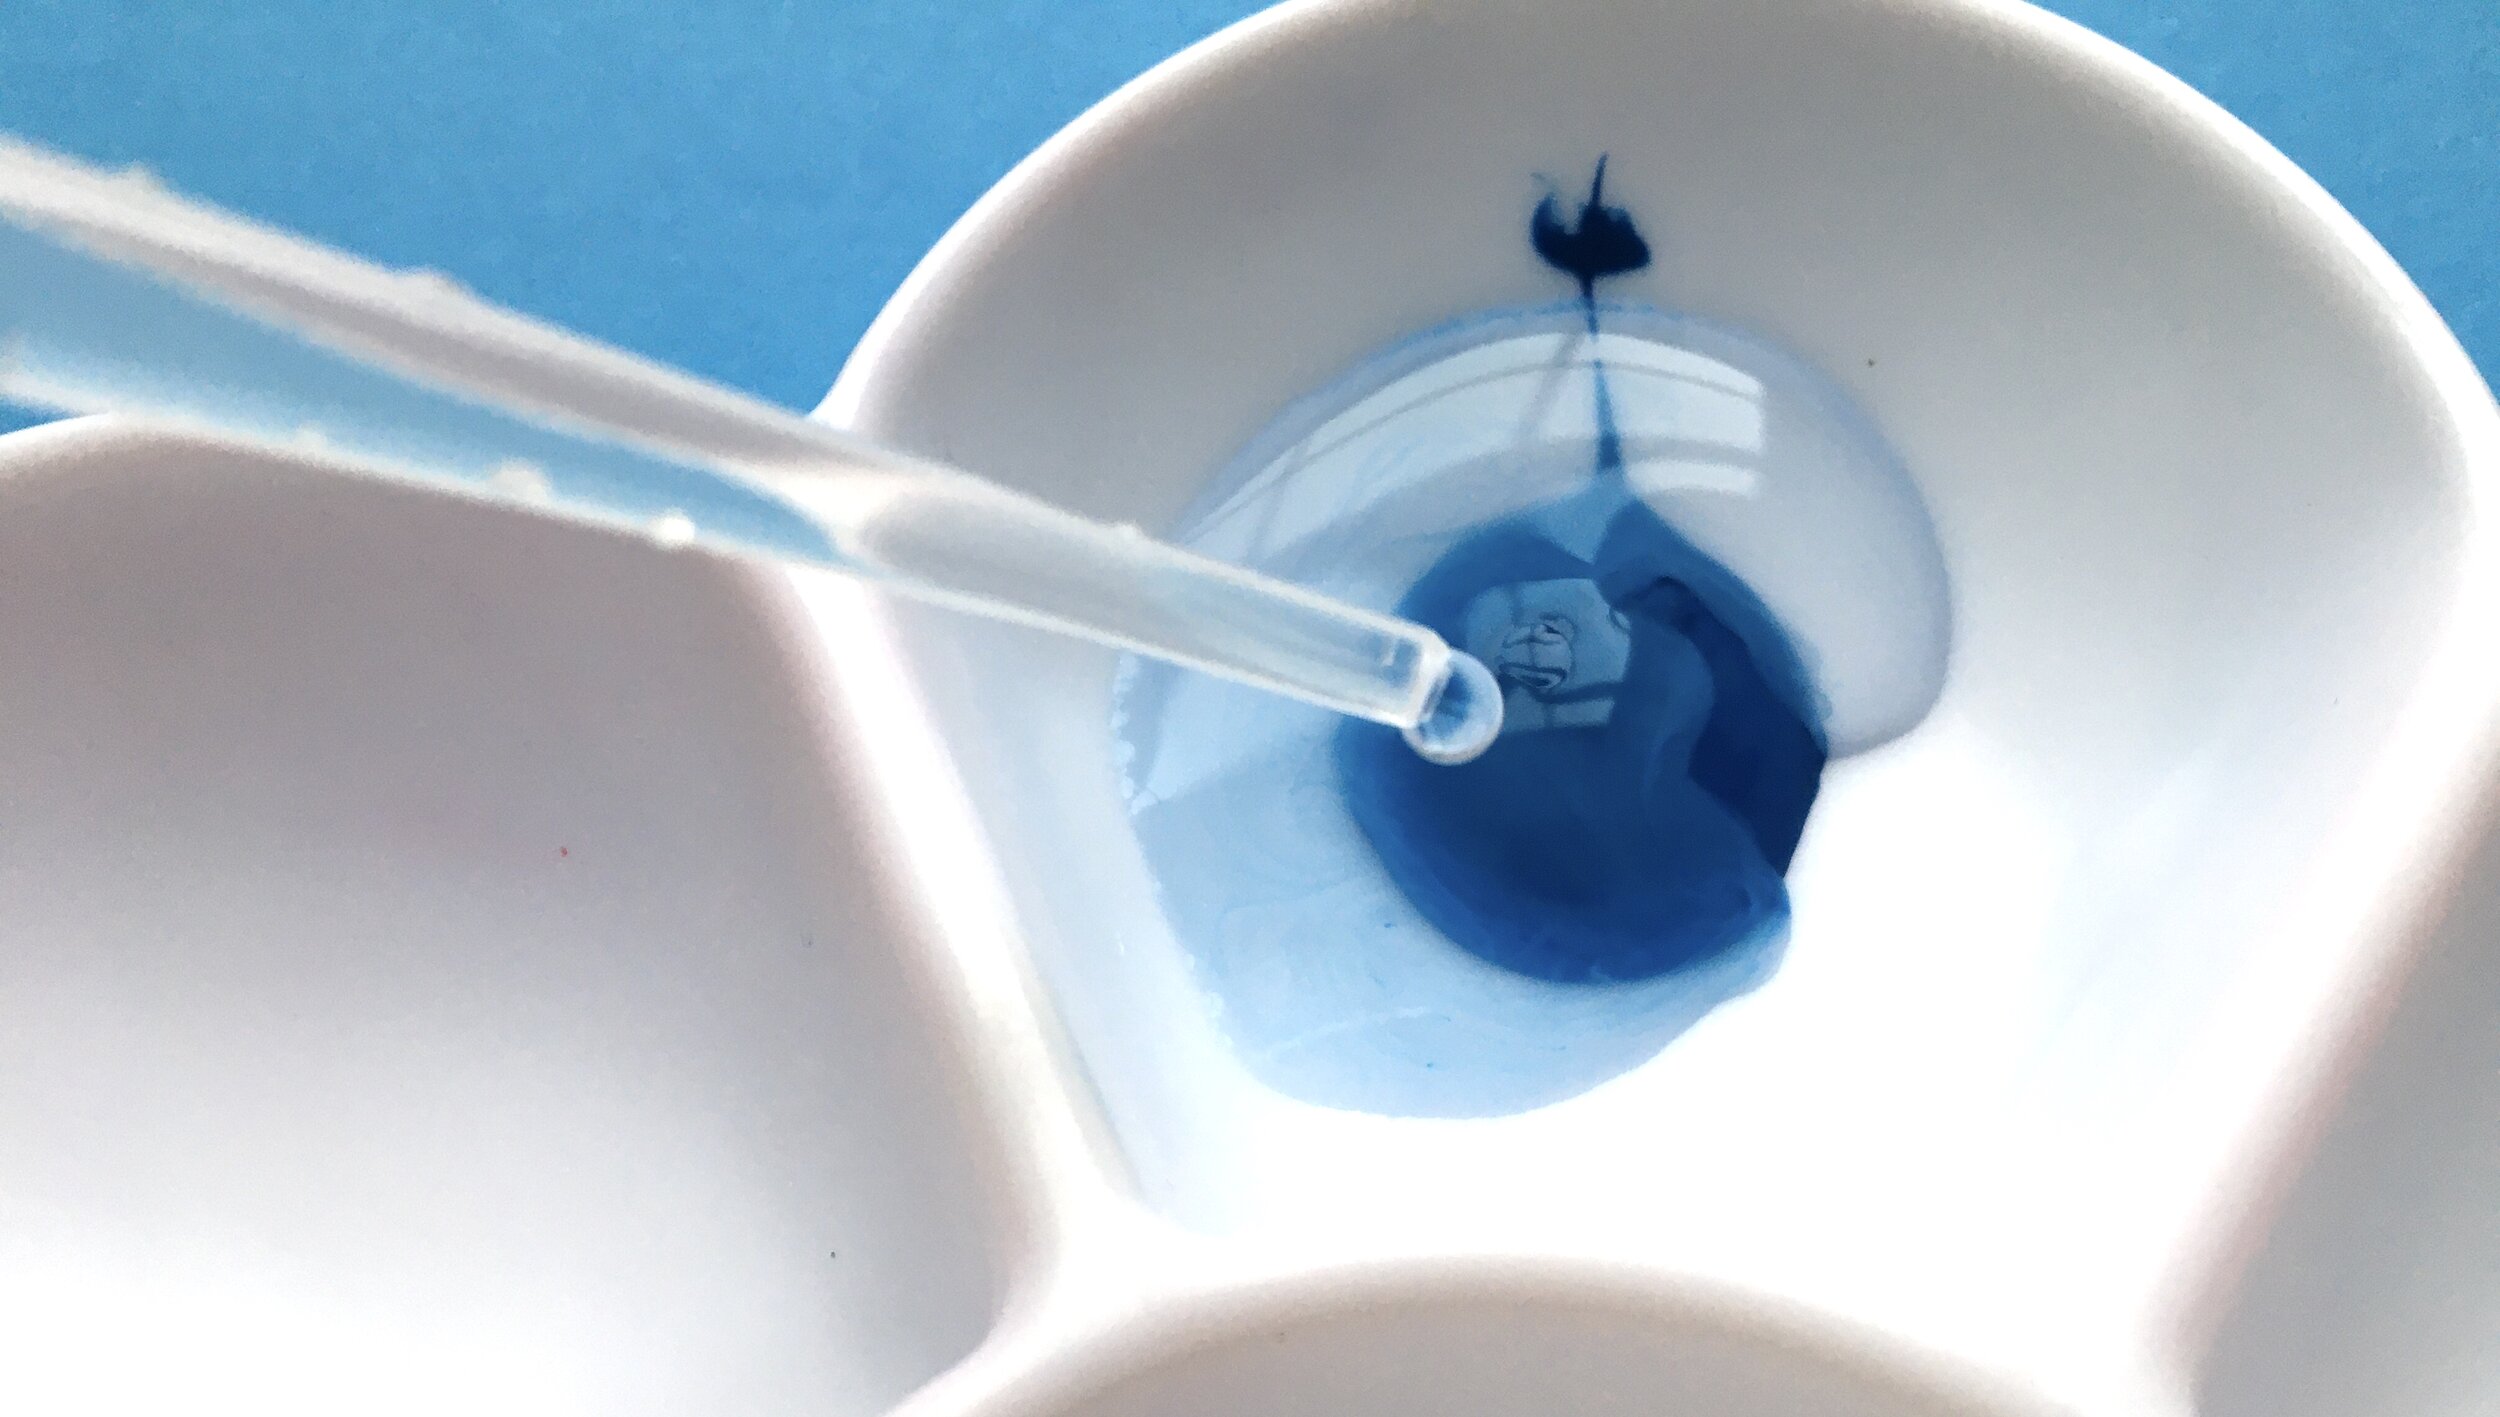
The consistency of the paint when it comes out of the tube is like clotted cream, or toothpaste: it won’t move unless you push it; it won’t flow unless you dilute it. At this thickness you’ll only use it very rarely, for painting in a tiny strongly coloured or dark detail right at the very end of the painting.
Straight from the tube, it’s too thick to paint with, but take a garden pea sized amount of neat paint and add just a few drops of water to it to get it moving. I’ll usually use the pointed end of the brush handleto mix this, as the bristles would just become clogged up with the thick paint and absorb so much that there’s little left to actually paint with.
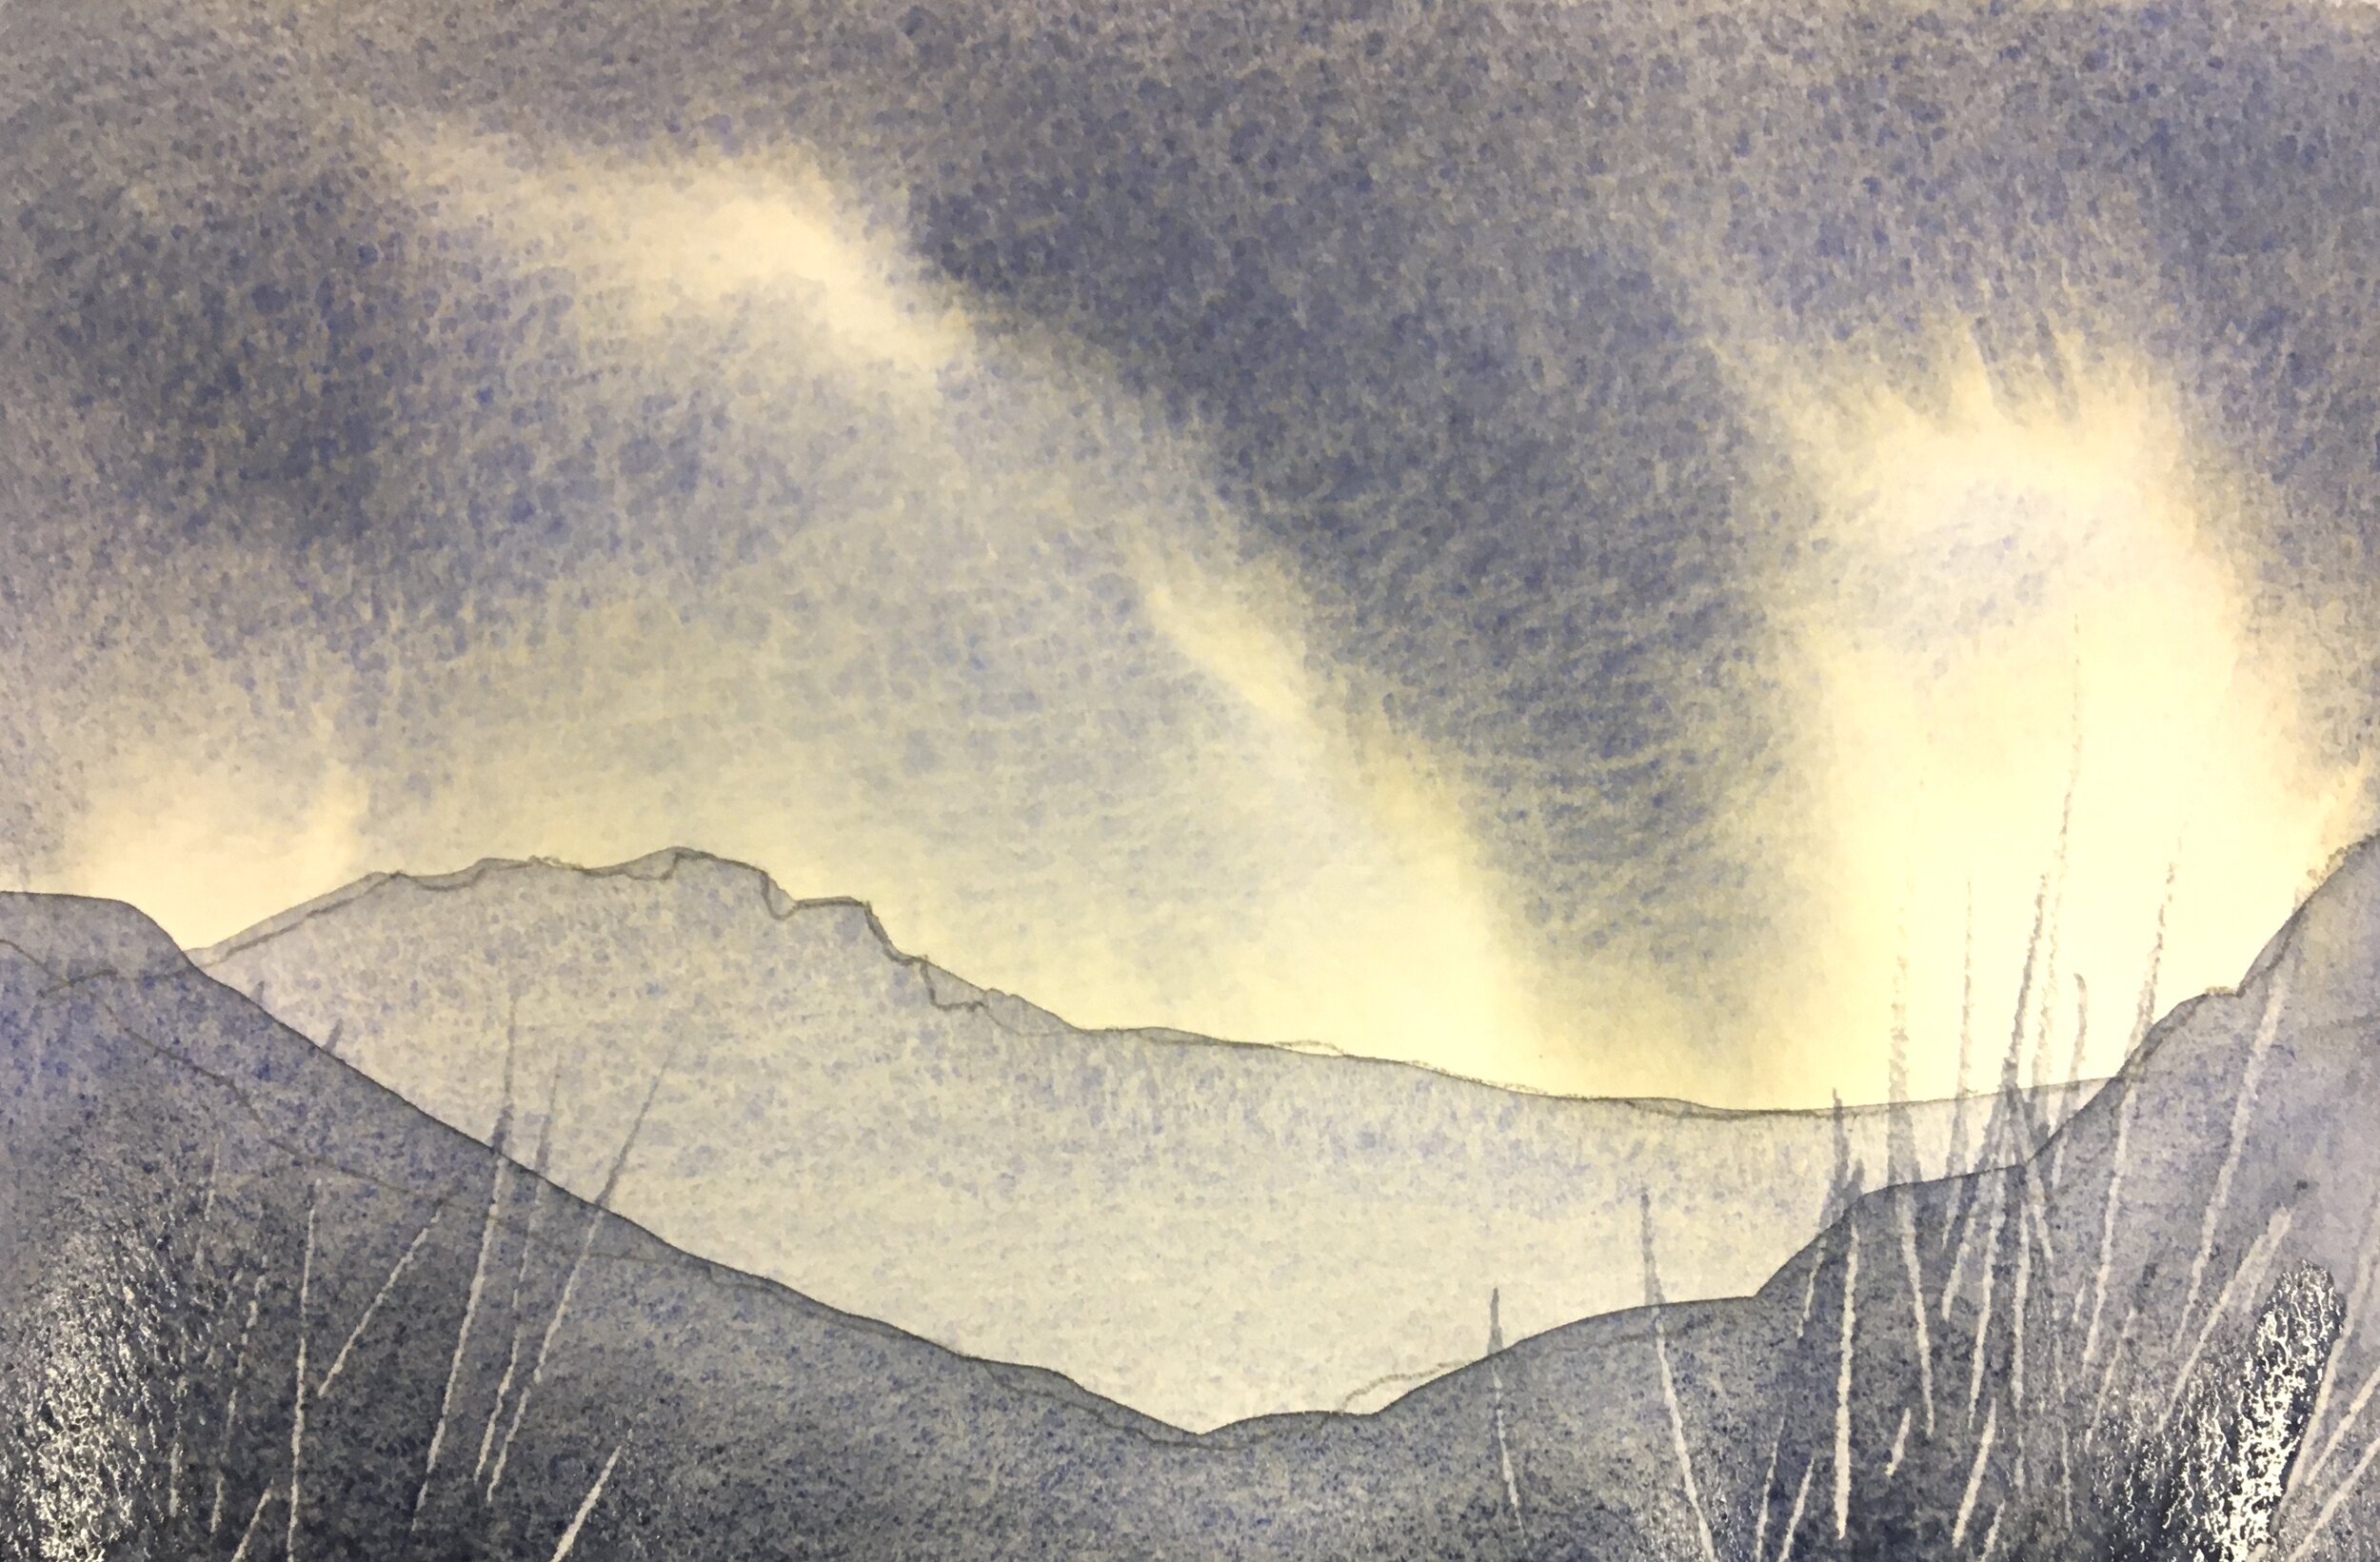
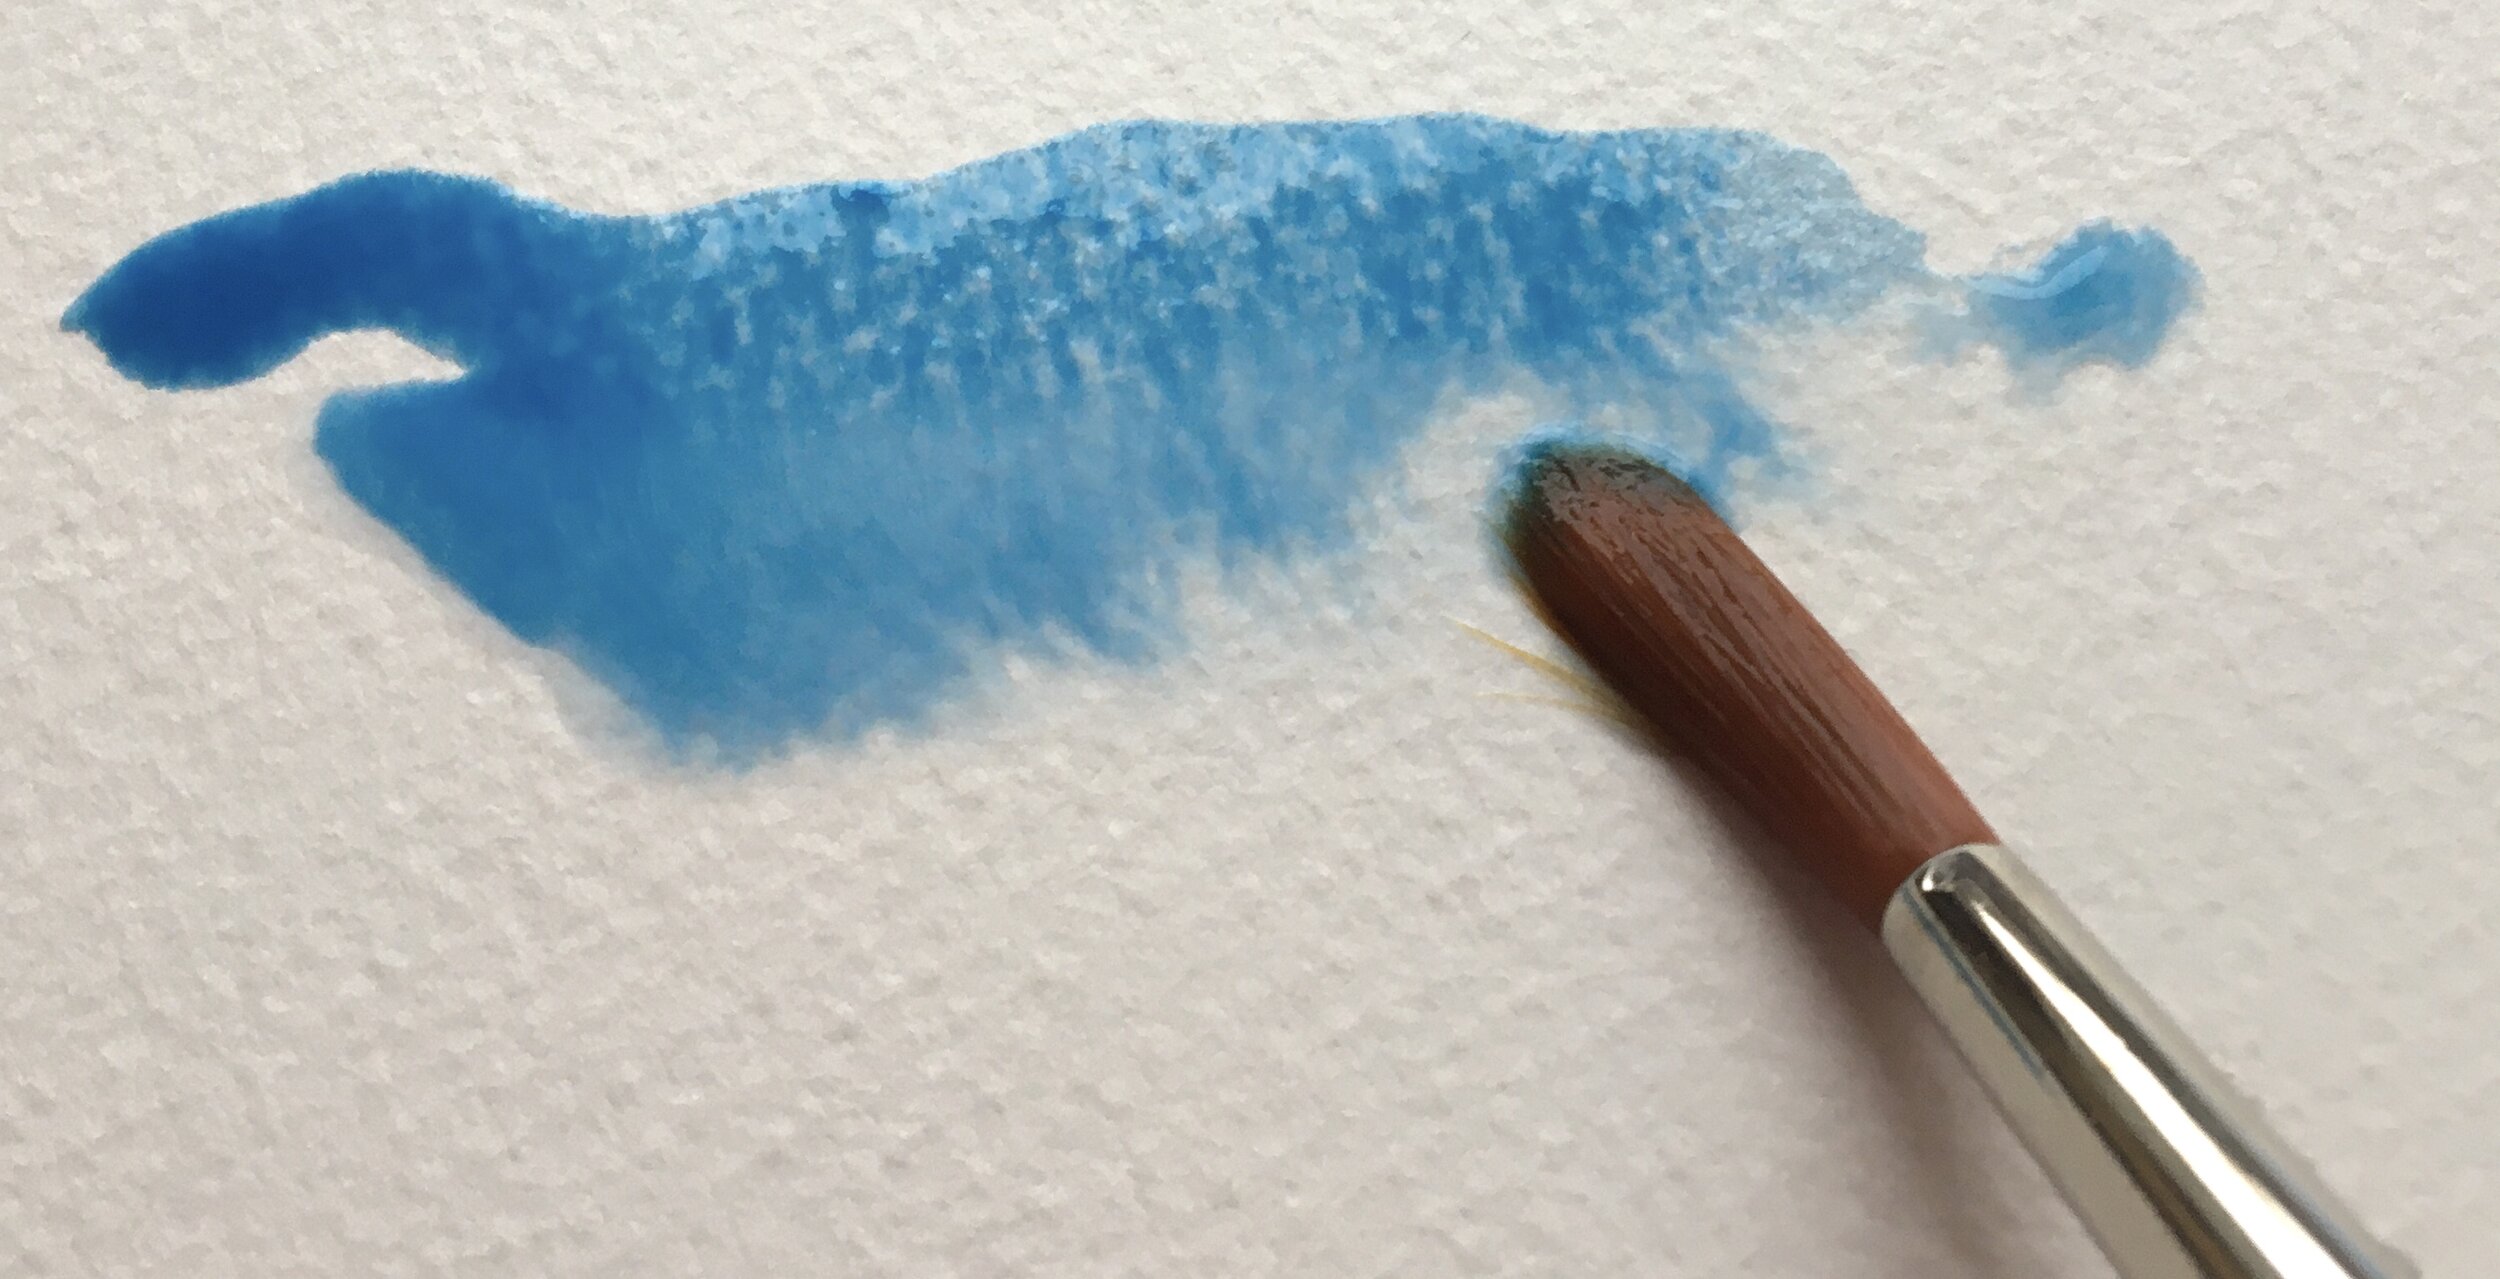
Now, if you dip a just-damp brush into this thick mix ( but not a sopping wet brush, or the water will flood over the thick paint on to the paper and just make a big mess,) and gently stroke it across the paper you’ll get the dry brush technique. You’ll create a very distinctive darker, heavier textured effect which will probably break up towards the end of the stroke, particularly if you’re working on a dry, textured surface This can make some very expressive mark making not often associated with watercolours. (Photo of 8A again)
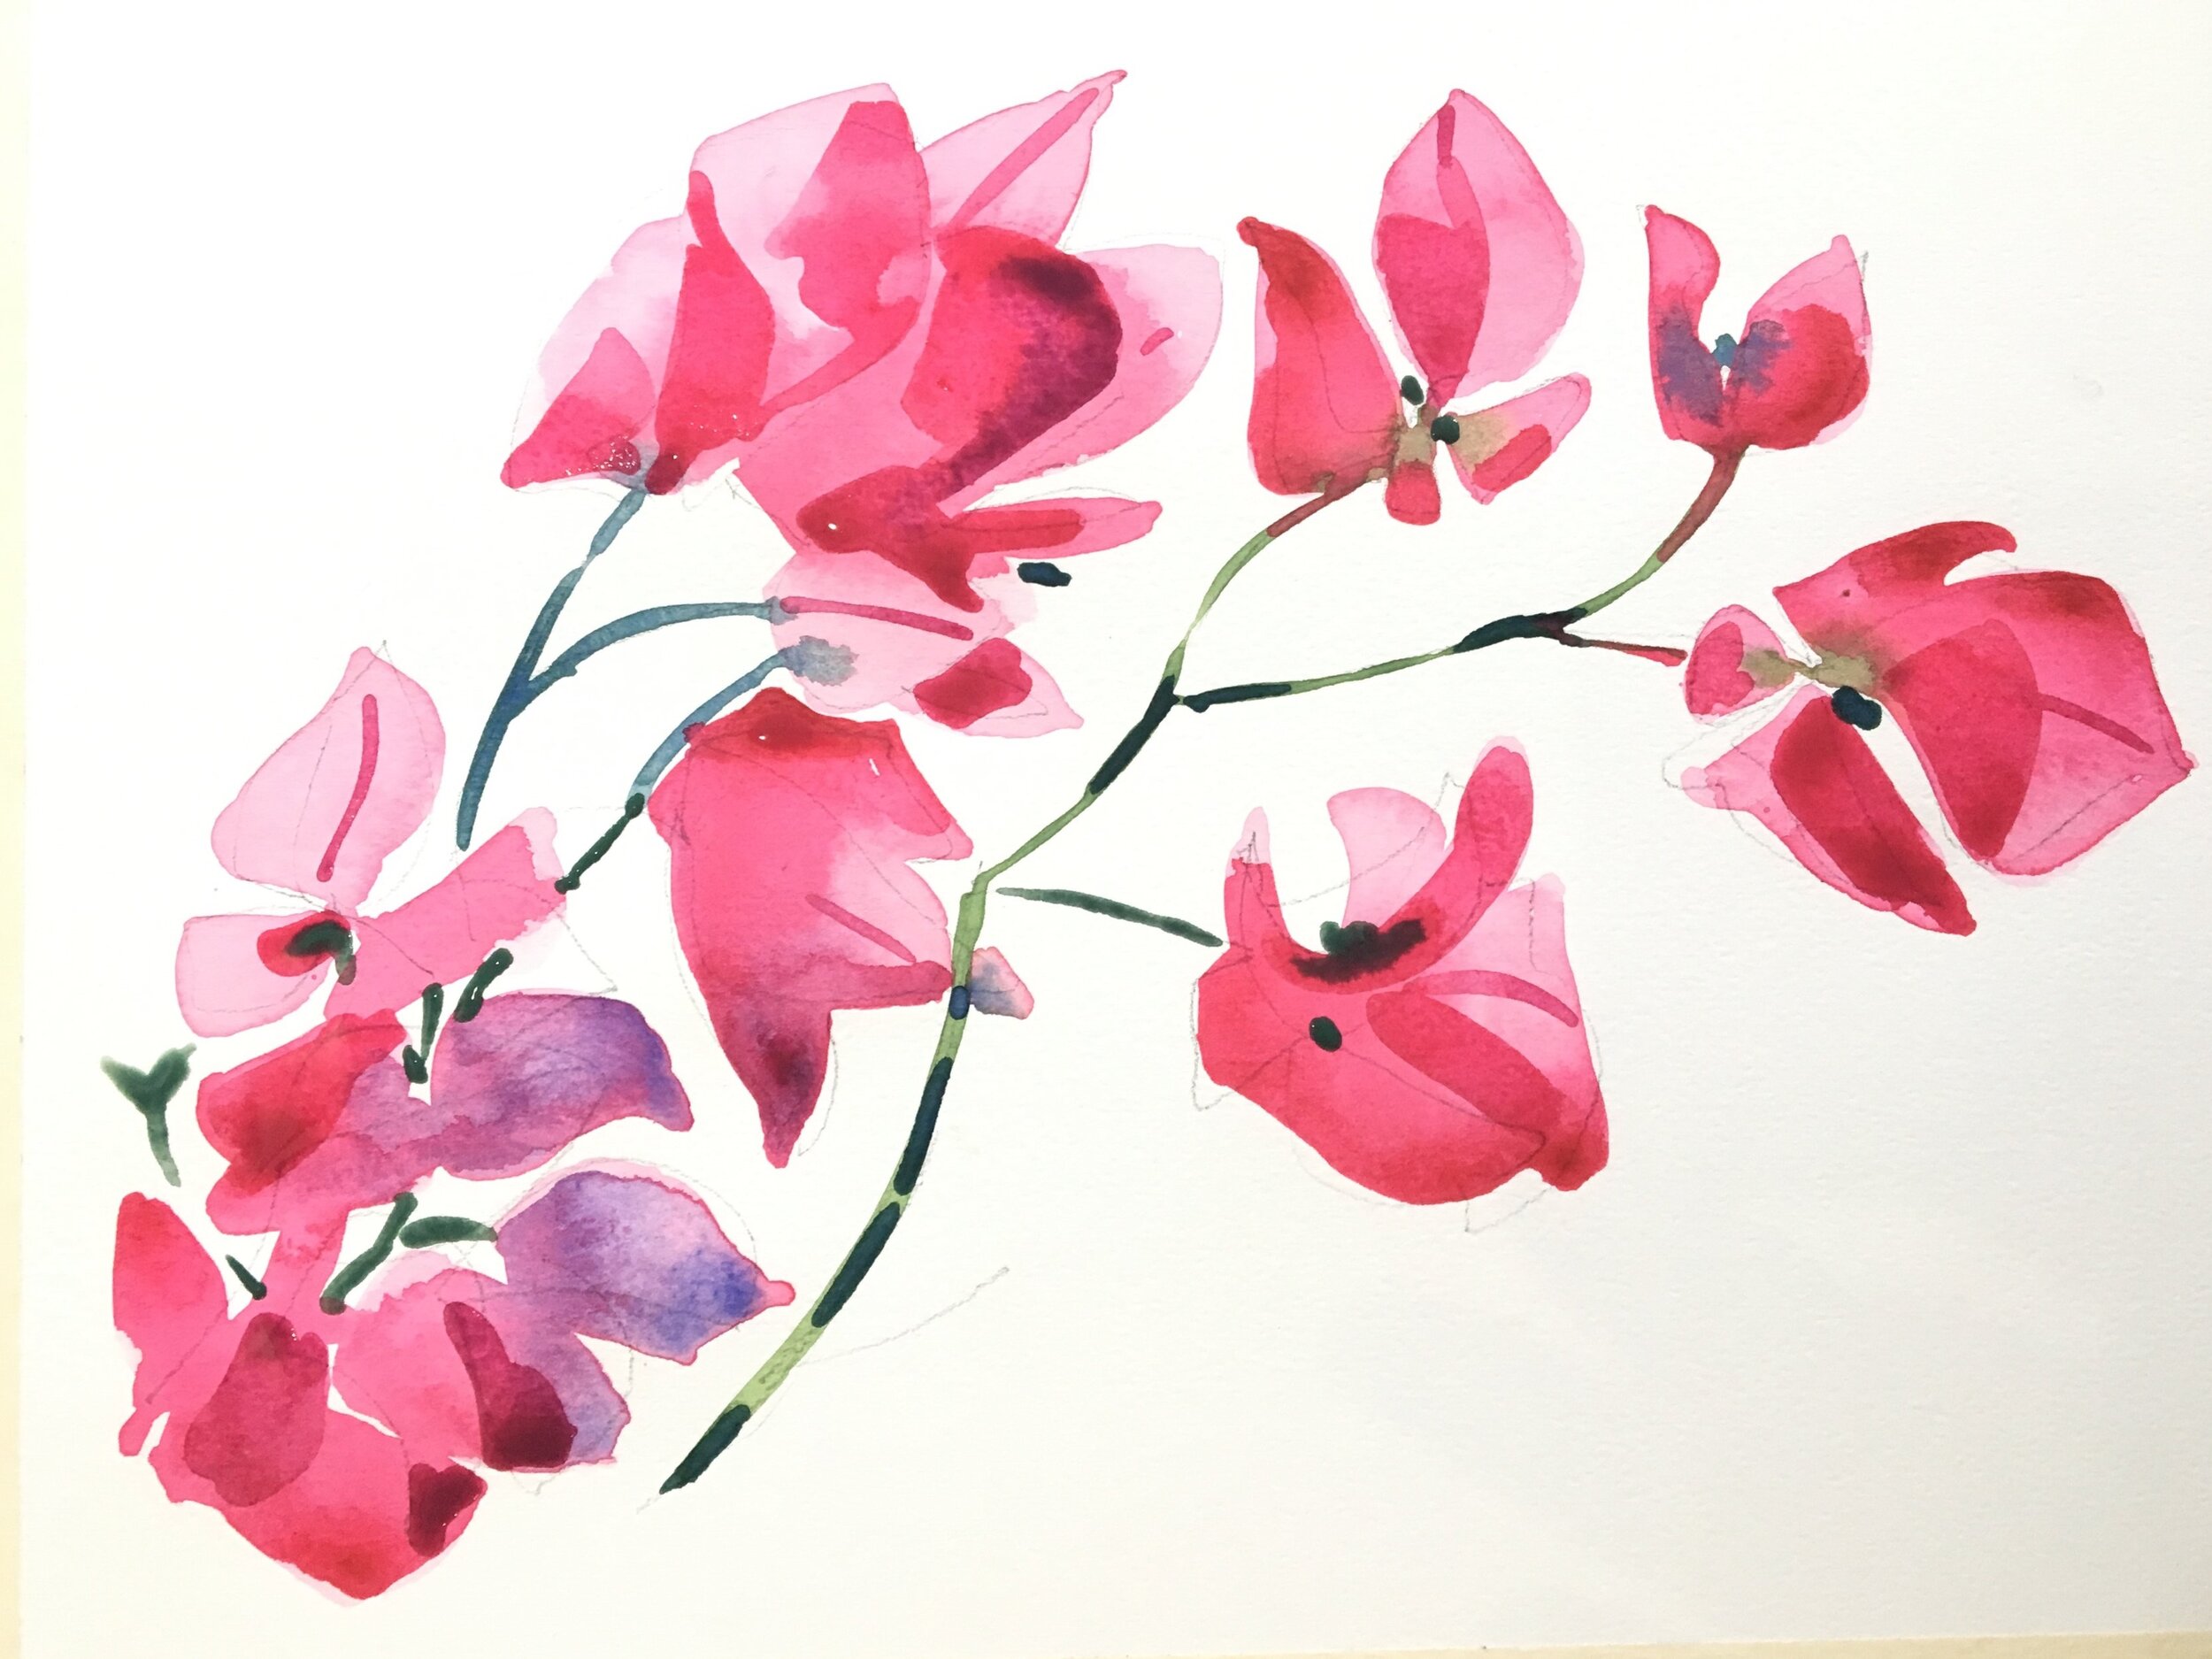
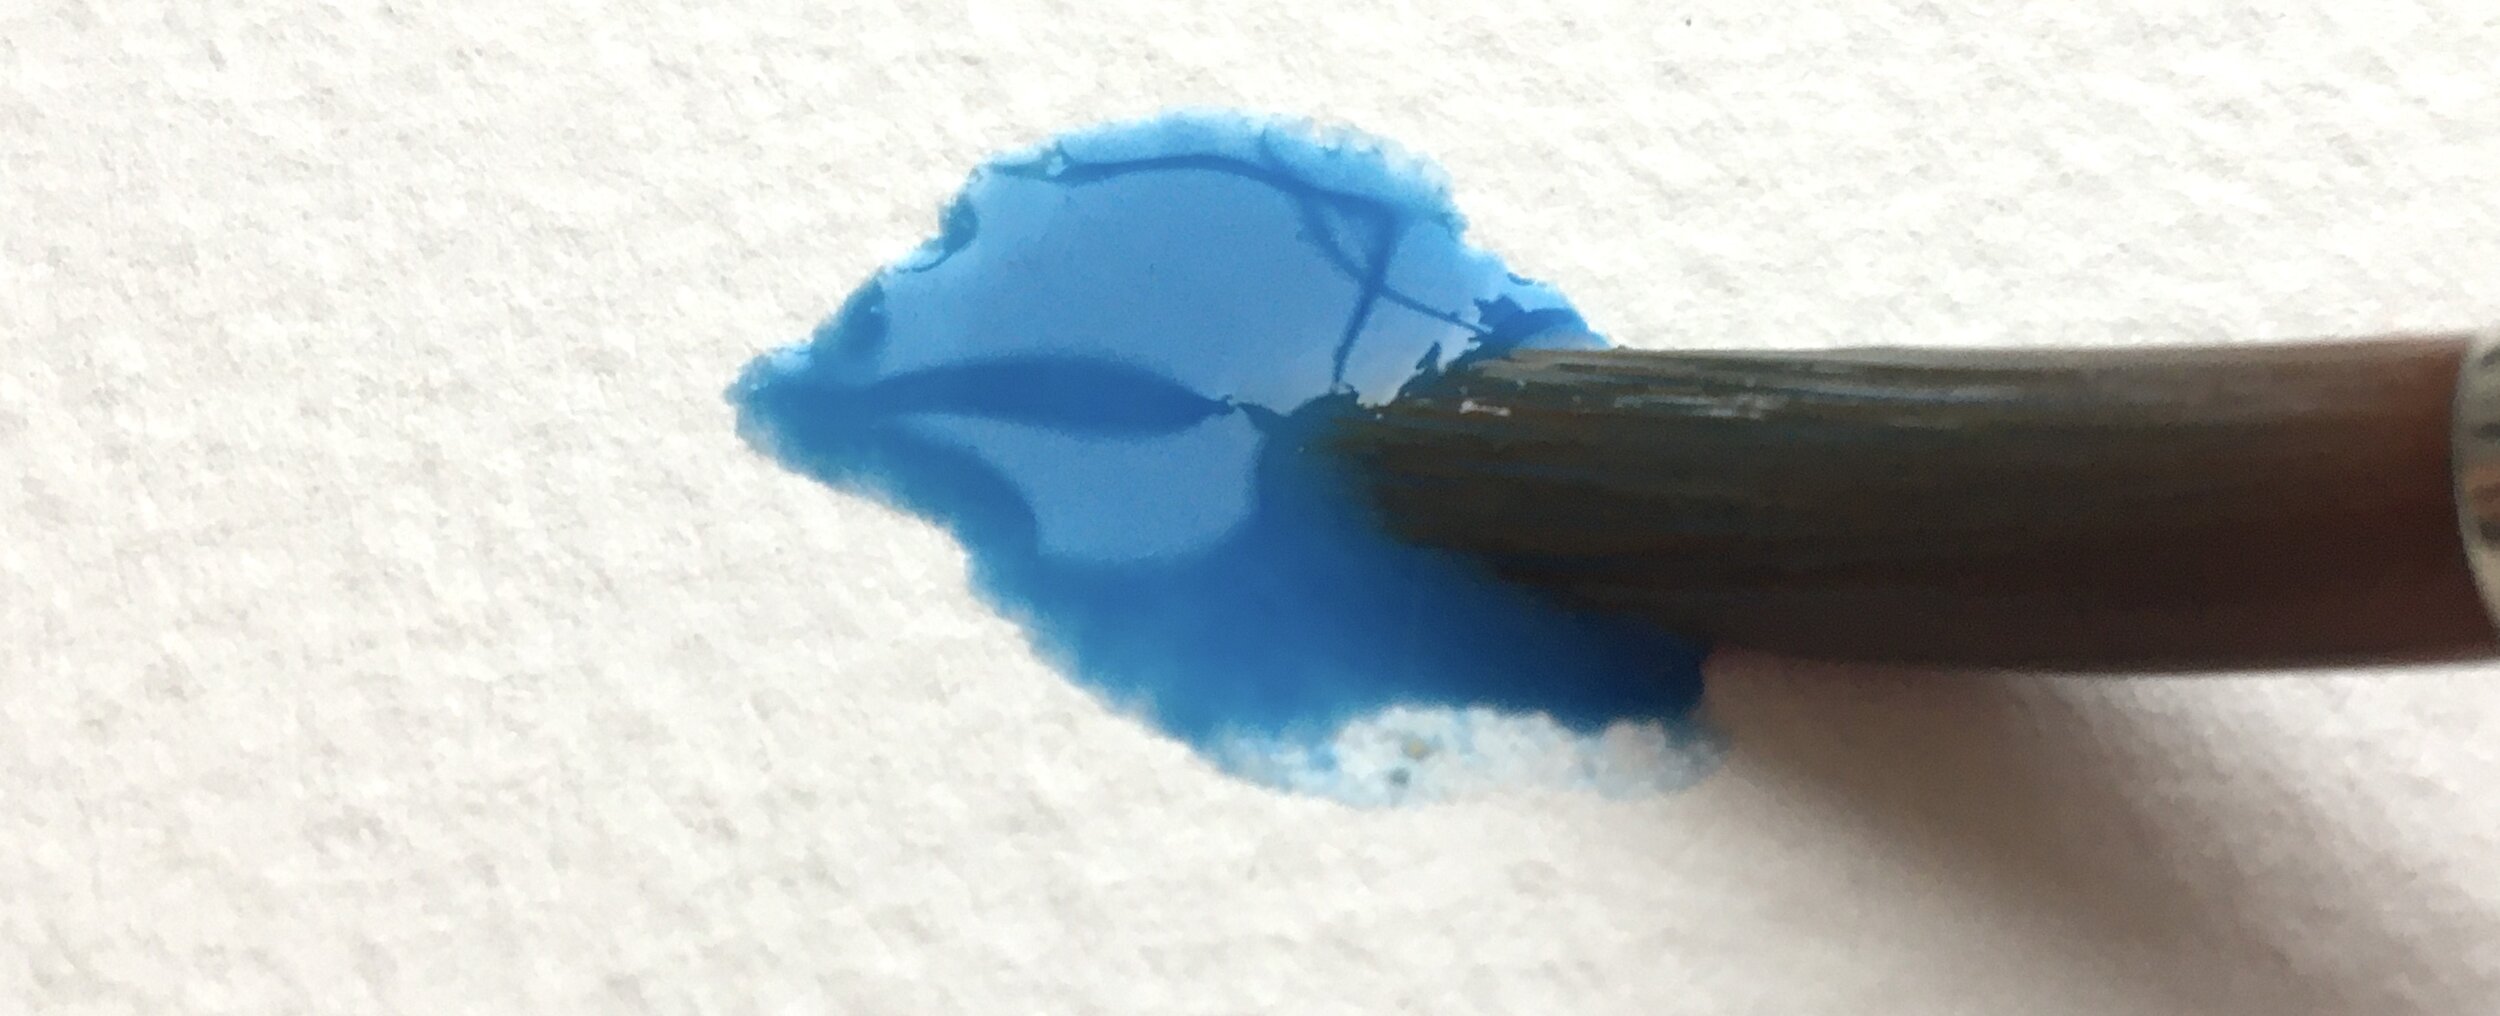
I really like to use this consistency to drop into a layer of wetter colour for some dynamic contrast, e.g. dropping some thick dark paint into watery red for the centre of a poppy, as the thick paint won’t bleed too much and go out of control, but it will have a beautiful soft edge around it: not a sharp, hard one. ( photo no 11of poppy)
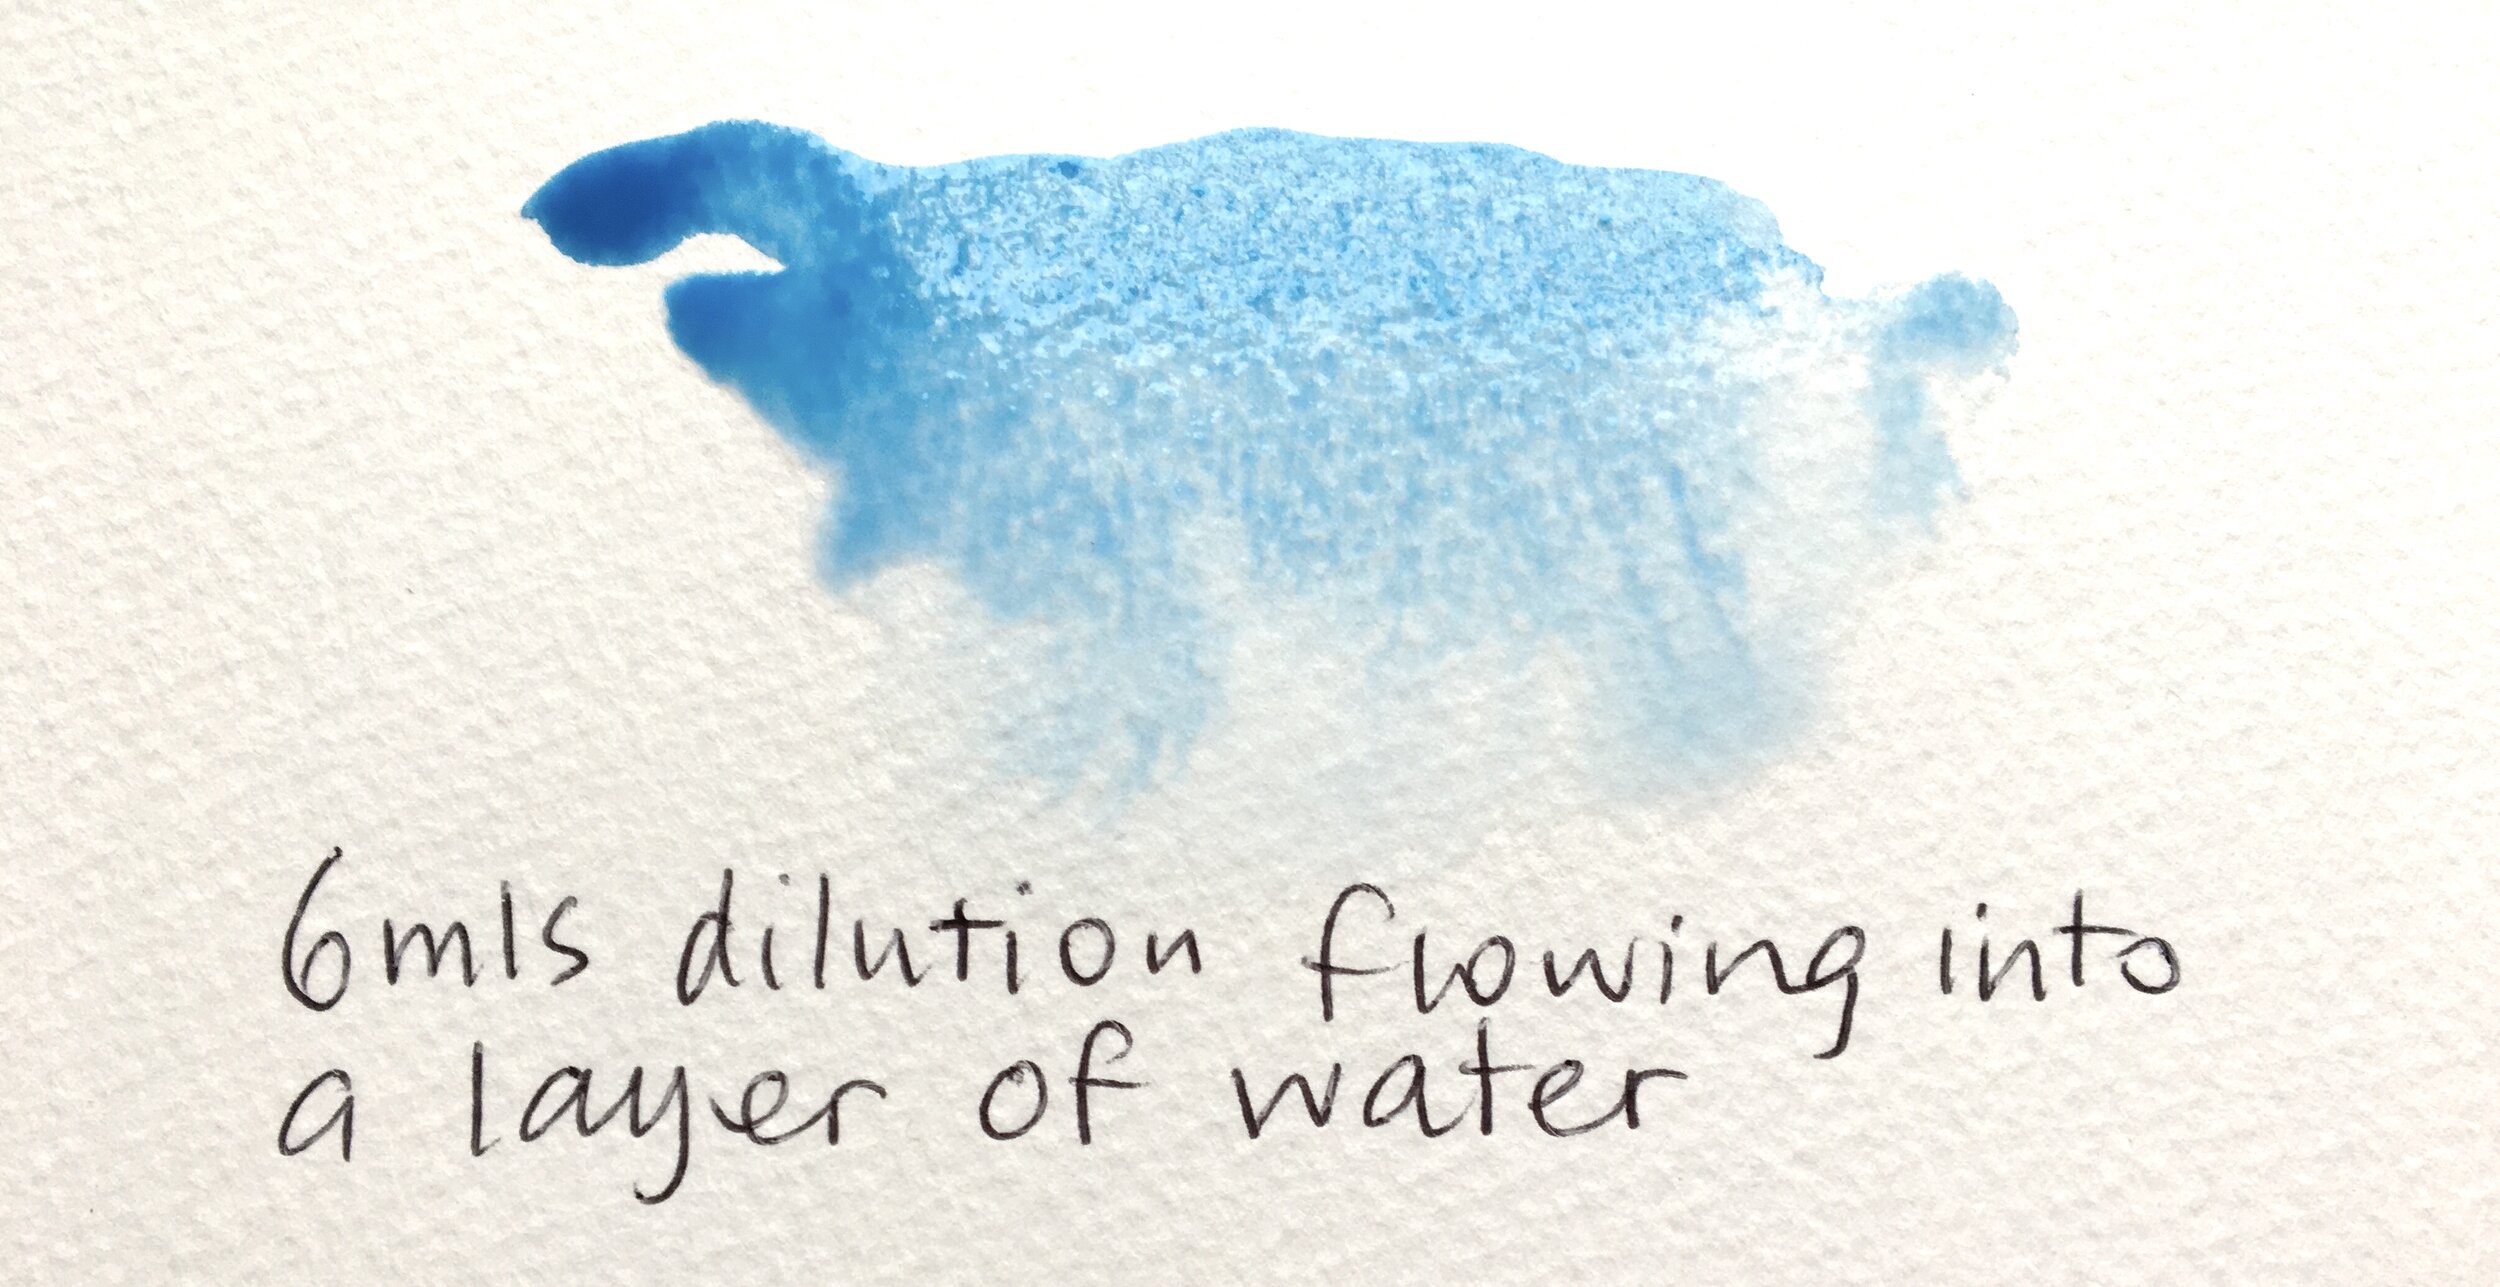
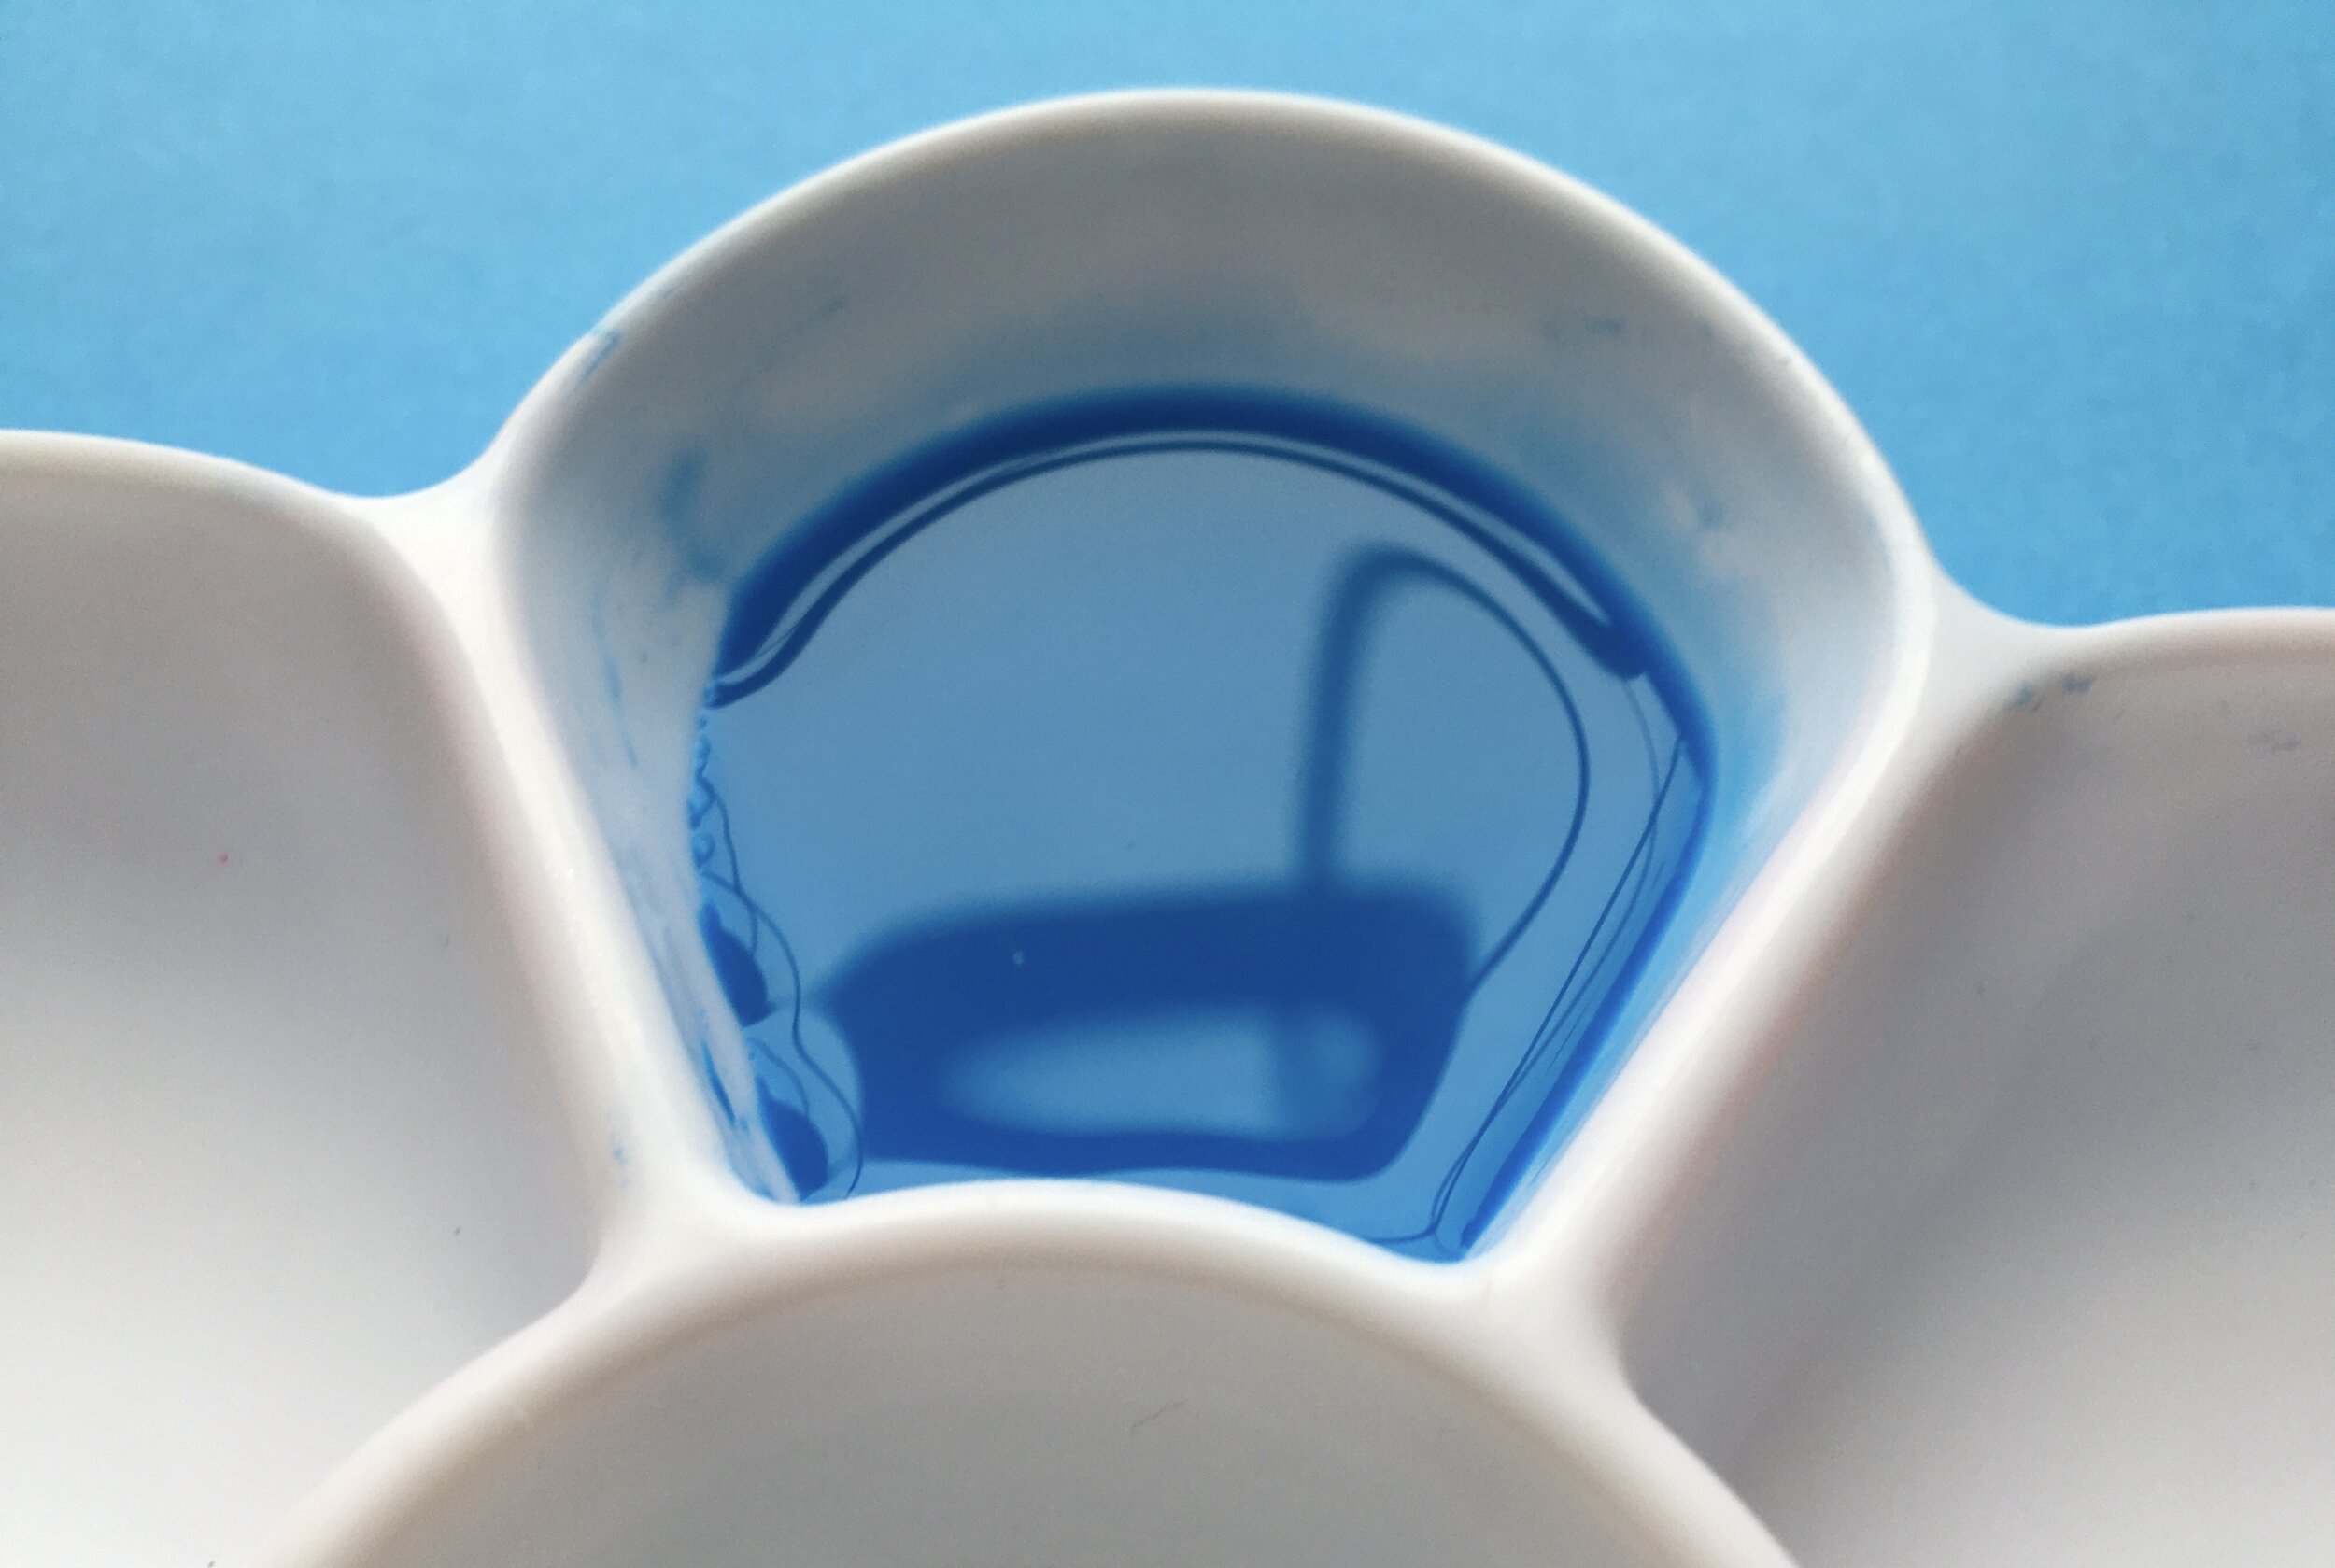
At the other end of the spectrum, the most fluid watercolour can be would be the consistency of water. You’d use this consistency for that rose petal I mentioned, or the merest memoryof a colour in your painting. For this you might put one or two teaspoons (5- 10 ml) of clean water in a well of your palette and then add just one or two drops of well diluted colour. You’ll use a fully loaded (well-dunked!) brush of this consistency for it to even show up on the paper, and as weird as it sounds, it may not really be visible until it’s actually dry.
I often use this water-consistency for really delicate transparent sections of flowers, and then drop in a tiny spot of colour the consistency of full cream milk into the watery, still wet layer on the paper to add impact: e.g. the deeper coloured edge of a rose petal, or the strongly coloured stamens and pollen on delicate cherry blossom. This thicker consistency will travel a little on its layer of watery paint but won’t spread very farbecause the thicker paint doesn’t flow much.
And the middle way…
So, having covered the two extremesof consistency, (which you may only use about 10 per cent of the time,) how about the consistency of paint you’ll use most of the time?
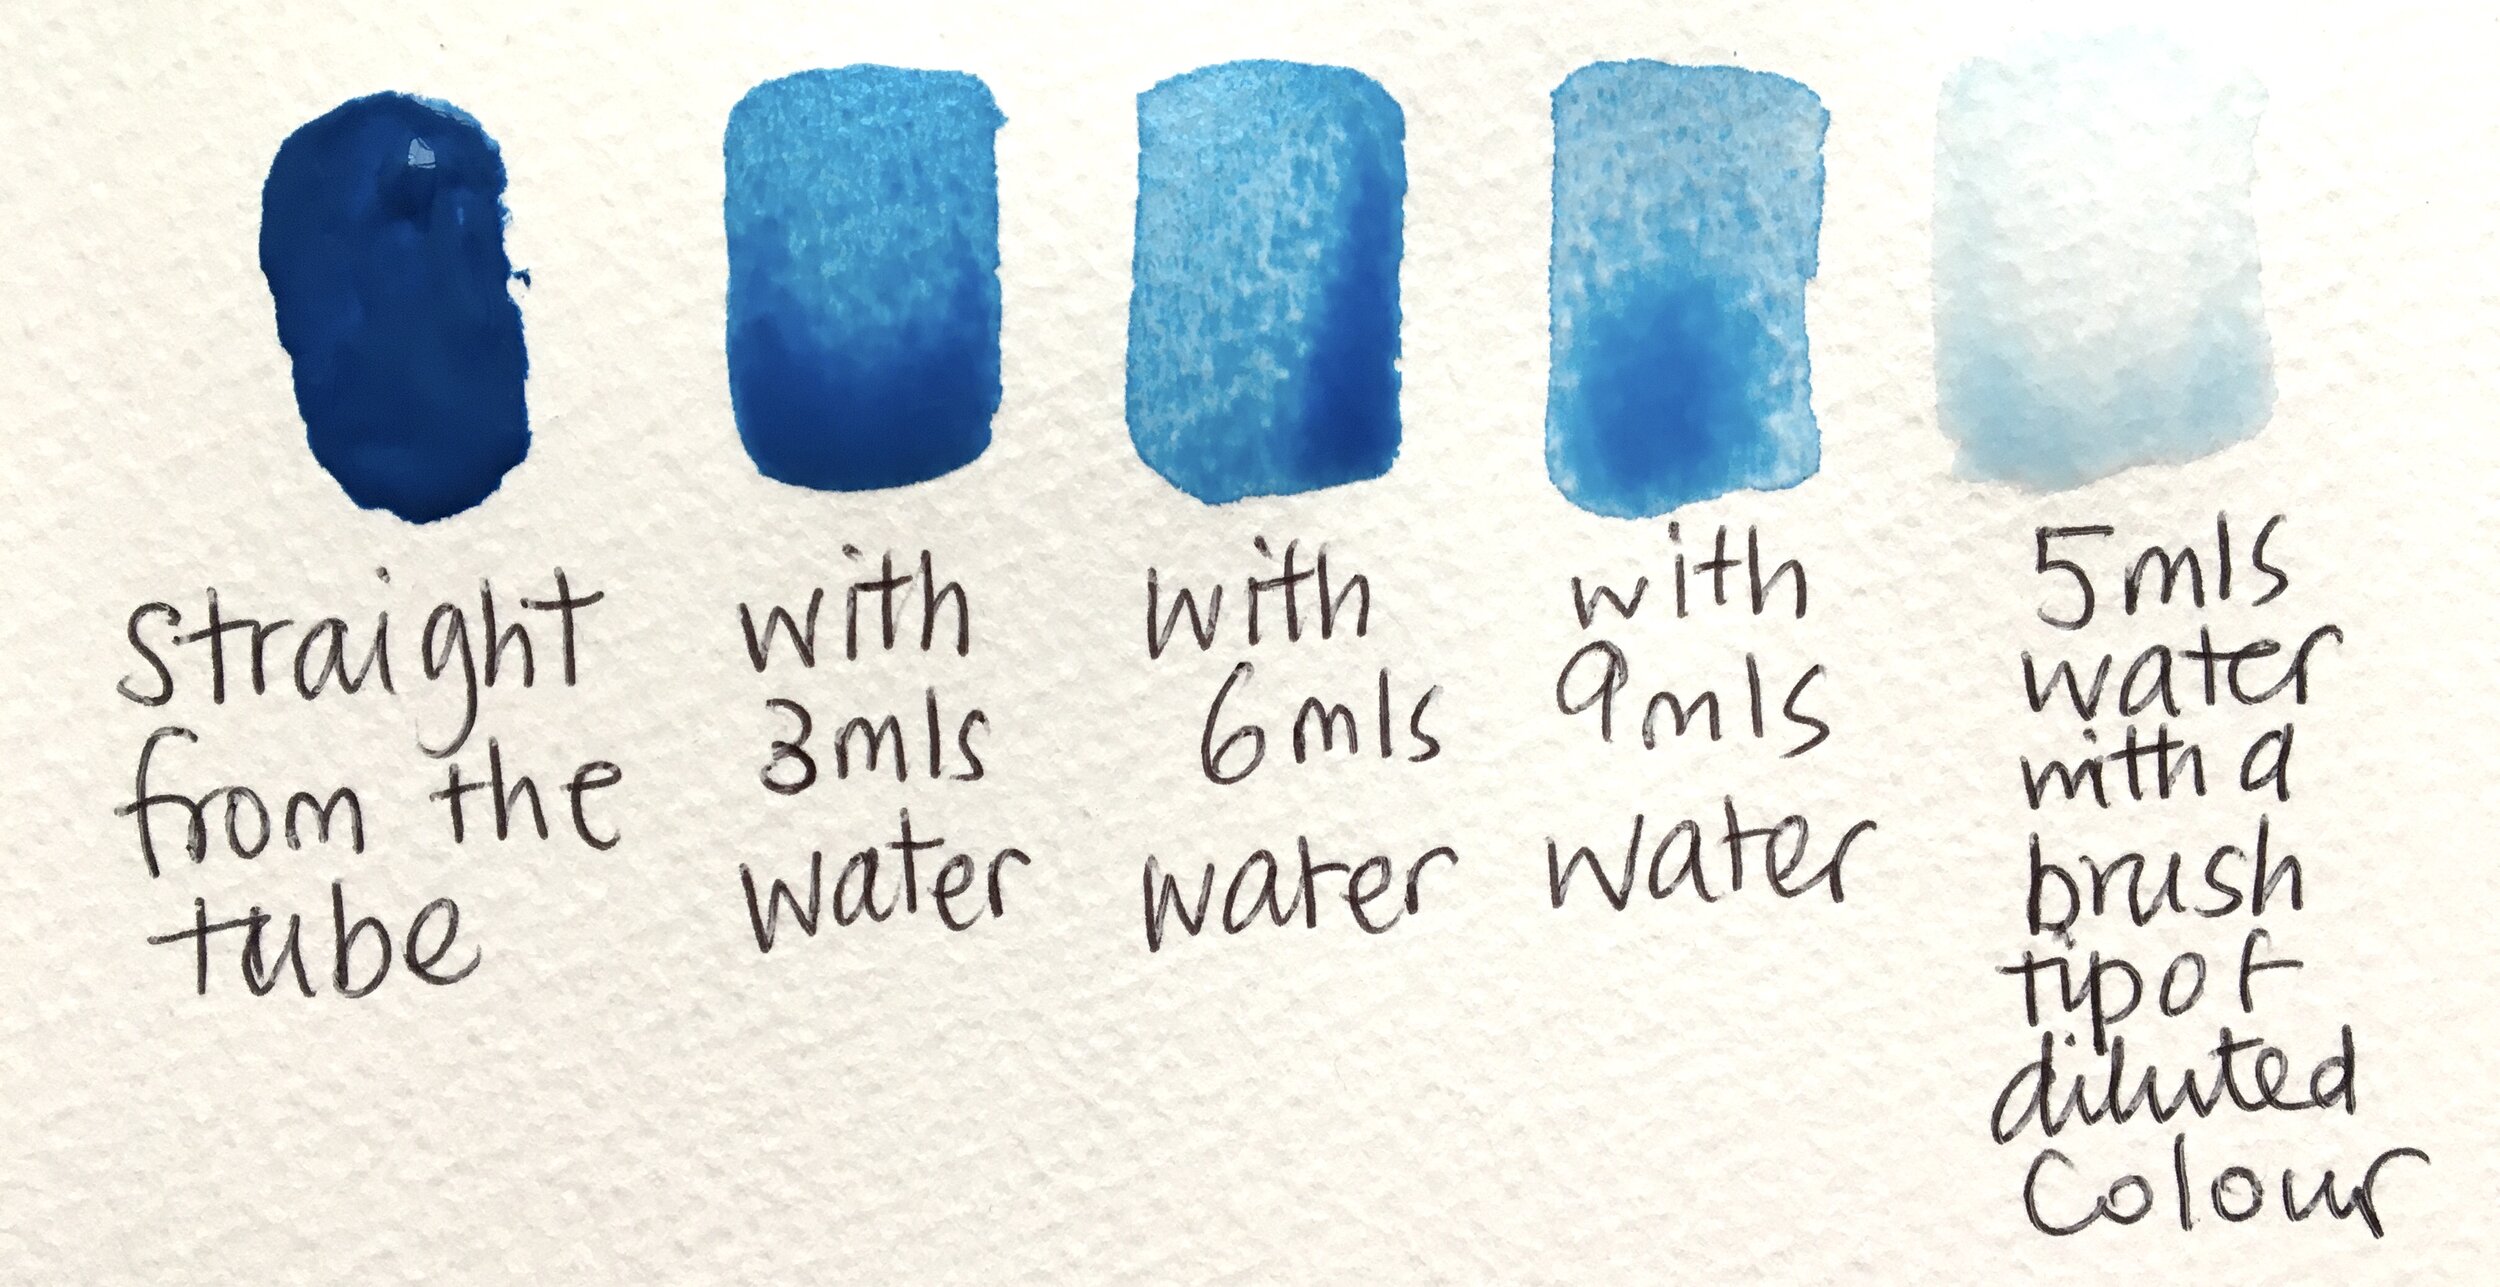
For my core colours I usually mix up a kidney bean sized quantity of paint with about 6- 10 mls of water (I use a pipette for the water, but you could also use a 5ml teaspoon or measuring spoon; or one of those little plastic 10ml syringes that come with medicine for children or pets.) It’s so much quicker than applying it drop by drop with your brush!
I try to mix a fluidity resembling semi-skimmed milk. I know it can be really hard to define what that is, but to demonstrate this for my students sometimes I actually put some milk in one of the wells alongside my other colours and just shake the palette a little to see whether the paint jumps around the same as the milk. The milk is very, very fluid, and jumps and bounces around in the well. Give it a try and see whether your paint reacts to movement as the milk does.
This is the optimum consistency of watercolour for most of your painting: it will perform well for transparent washes, glazes and wet in wet techniques. You can take some of the stock consistency colour to put in a separate well to dilute further, or add some thick, neat paint to if you need to at different points during your painting.
So, that’s my explanation about paint consistency in watercolour: pretty nerdy, I know! If you’ve read all the way to this point, then I admire your stamina. 😊
I hope I’ve inspired you to have a go at pushing the consistency of your watercolours to the extremes, and to experiment with the many different effects you can achieve by doing this.
Do let me know what you think, and what results you get if you try it out.
And have you got any watercolour tips to share? Can’t wait to hear about them!