How To Paint A Watercolour Christmas Card
We all love a winter robin at Christmas, and I thought I’d show you how to paint a simple watercolour robin in the snow to use for your Christmas cards. (And I show you a little secret for painting snowflakes which you’ll love.)
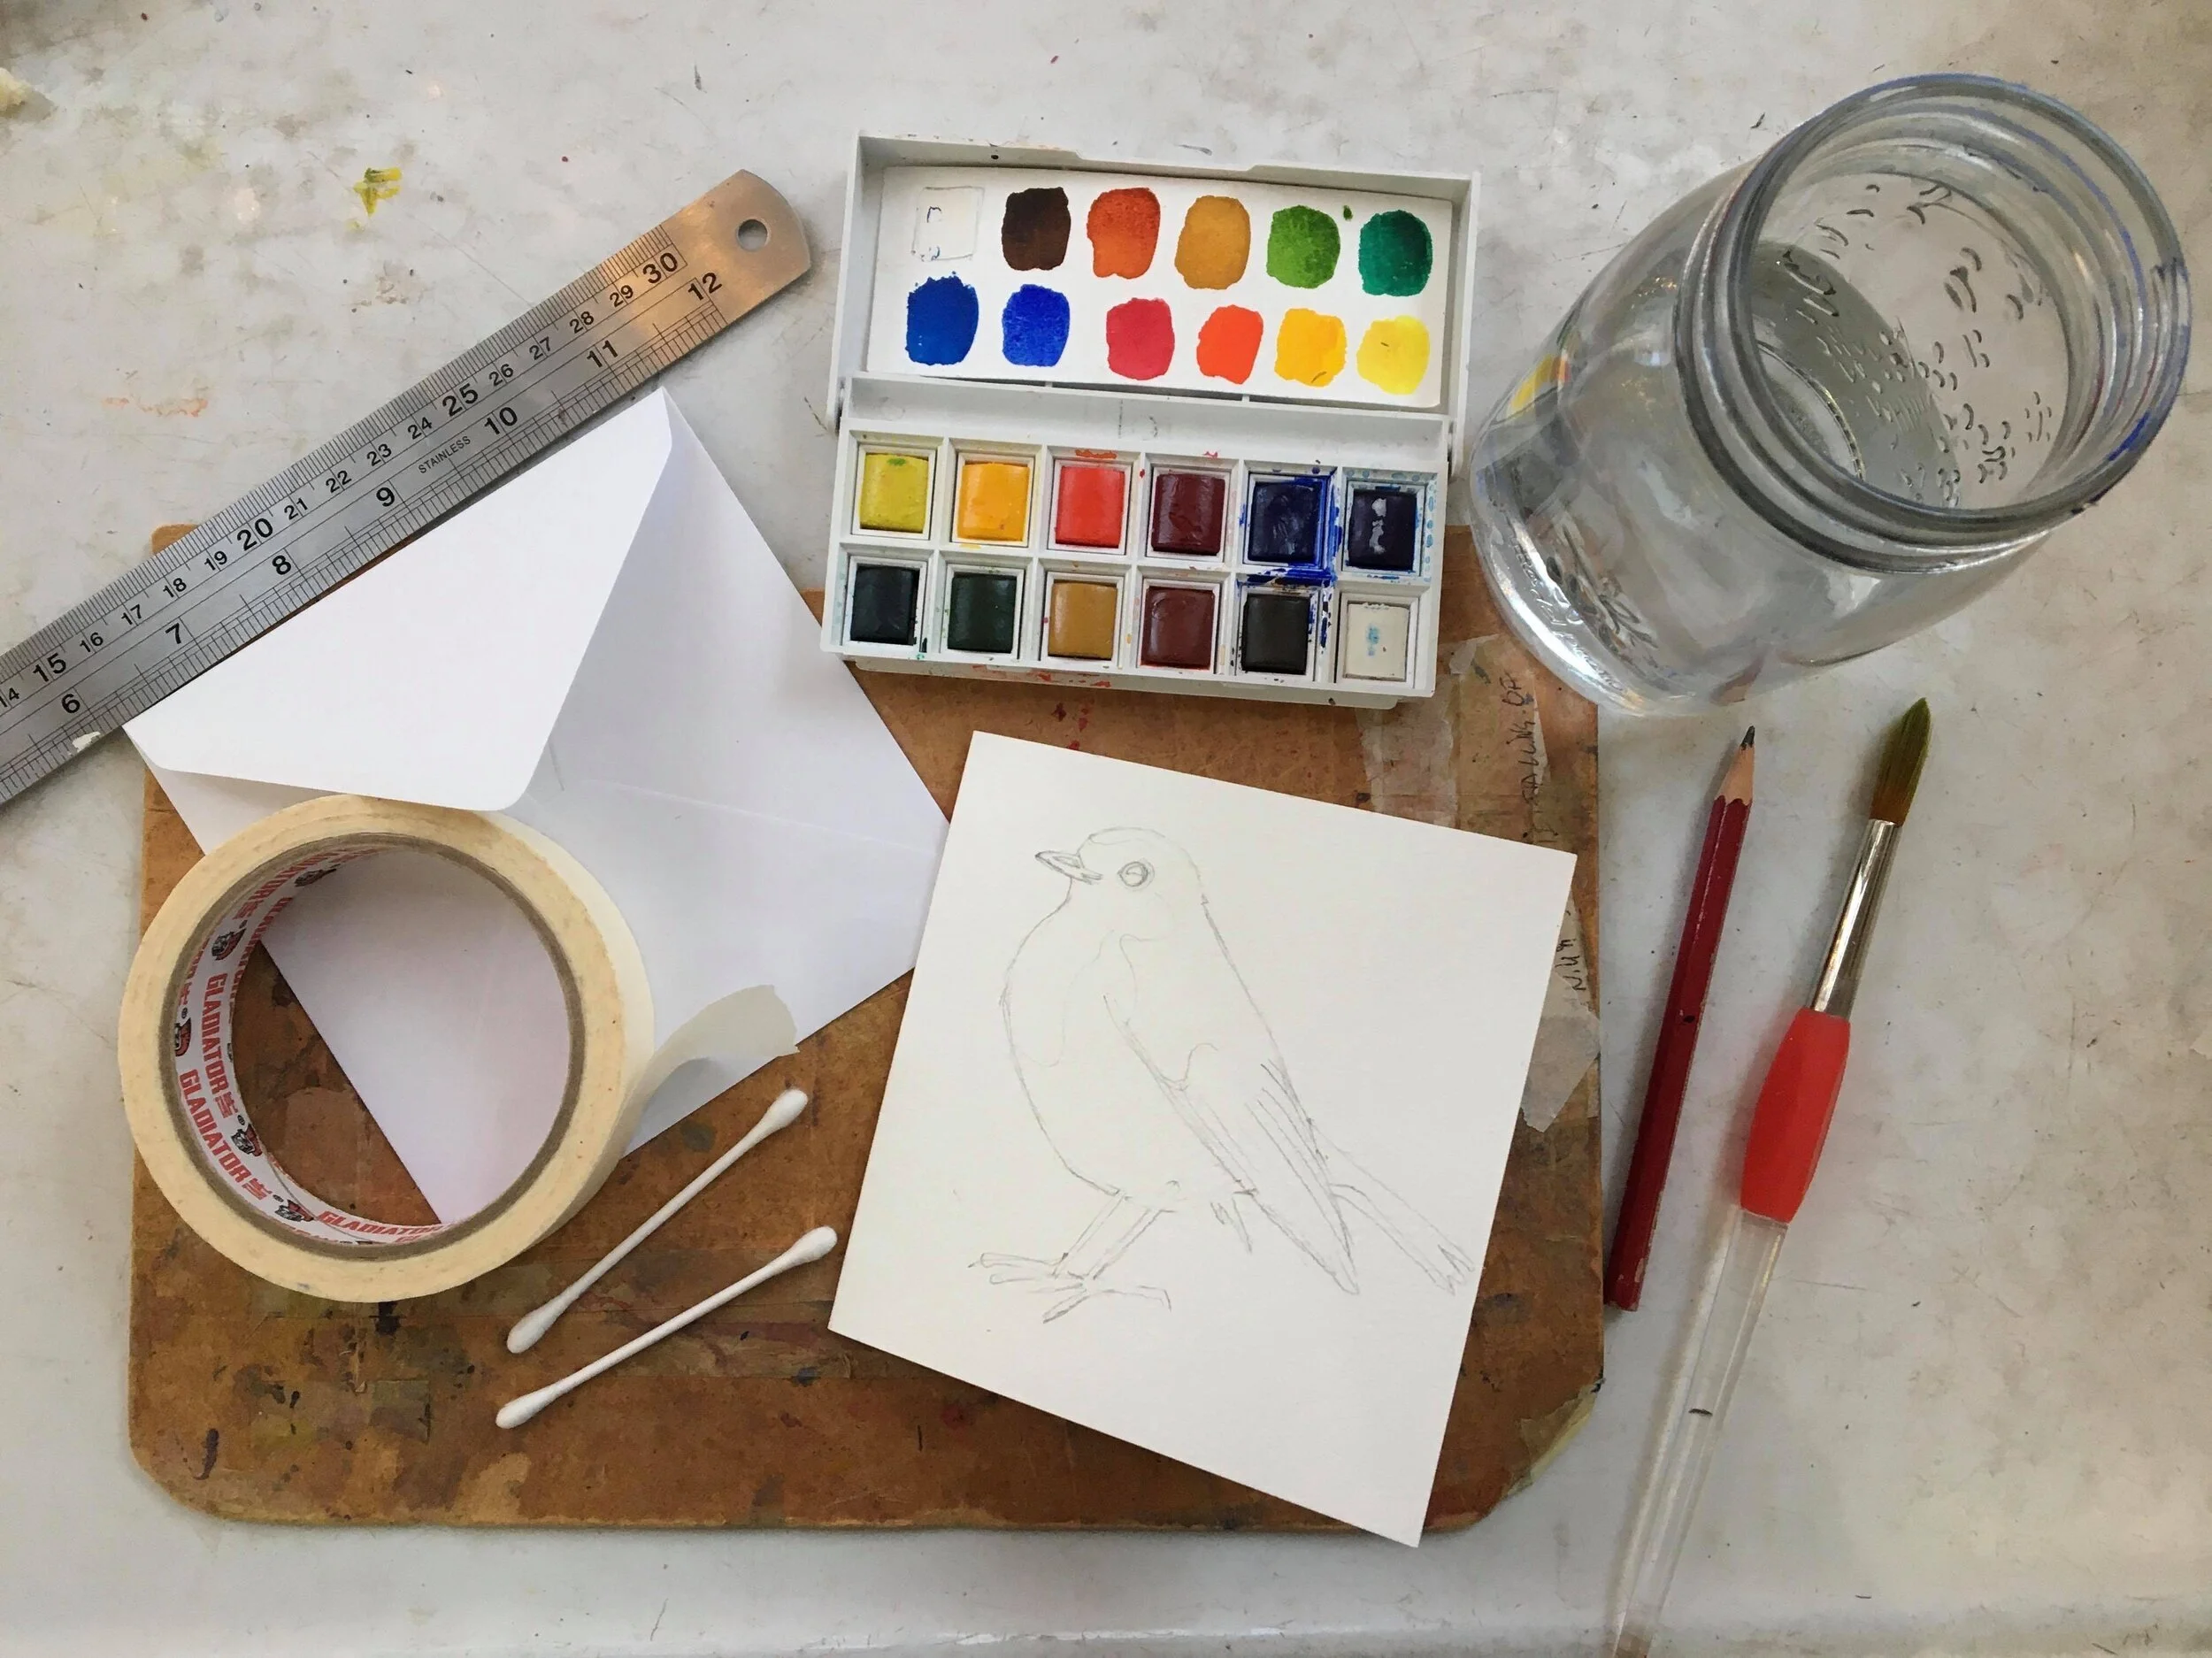
Here’s what you’ll need:
watercolour brushes: a no10 round brush and a small details brush
300gsm (140lb watercolour paper)
A board to tape your paper to and masking tape
Pencil, rubber, ruler, craft knife
A watercolour box (I used the Cotman Sketcher’s Watercolour box)
A jar or two of clean water, a palette, a couple of cotton buds, some kitchen roll
Tracing paper if you want to trace the drawing
Here’s how to do it:
1) First make your greetings card: cut your paper to the size you’d like the card to be (you’ll need to double it and then fold in the middle to create the front and reverse side.) You might want to choose the envelope first and then cut the card to size. Or just buy a set of watercolour cards and envelopes.
My envelope was 13cm square so I made my card just a bit smaller. I cut a piece of watercolour paper 25cm wide by 12.5cm high, then folded it in half to make a 12.5 x 12.5 cm square card.
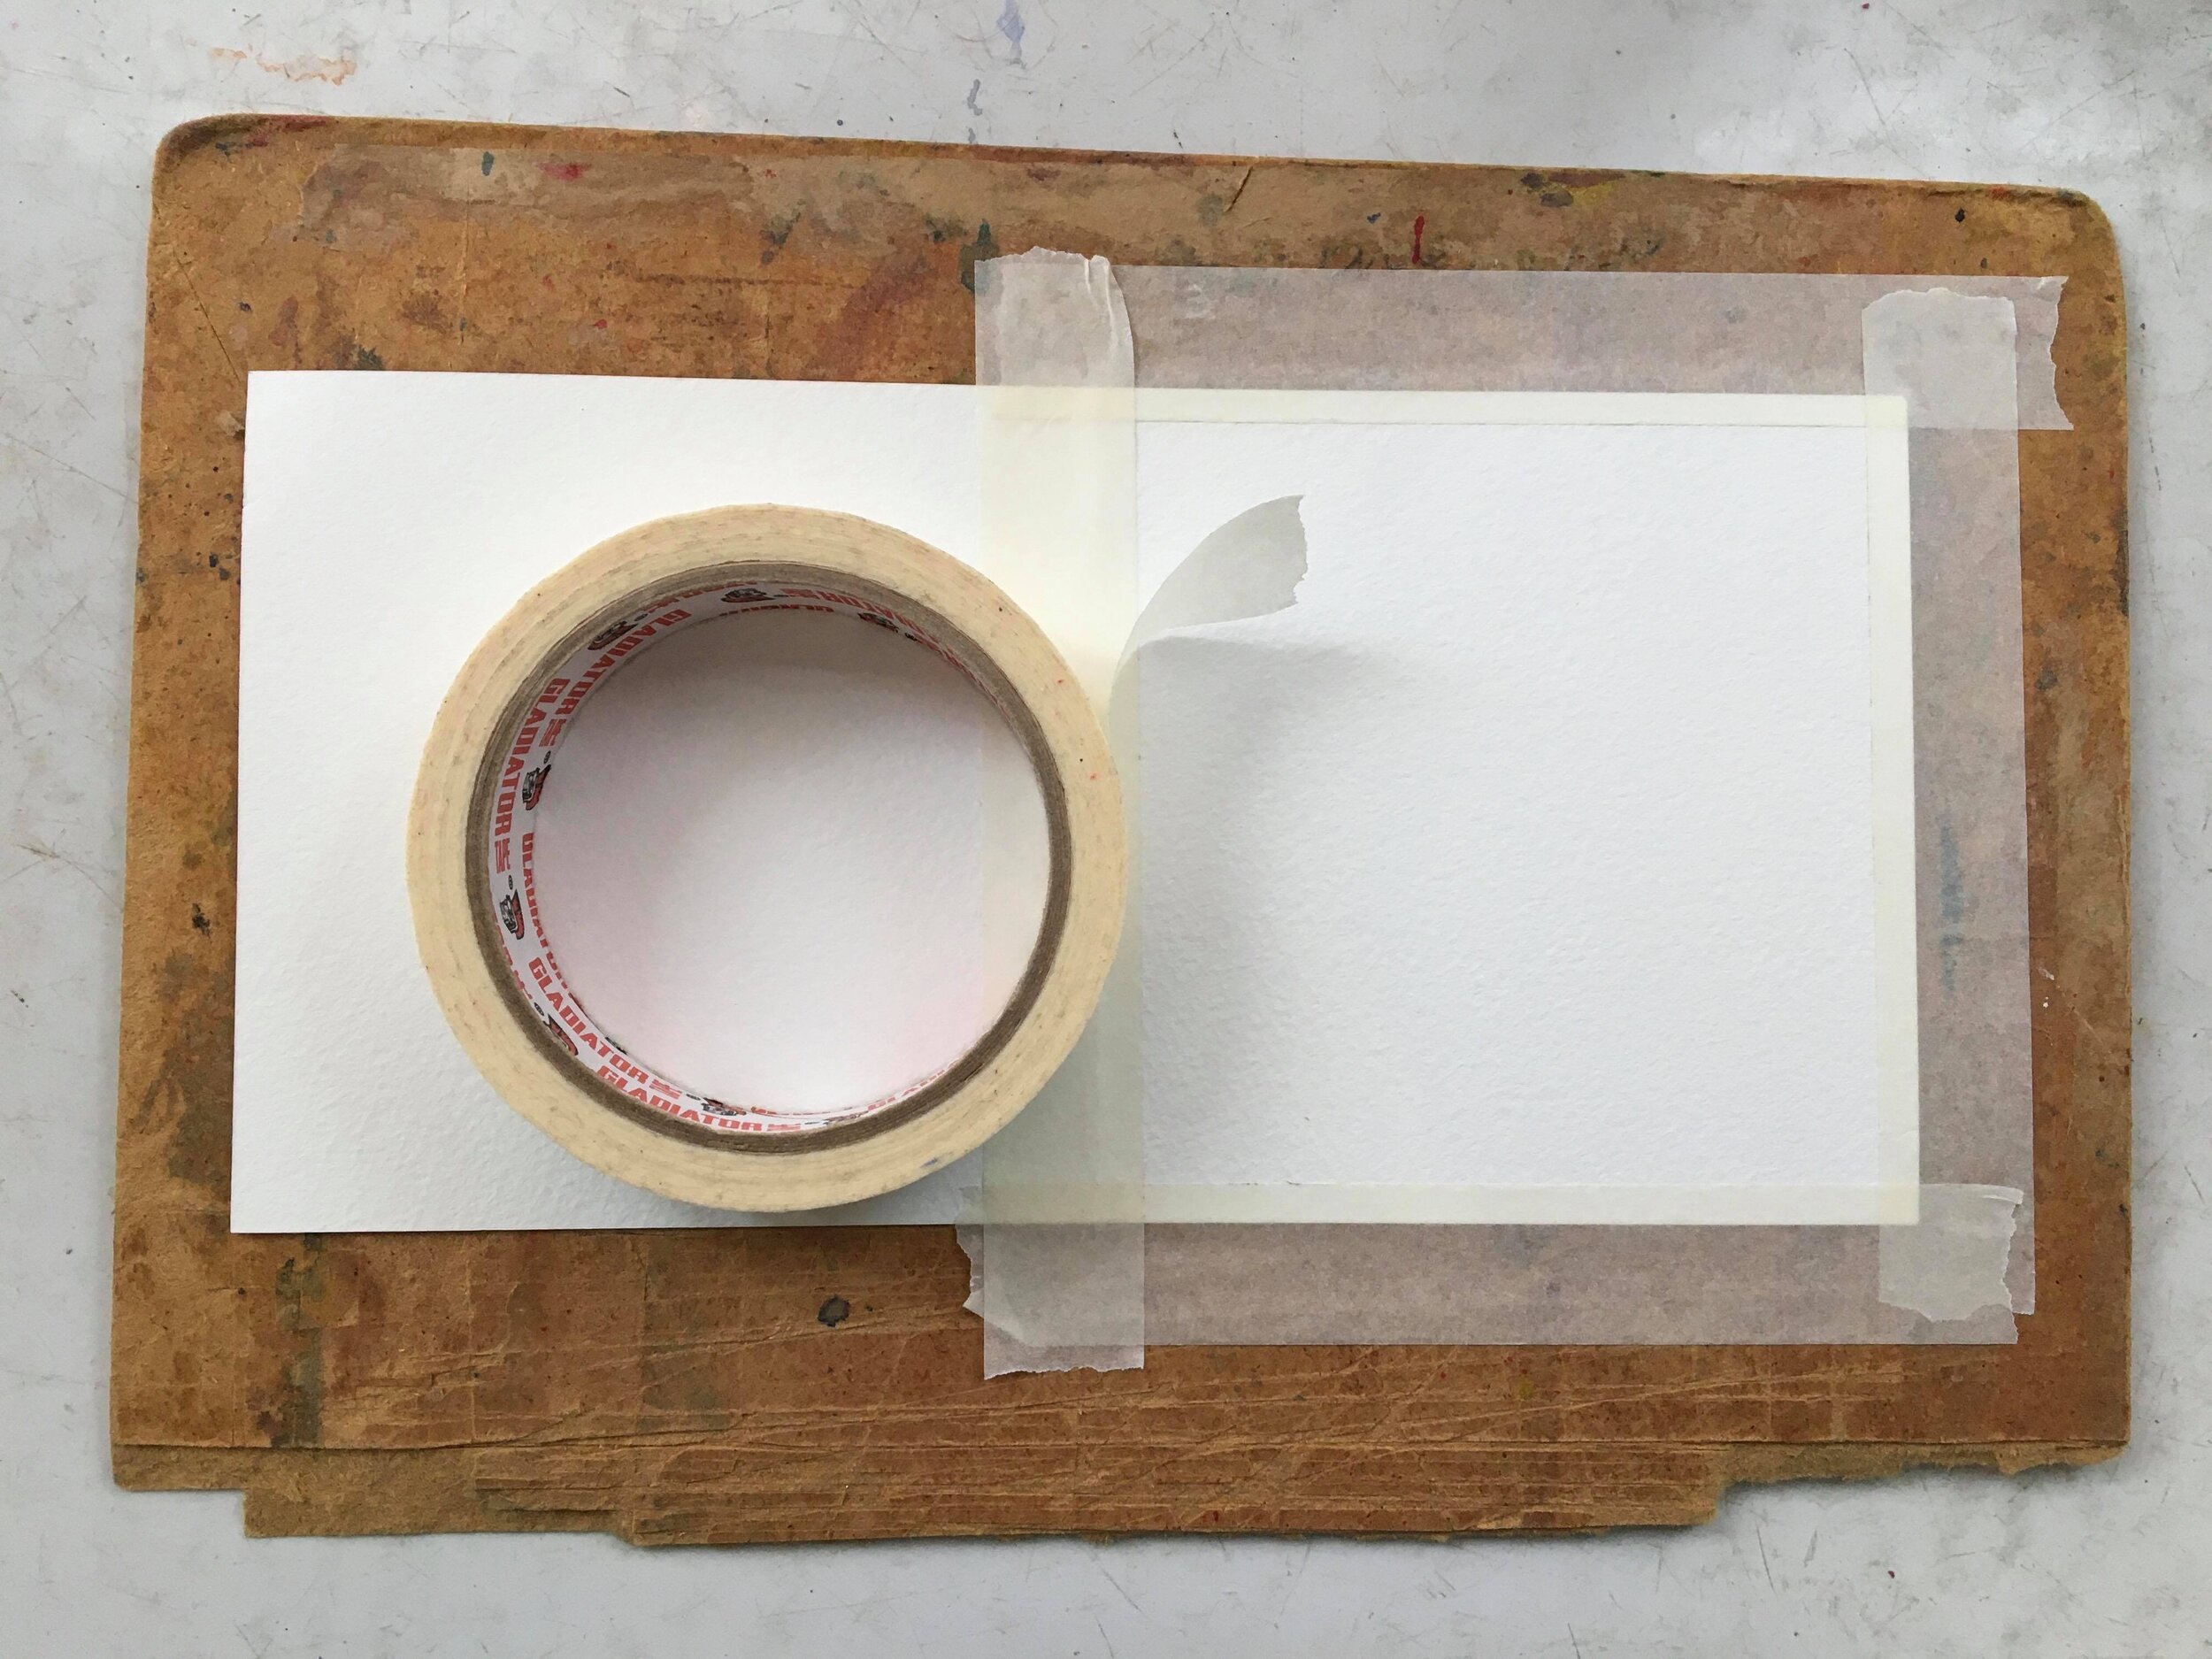
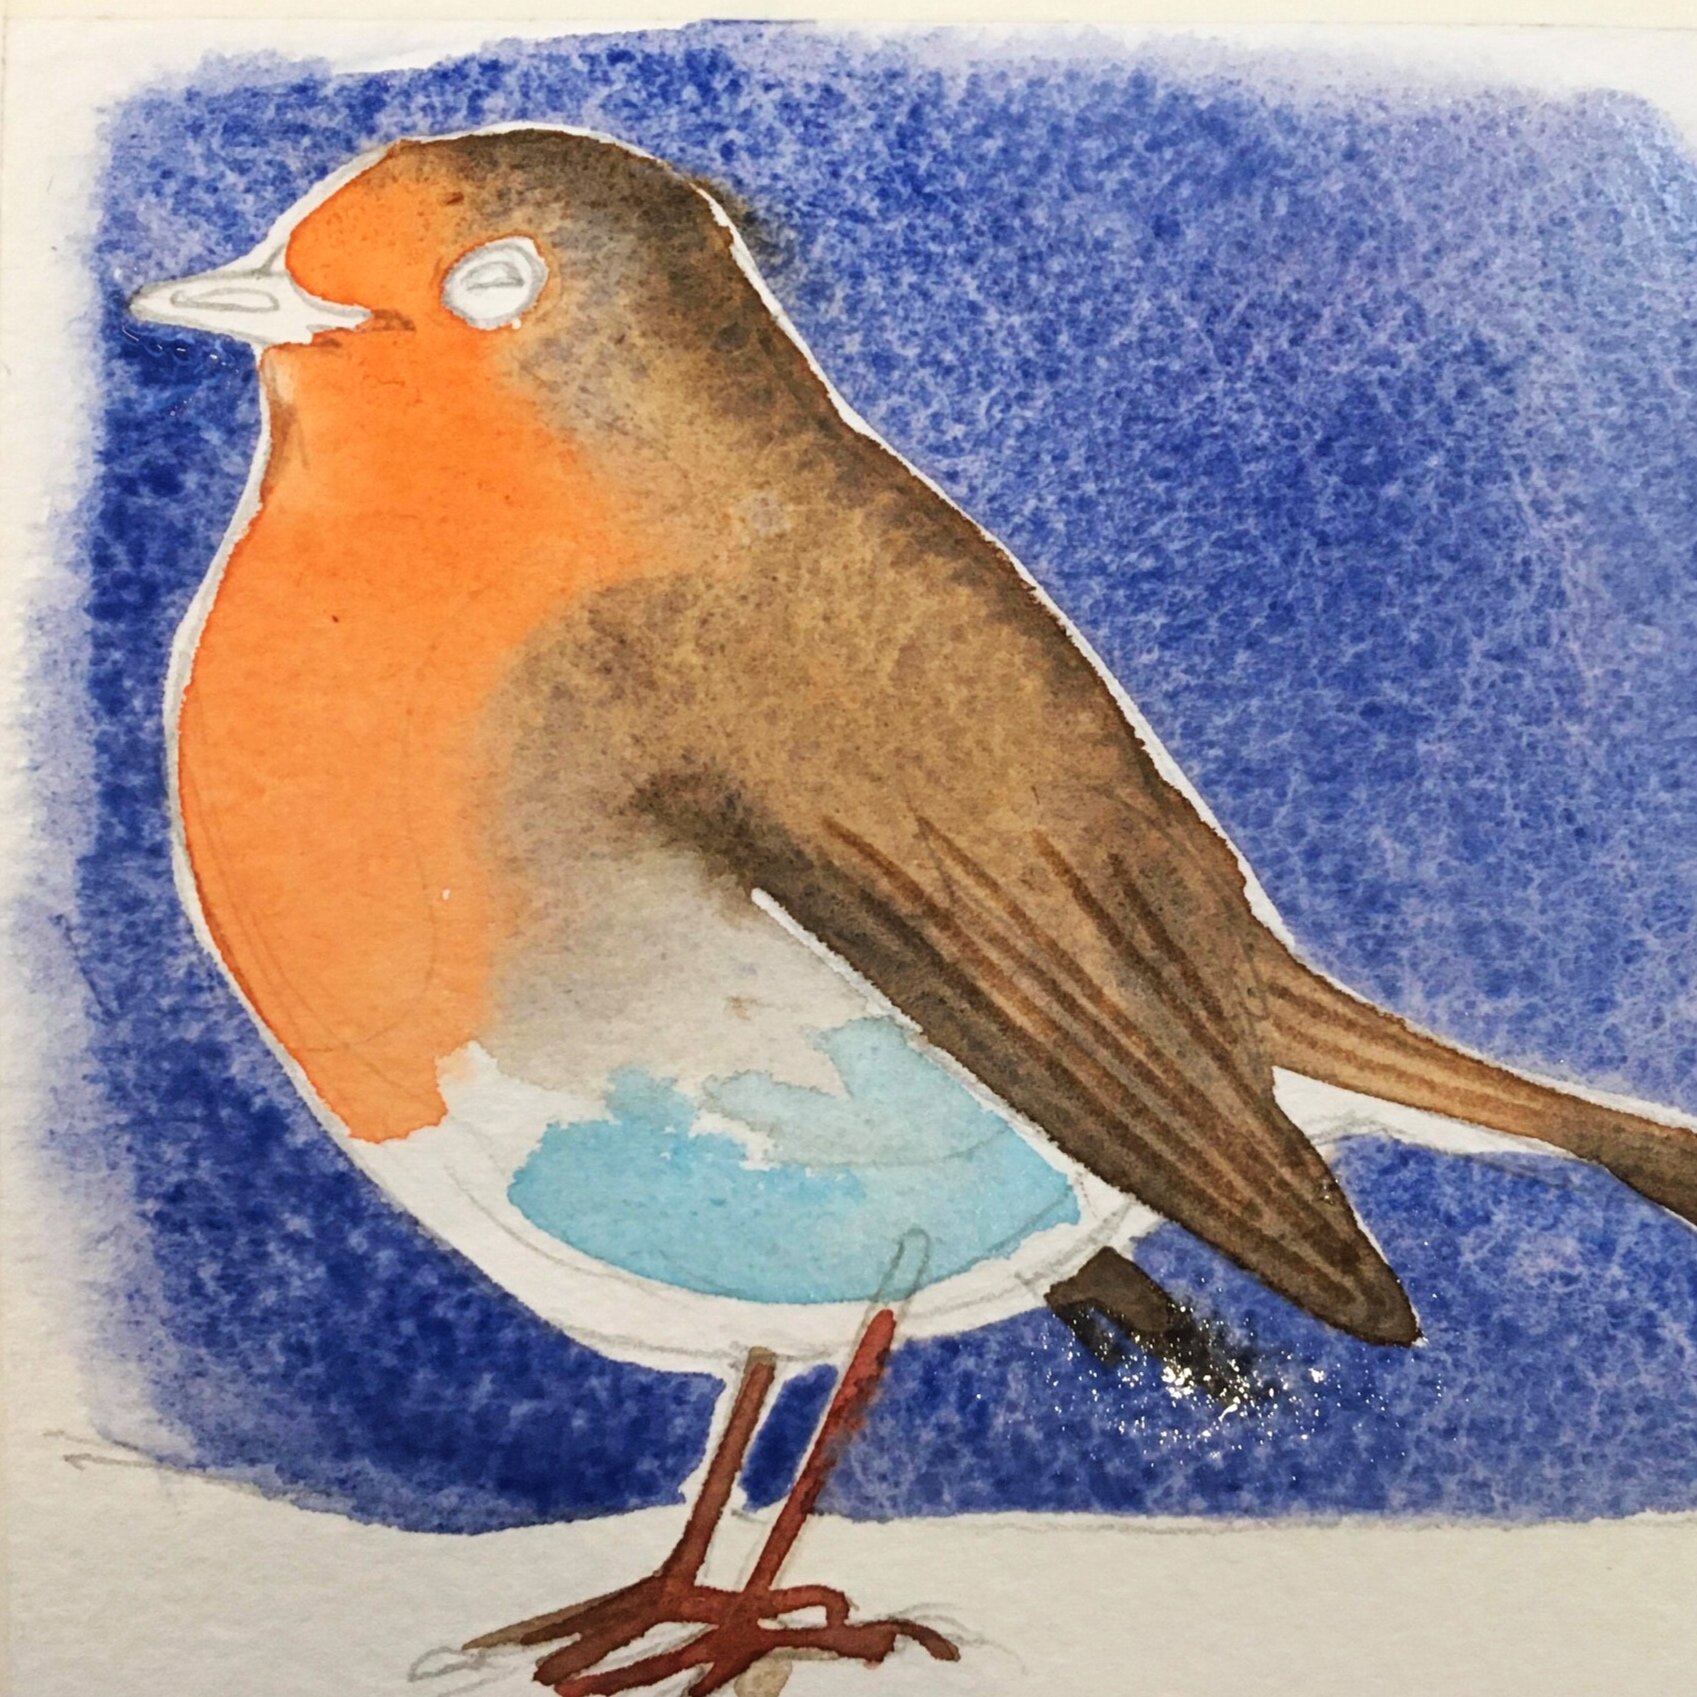
2) Sketch an outline drawing of your robin (or you could trace mine) on to the front of the card. Leave a margin of around a few cm white space around all four edges because....

3) You’ll use masking tape to tape around all four edges of the front of the card to a piece of board so that the paper won’t warp when you make it wet later.
4) You’ll need to reserve a few little white areas to use as highlights on the eye and the shiny beak, so lightly draw around those areas in pencils to remind yourself later to paint around them and leave the inside of the areas as dry white paper to create bright white highlights.
5) Mix up the colours you’ll need in the separate wells in the palette before you start to paint: this will help you to paint more spontaneously when you actually begin: also it’s essential to do this is you’re planning to paint in wet in wet technique.
TIP: when you using hard watercolour blocks (pans) give them a good spray with a water spray a few minutes before you start to use them. This water will absorb into the paint and soften the pigments so it’s much easier to mix strong, vibrant colours.
6) Apply your no 10 brush, really wet, to the colour you want to dilute and slowly brush back and forth, whilst counting to ten. This will help you get much stronger (not watery and wishy washy) colour from your blocks. Transfer this colour to one of the wells in your palette and also try it on a scrap of watercolour paper to test the colour and strength. You may find you want to add more paint to make the colour more intense, or add more water to make the colour more transparent.
Do this for all your colours. I used the following:
Background: Ultramarine Blue with a little Alizarin Crimson mixed in to make it slightly more purple hued
Shadows: a small amount of very, very diluted Pthalo Blue for the light blue shadows on the Robins tummy and the snow underneath him
Robin’s Body: Cadmium Yellow and Cadmium Red mixed together to make an orangey red; the grey was a little Ultramarine Blue mixed with a little Burnt Sienna with added water to make it a light transparent grey; the brown was made from lots of Burnt Sienna ( warm brown) mixed with Ultramarine to make it darker.
So now you’re ready to paint!
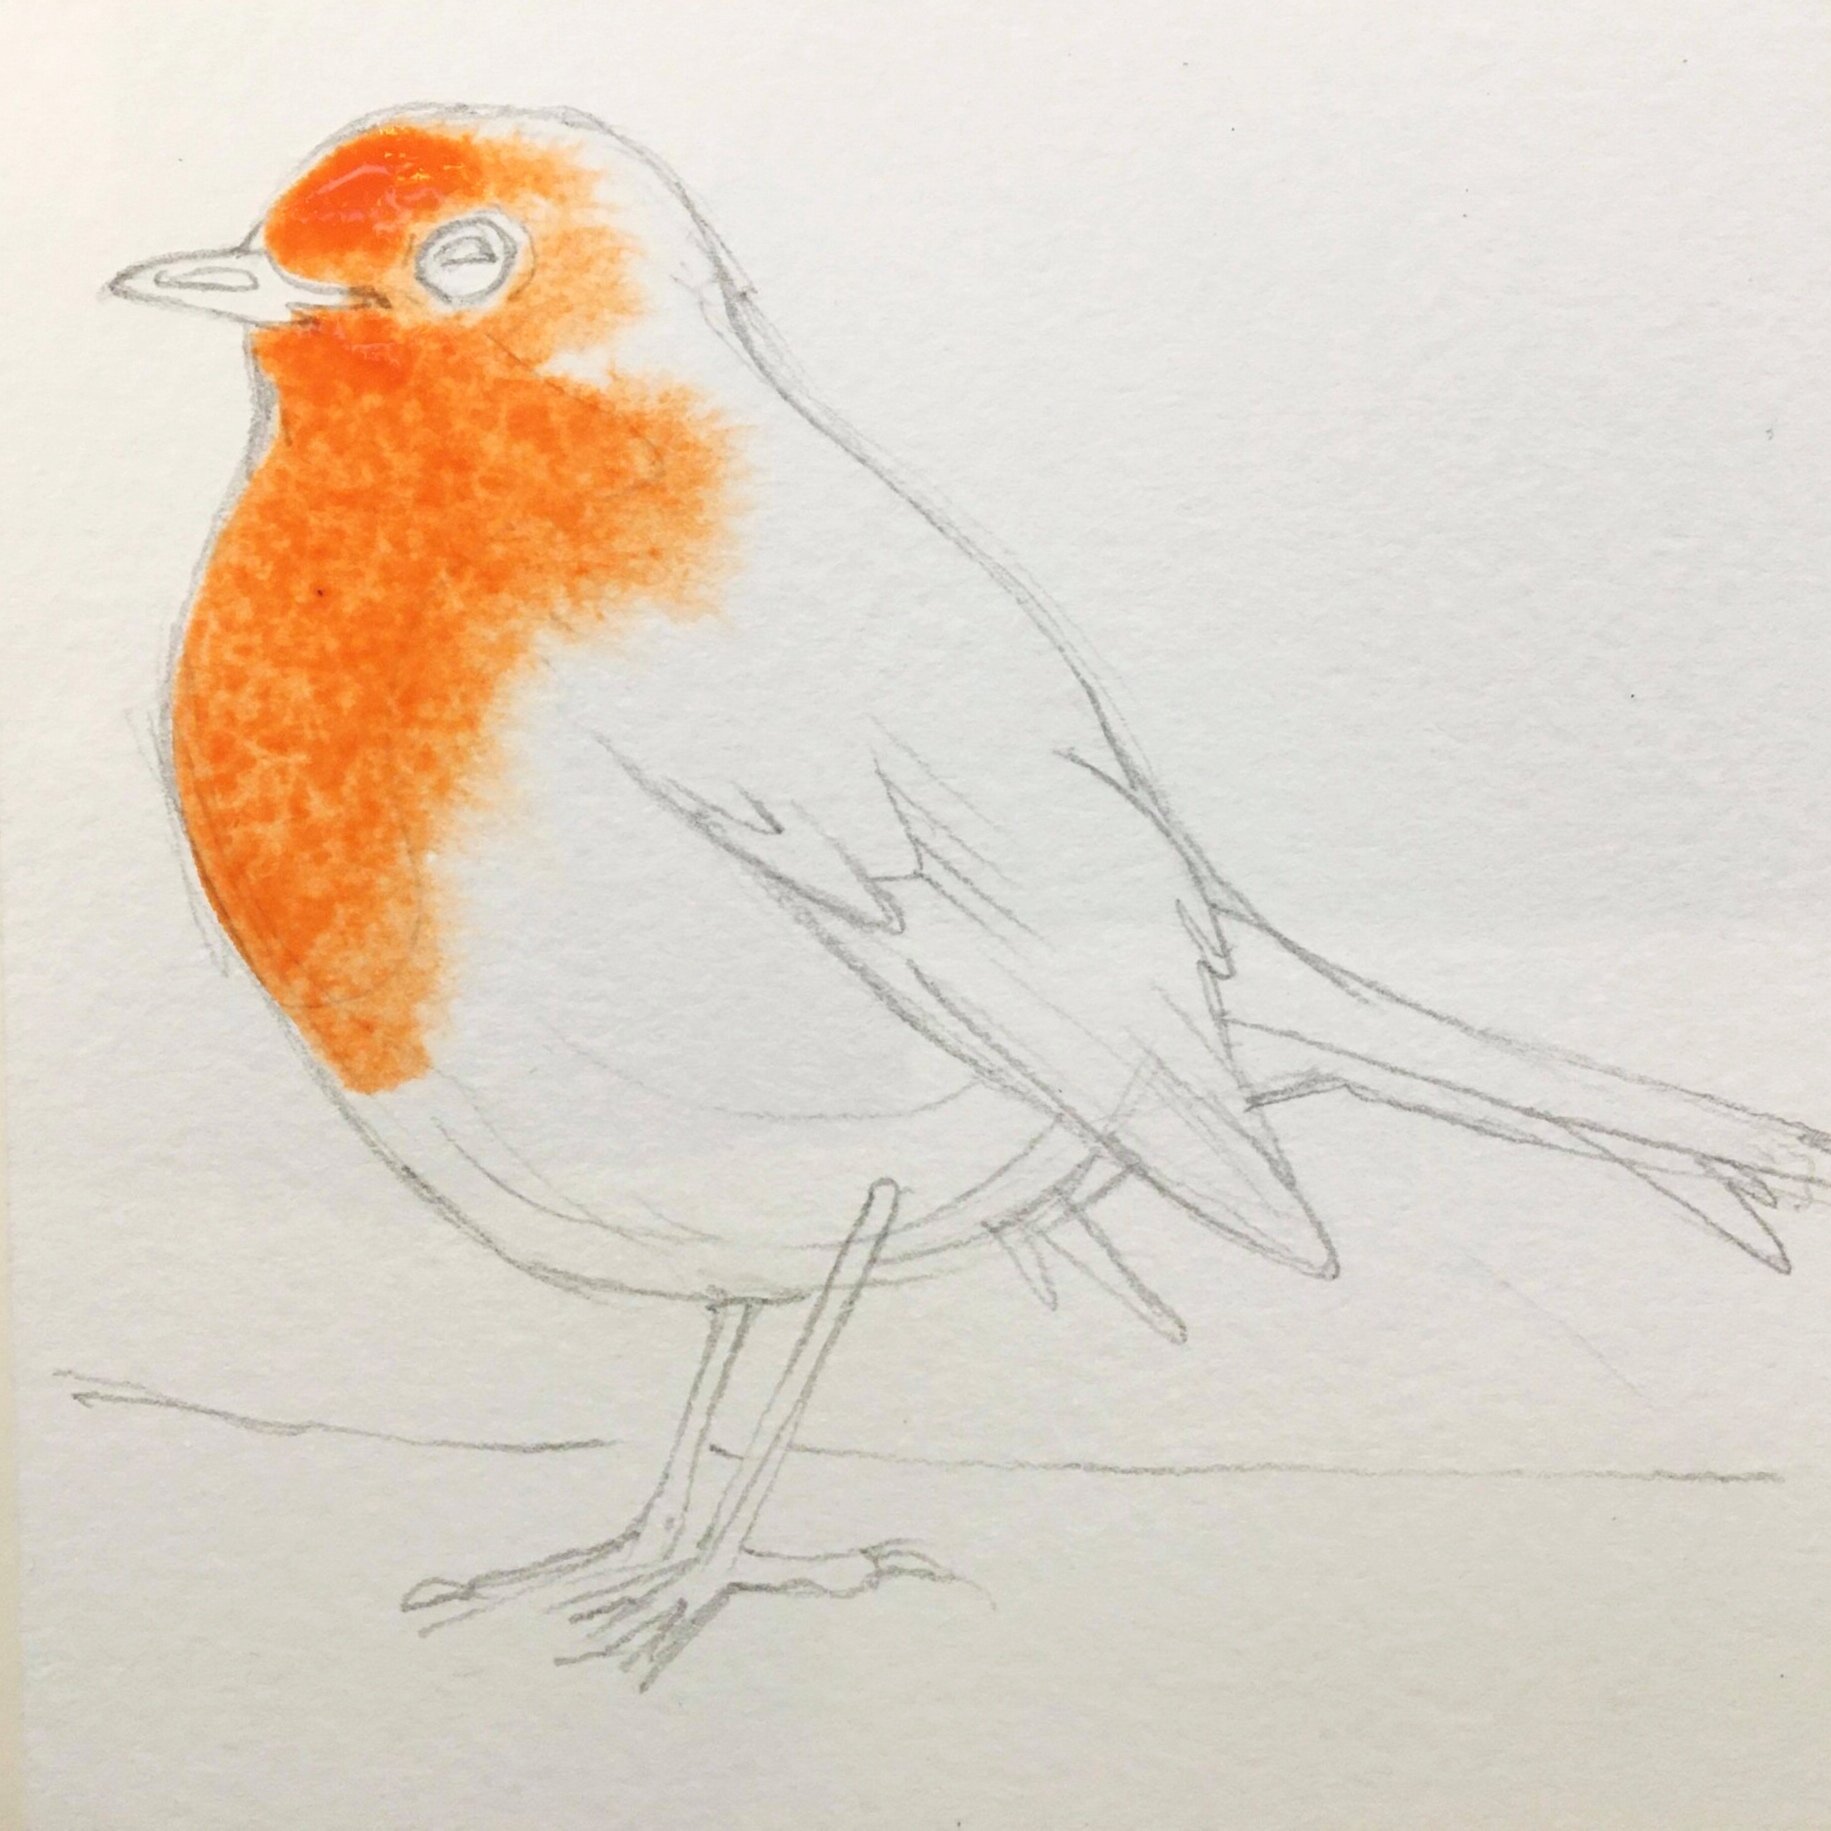
7) Dampen the whole shape of the robin with a wet brush, with the exception of the eye and the beak: these will stay dry.
8) Fill your brush with the orange/red and stroke it into the damp surface over the breast, head and shoulder.
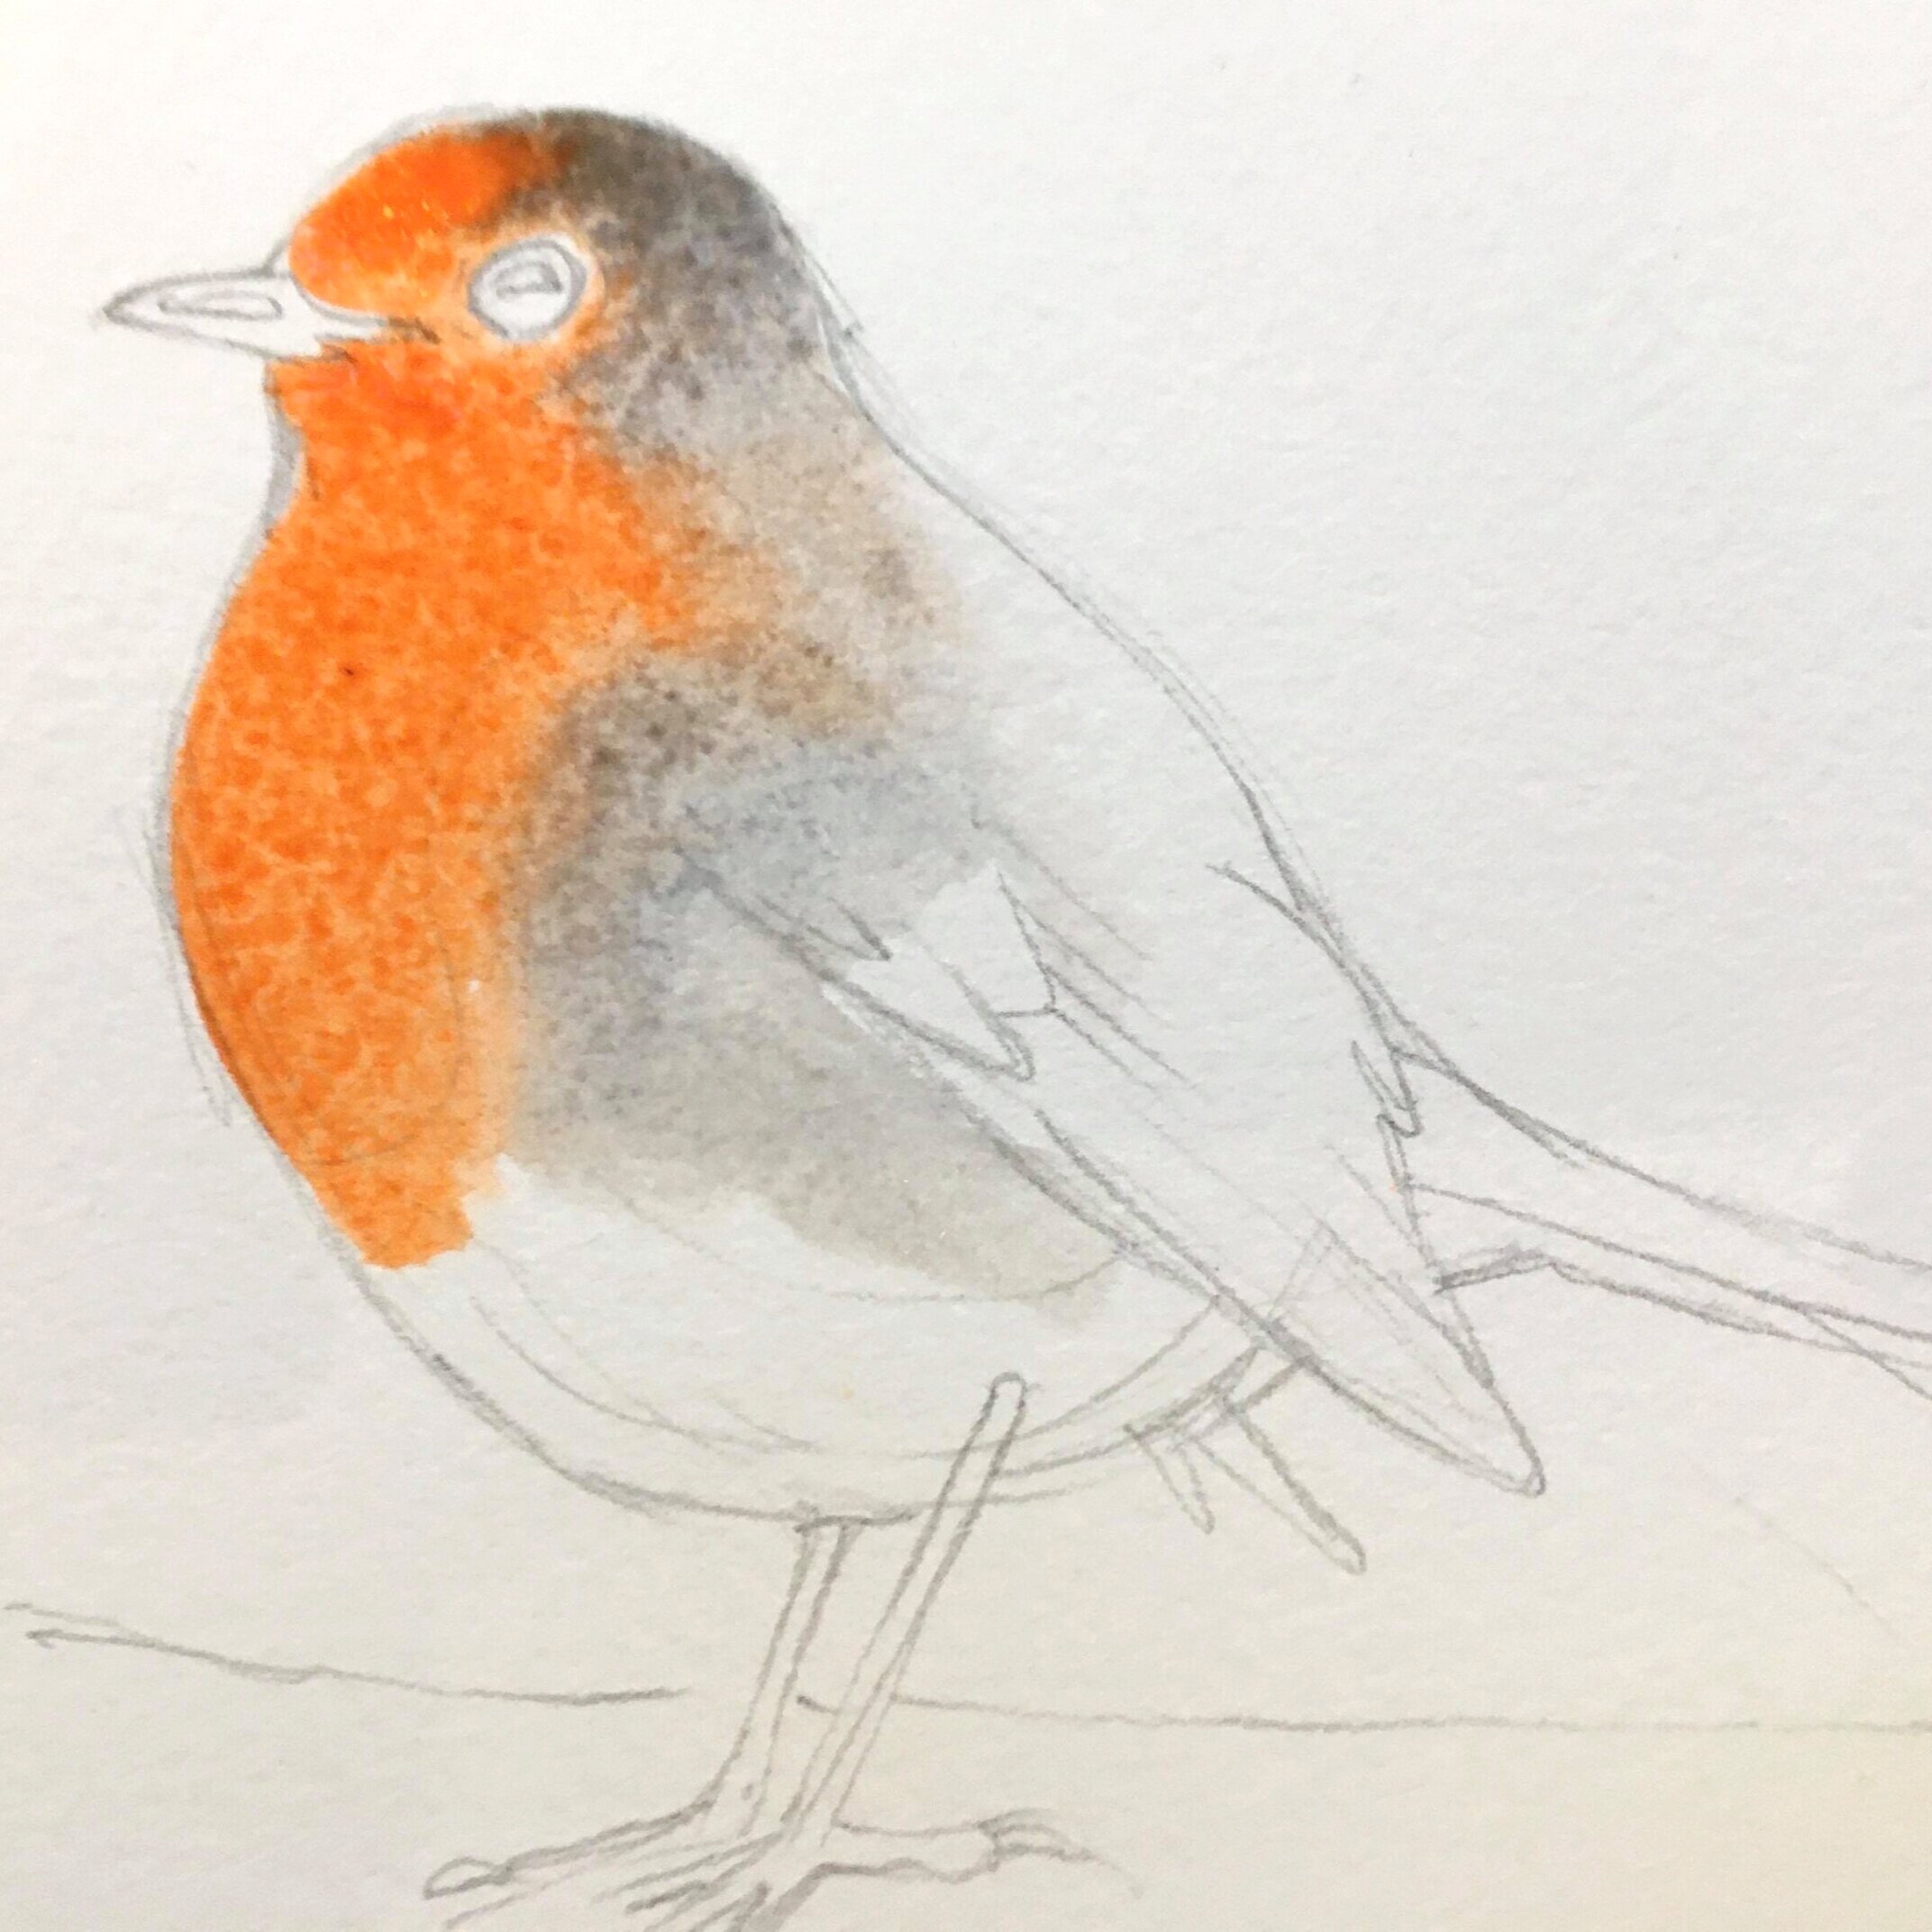
9) Wash out the brush and blot it on kitchen roll, then dip it in the grey. Paint the grey right next to the red: the two colours will merge a little where they overlap. (Resist the urge to blend them or they will turn muddy.)
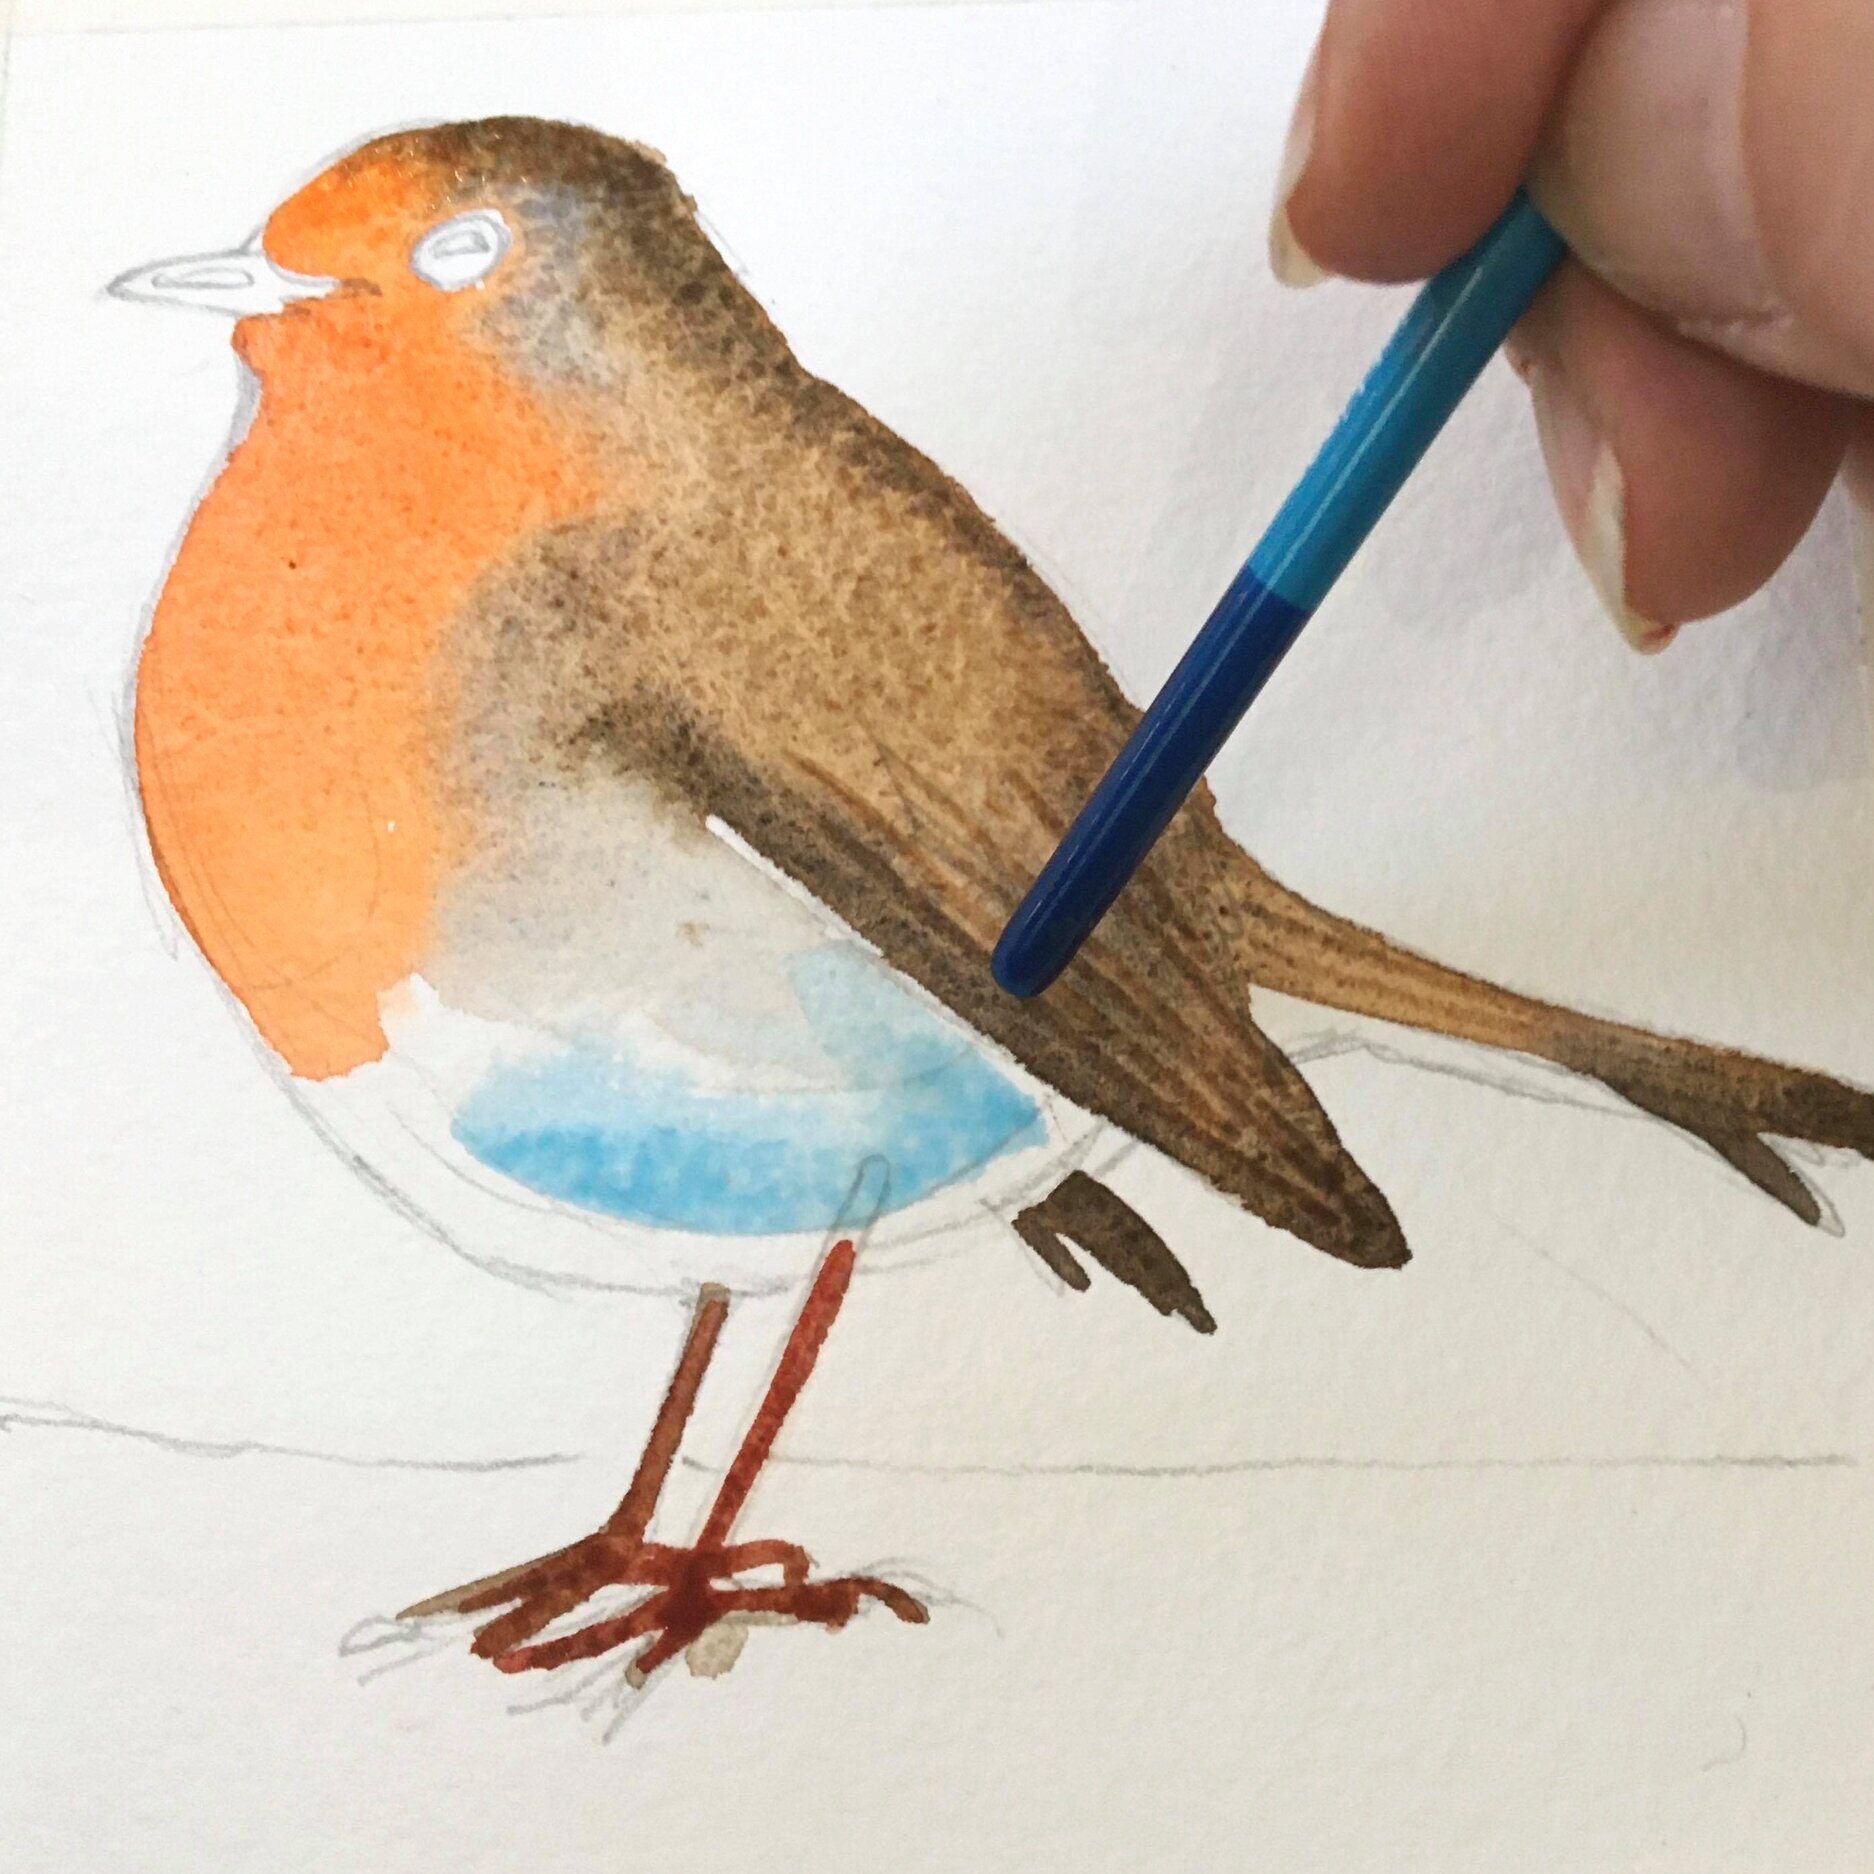
10) Wash out the brush and blot again, fill it with the dark brown and paint the rest of the robin except for the white underbelly. Let the brown merge with the wet grey a little.
11)You can add a little details to the feathers on the wind by using the pointedwooden end of your fine detail brush to score a few lines into the wet paper: the damp brown paint with settle in the grooves as darker lines.
12) Wash and blot the brush, then sweep a little of the very diluted Pthalo Blue as a shadow in the underbelly, and the shadow in the snow underneath the robin.
That’s the tricky bit done! At this stage it needs to either be left in a warm place to dry or given a quick blast with a hairdryer. Either way, the paper must be absolutely dry and lying completely flat against the board again before you start the next steps, which is painting the background.
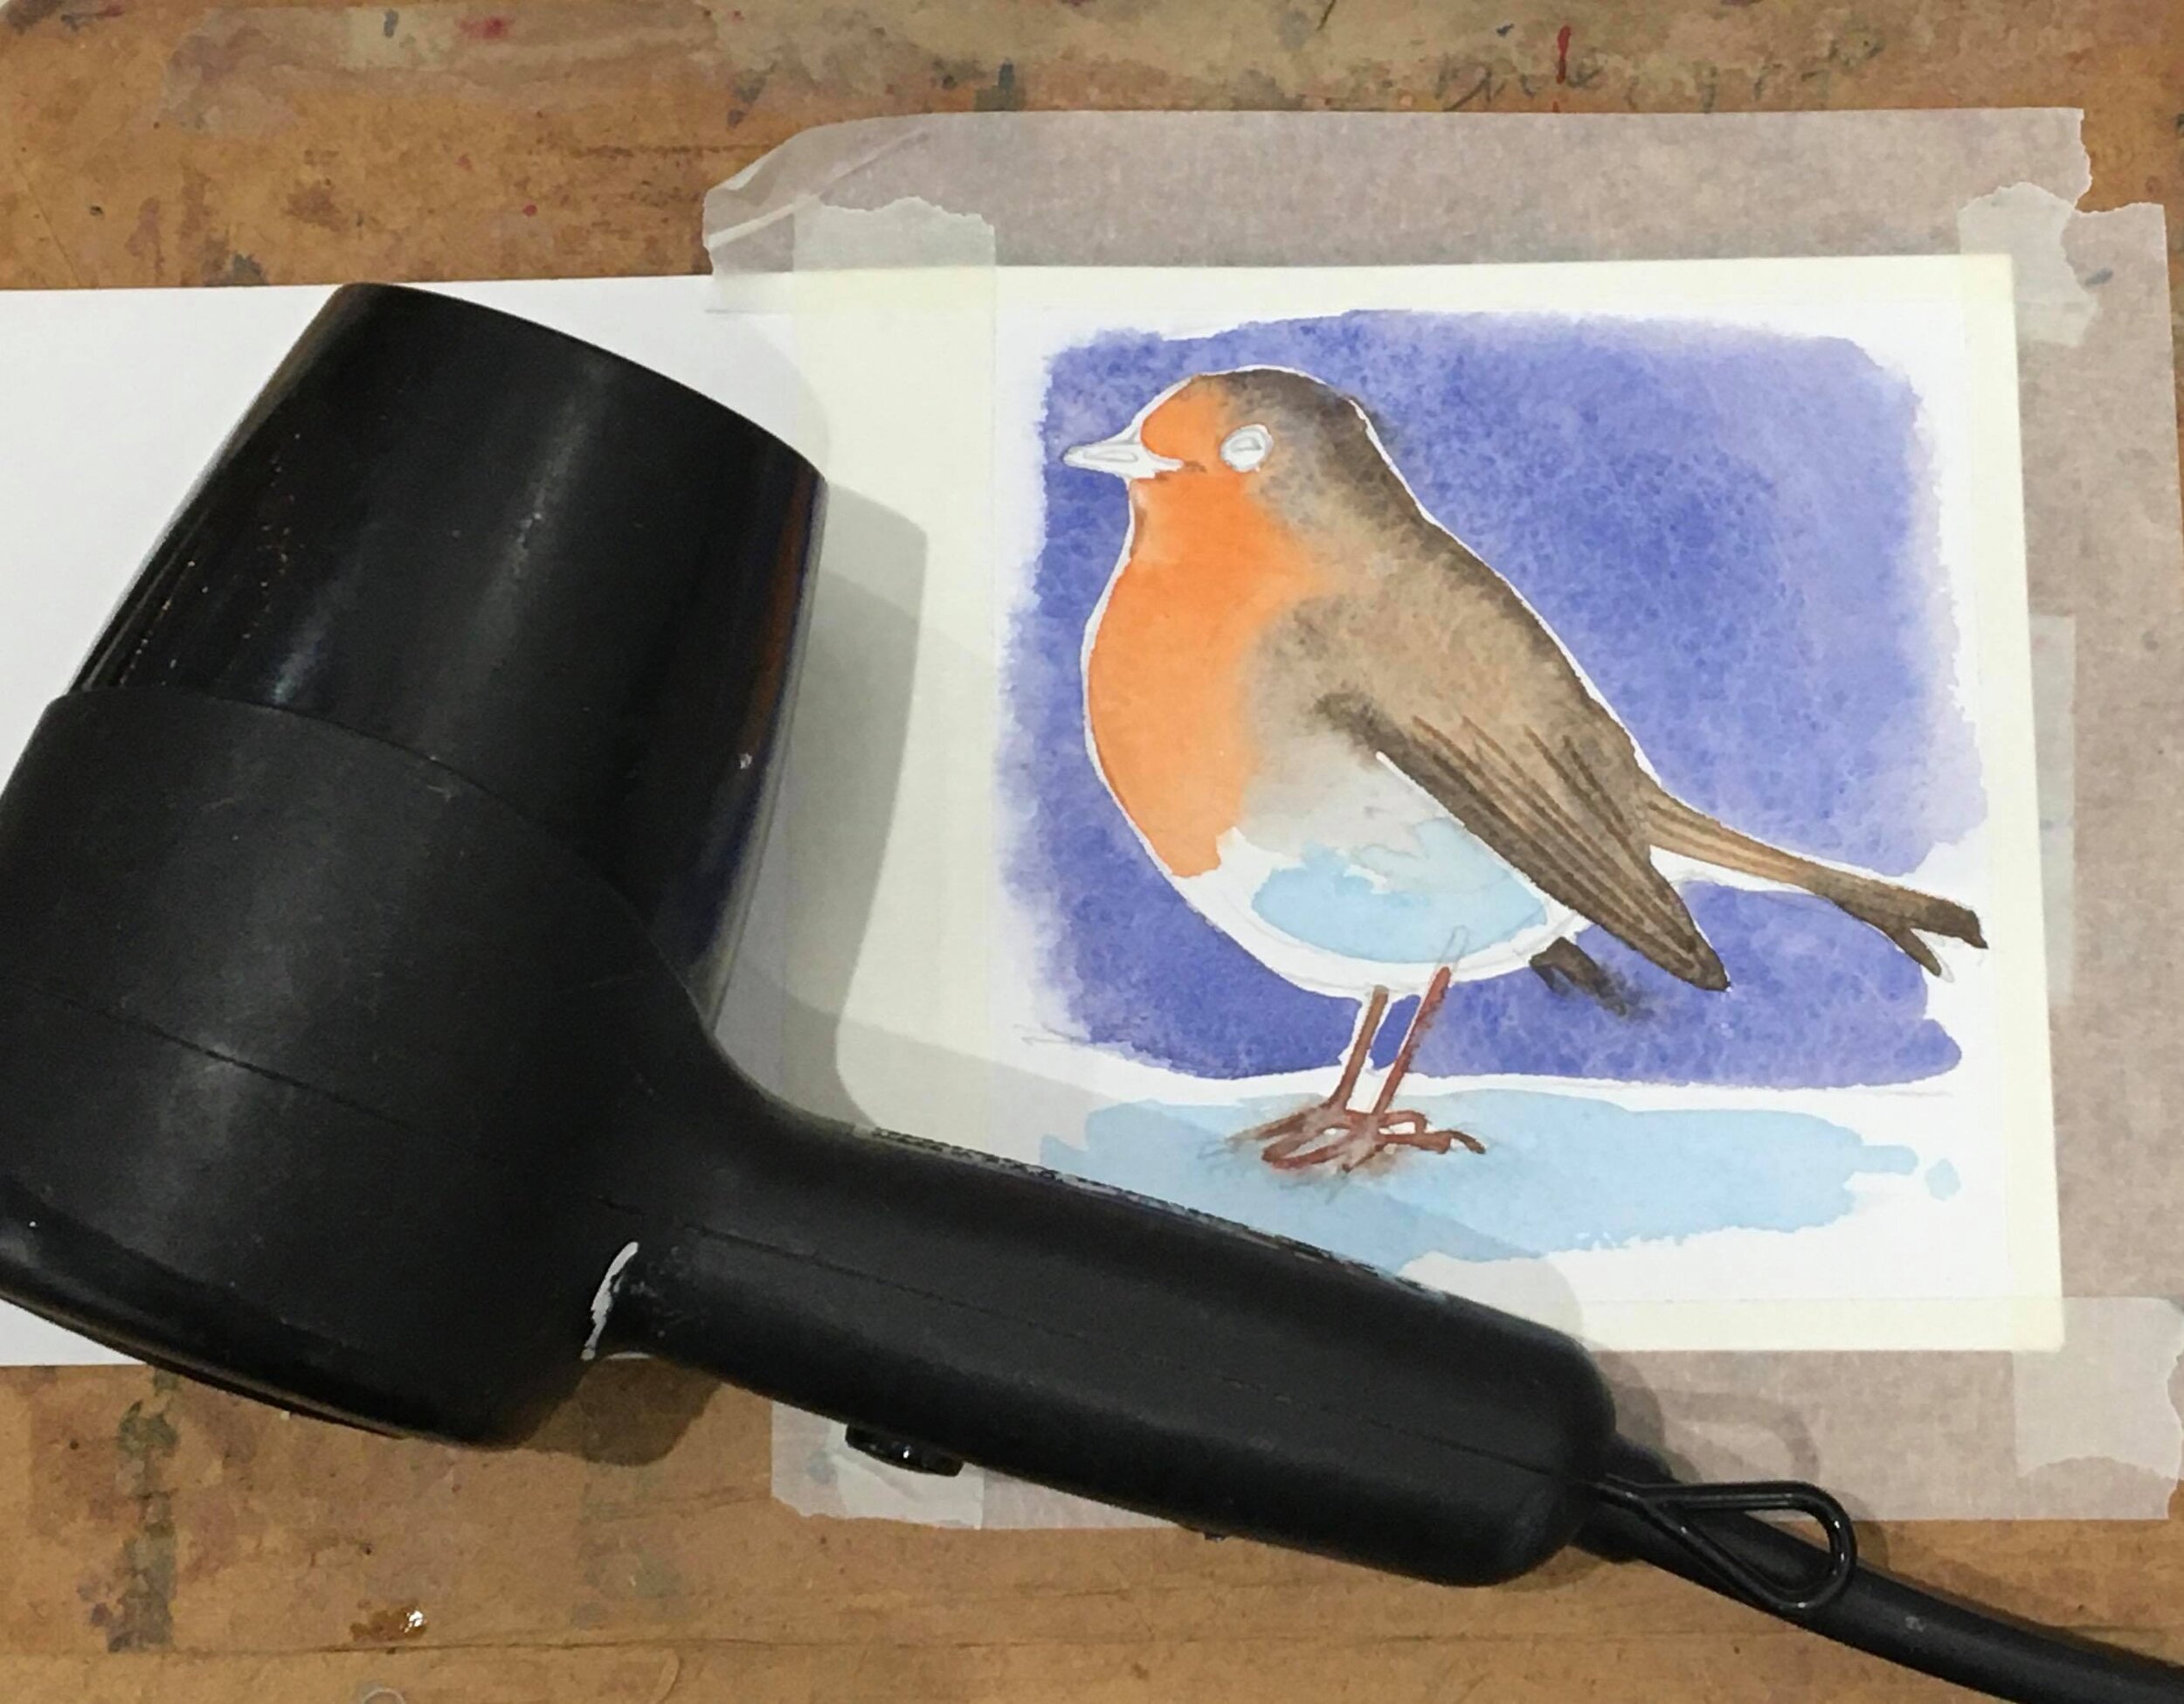
13) Now you’re going to use your clean no. 10 brush dipped into clean water and you’ll paint the water all the way round the outside edge of the robin (Paint this slowly and with smooth, careful brush strokes so the background doesn’t look ragged.) then dip your brush in the Ultramarine Blue in the well and paint all around the outside edge of the robin into the damp surface of the paper.
You’ll create a sharp outline around the Robin but the outer edge of the blue brush stroke will blend into the damp paper to create a soft, diffused effect. Extend the background out to however far you wish: you could let it softly fade out back to white as I did, or paint the blue right out to the edges and over the masking tape. (Know that if you do this you’ll have a neat, crisp white border around the edge of the card when you peel the tape off when finished.
Again: leave this layer to dry completely.
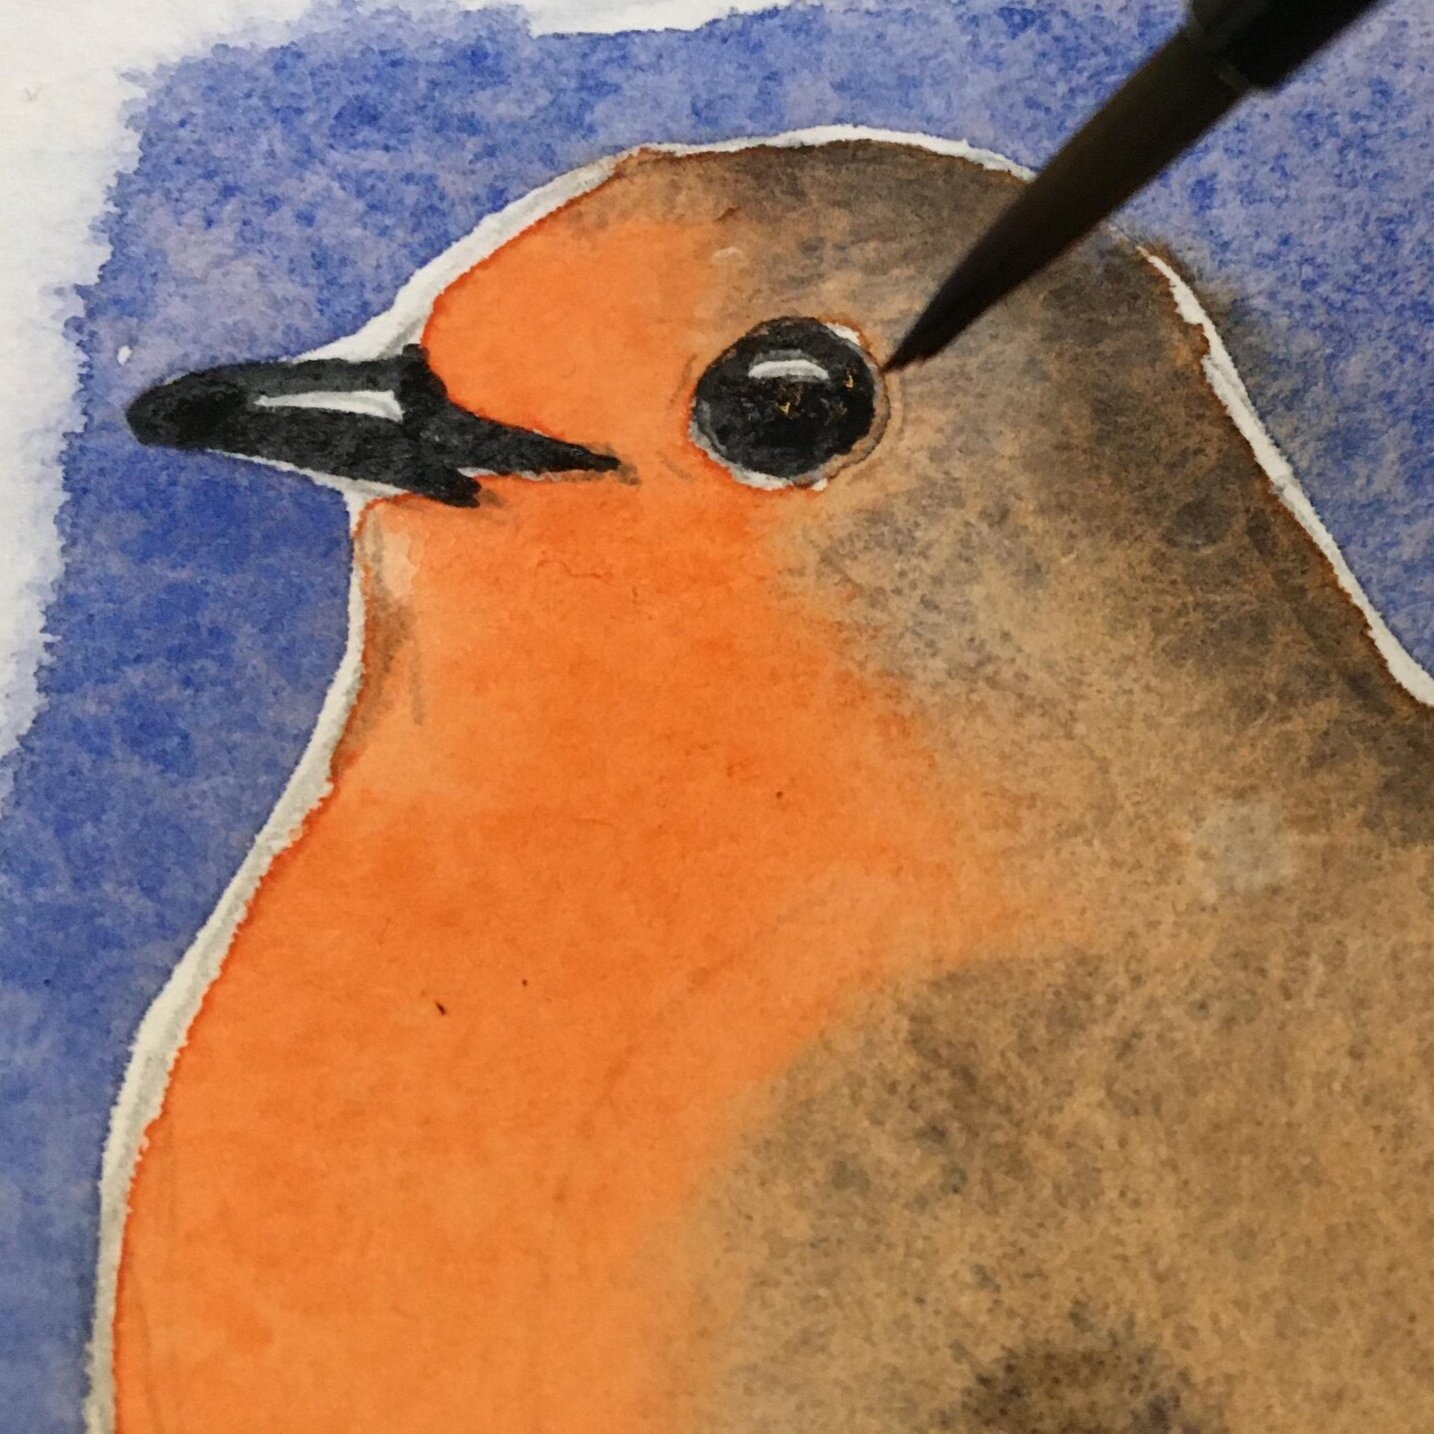
14) Paint the eye and beak by mixing up a little Ultramarine with Burnt Sienna with much less water to make a very intense dark almost black colour. Switch to the small detail brush and just using the tip, carefully paint around the highlight area of the eye which needs to stay as white paper, and paint in the rest of the eye. Do the same with the beak.
15) Dilute a little of the colour you used for the eye and beak, and use to paint the legs with the fine brush.
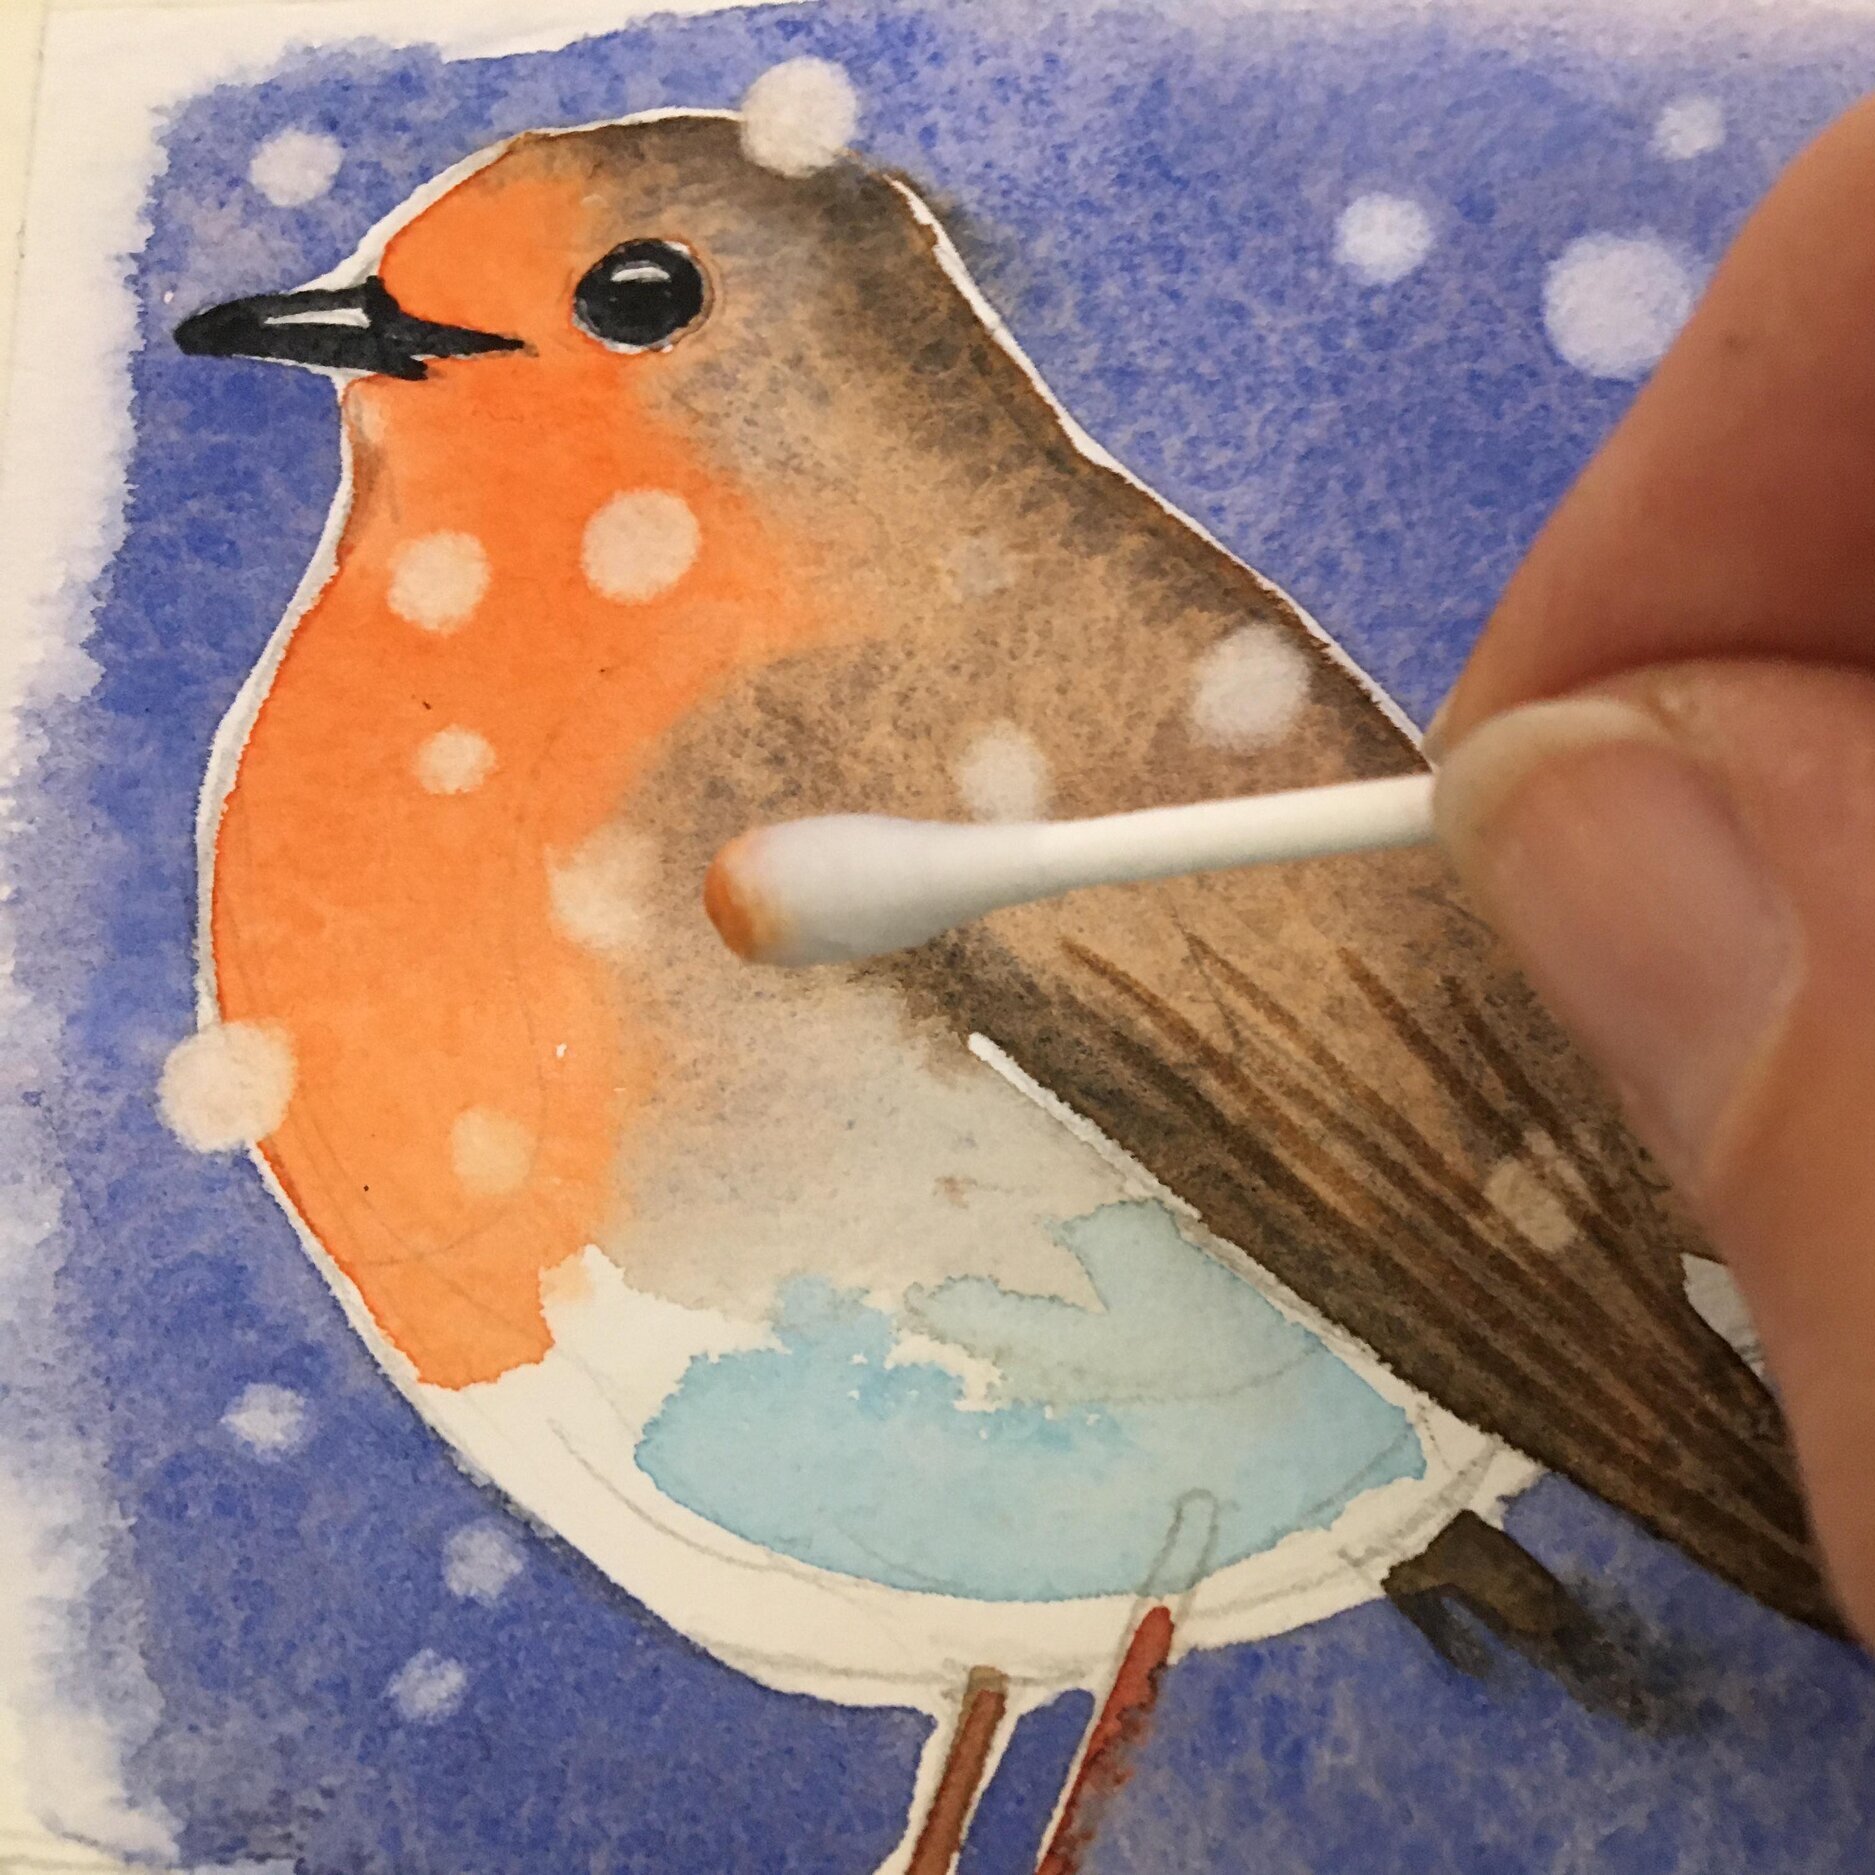
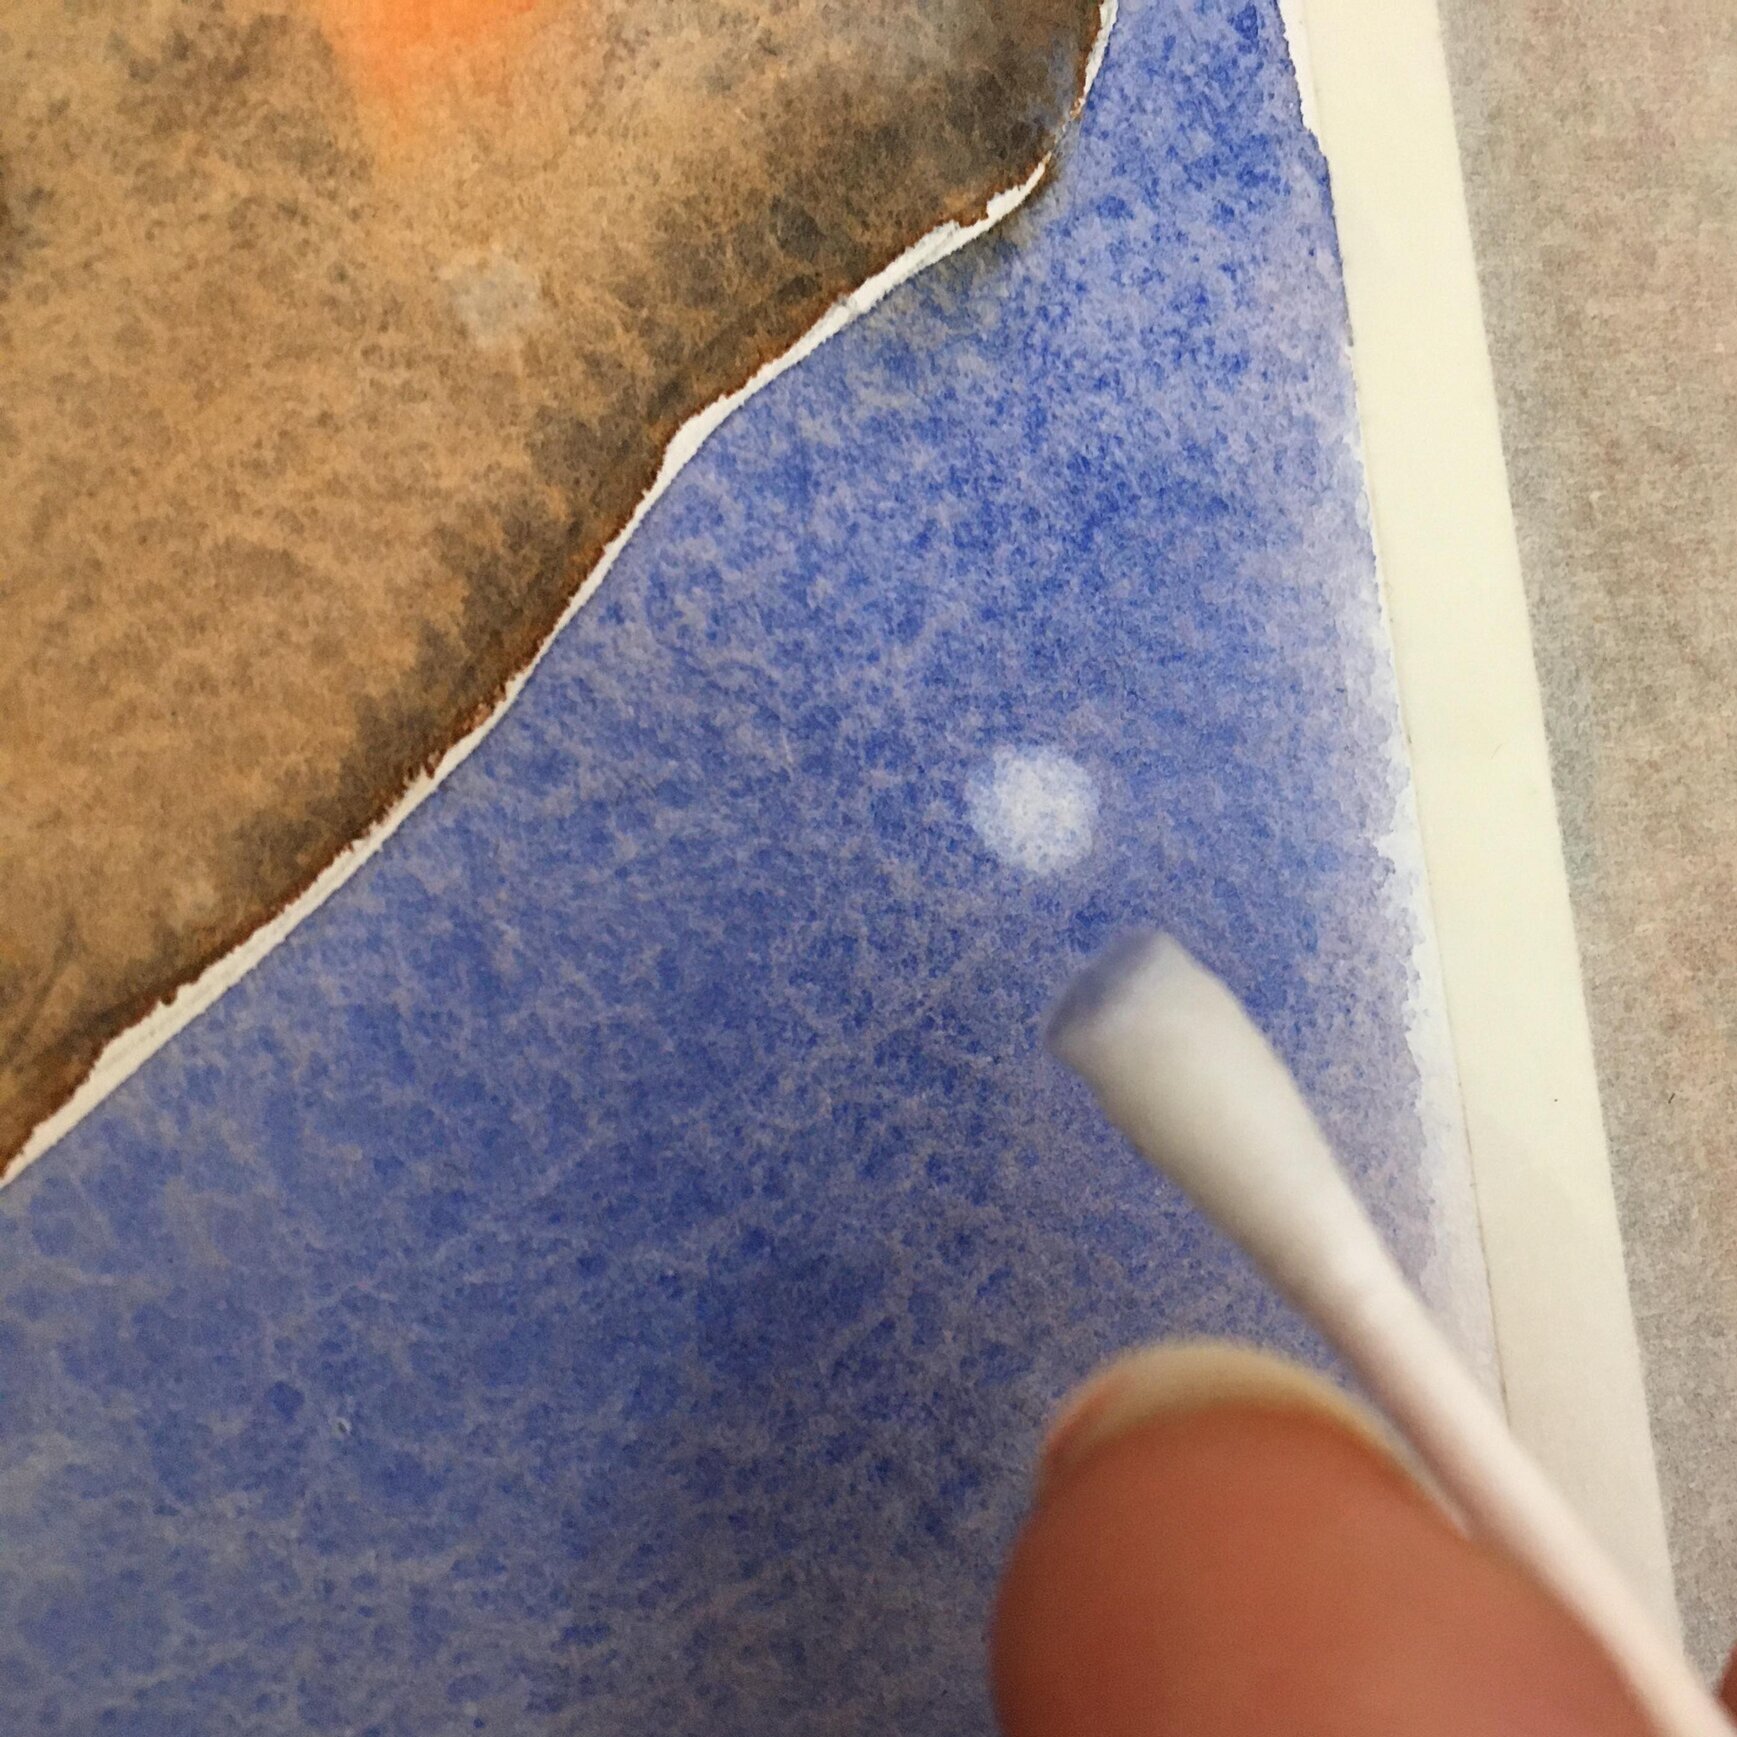
16) Now comes the fun bit! We’ll paint the snowflakes. So rather than using white paint, we’re going to take paint away to make the snow.... (This is called “Lifting Off” and you may want to practice this on your test sheet first.)
Dampen a cotton bud with a little and place the damp tip where you’d like to place a snowflake and touch the dry surface of the paint. Leave the tip there for a second or two. Some of the paint will transfer to the bud and that place on the background will look lighter. If there’s not much difference, press some dry kitchen roll on it: this will take more paint off and make it lighter. Place the bud on another area, and this time rotate it very slightly on the dry paint surface: this will create a larger snowflake. Every couple of snowflakes you paint, transfer the colour on the tip of the bud to kitchen roll and then re-dampen with clean water. I alternated with small, less white snowflakes in the background, and larger, whiter snowflakes in front of the robin to make them look closer in the foreground.
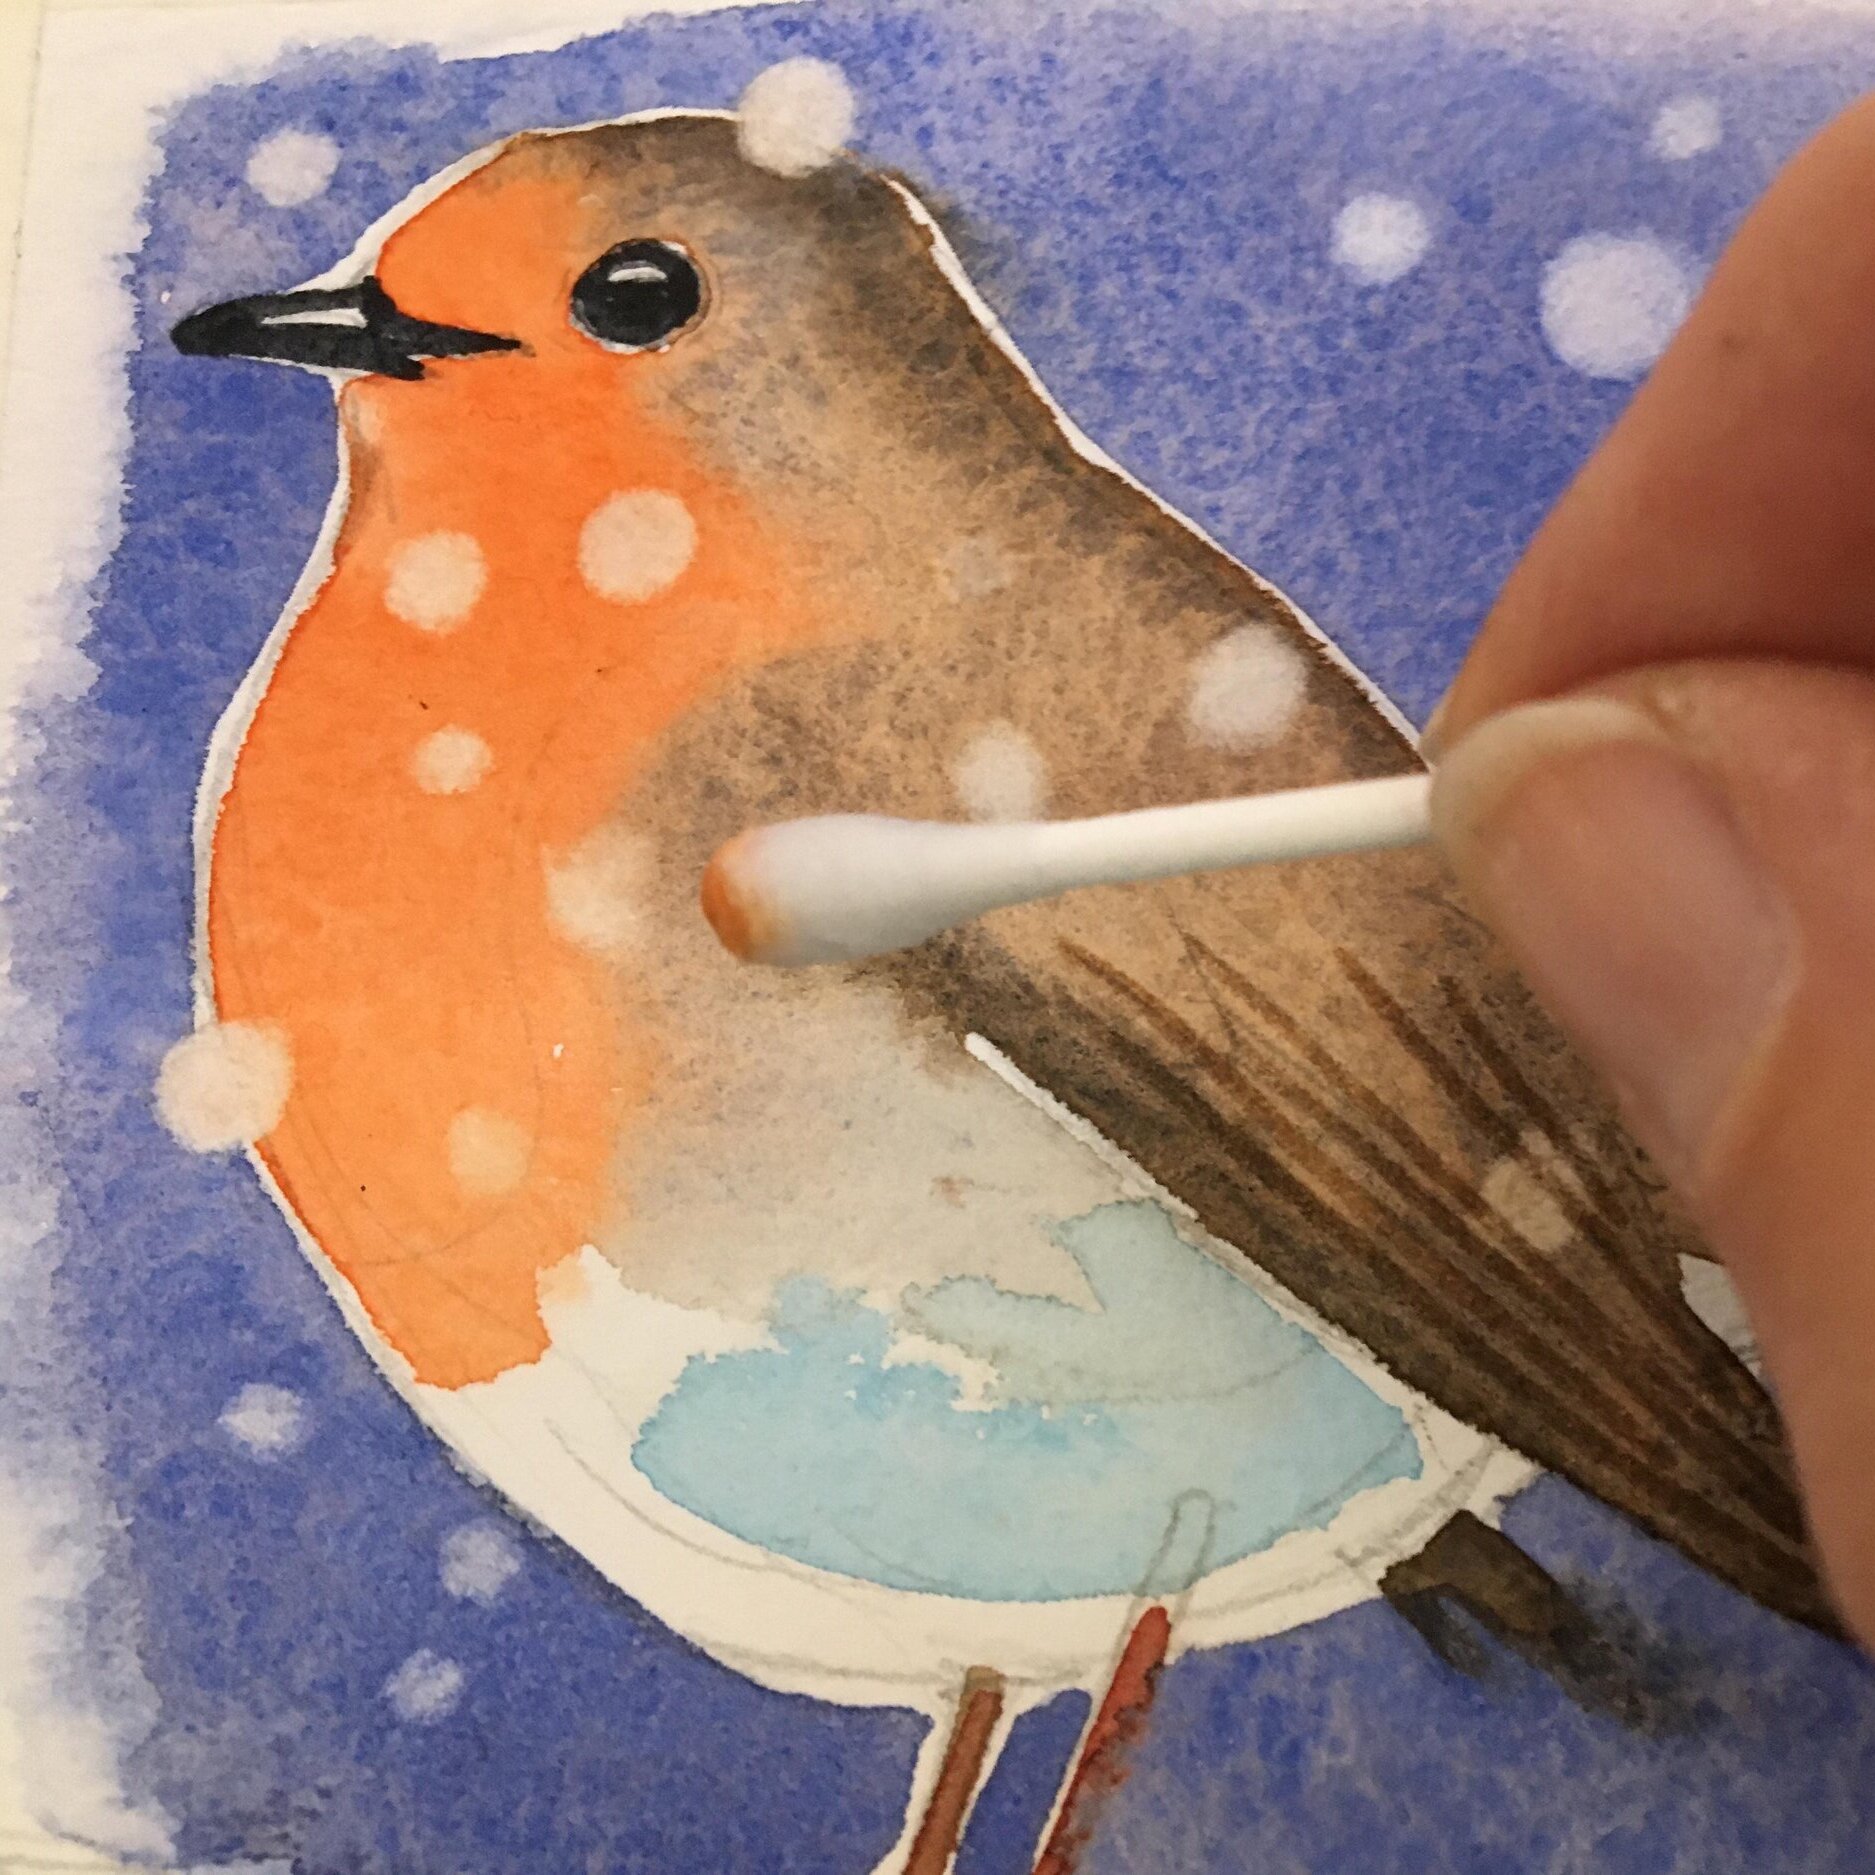
TIP: try not to have the snowflakes too regularly spaced or they make may look like polka dots. Or on the other hand, that’s quite a nice idea!
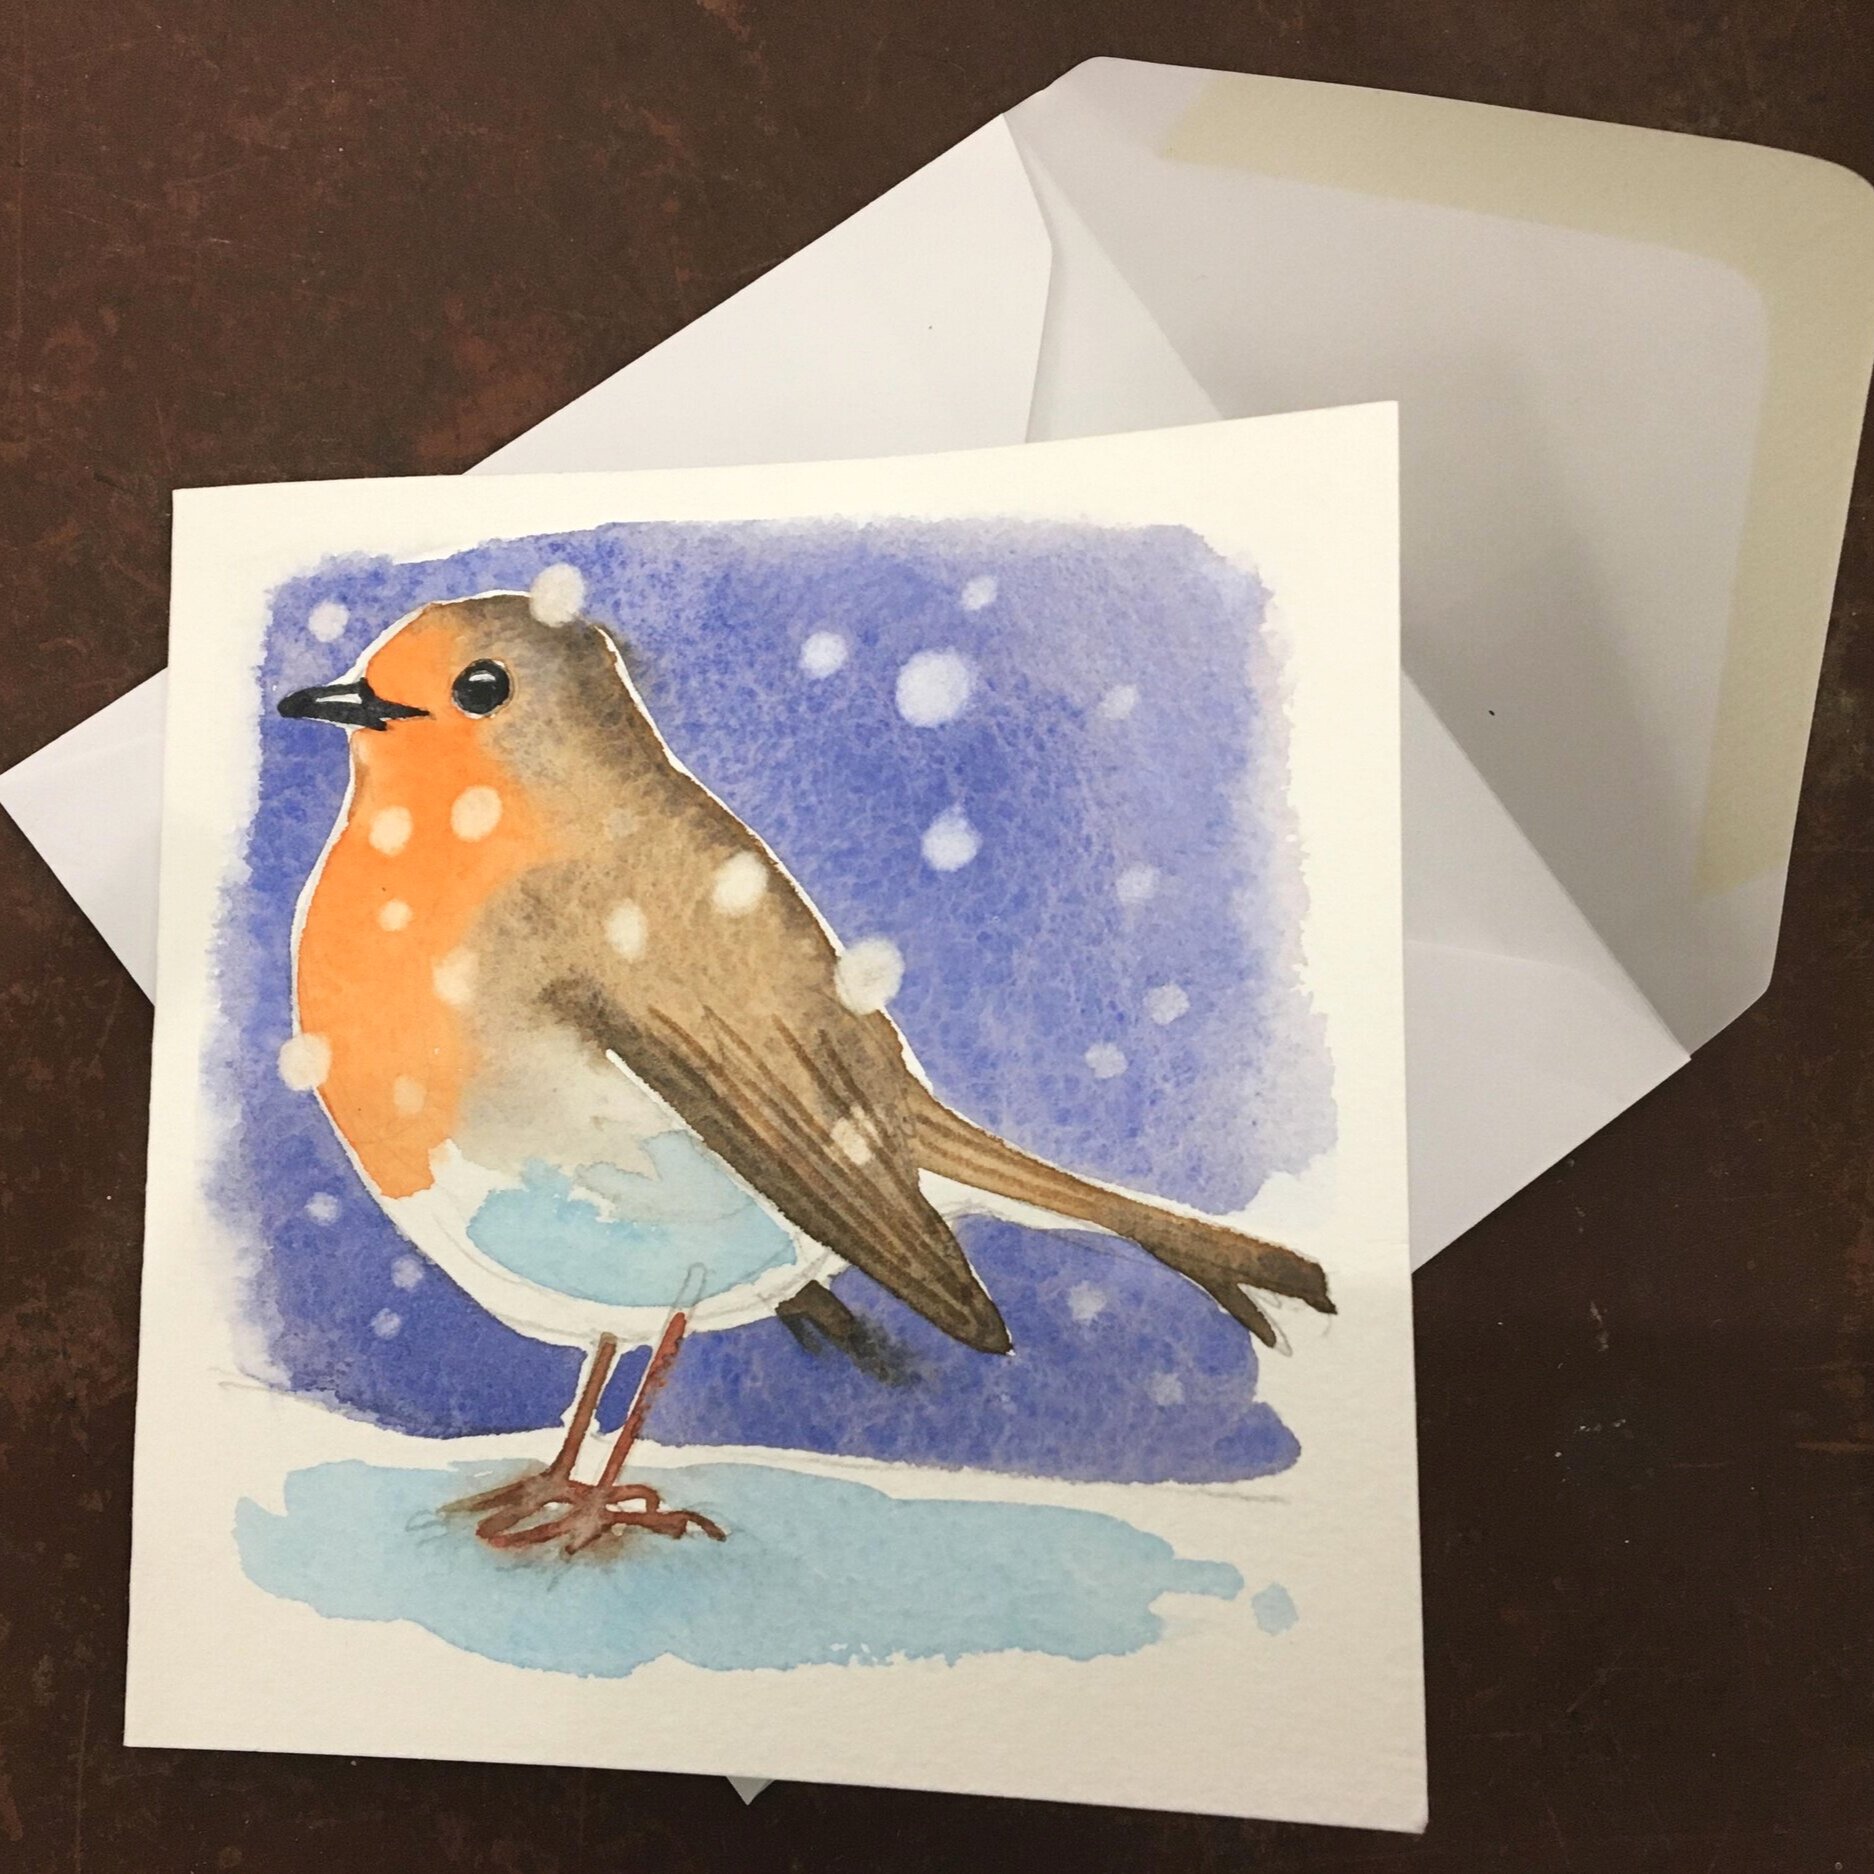
17) So all that’s left to do now is to gently peel away the masking tape, fold your card and feel very proud of yourself!
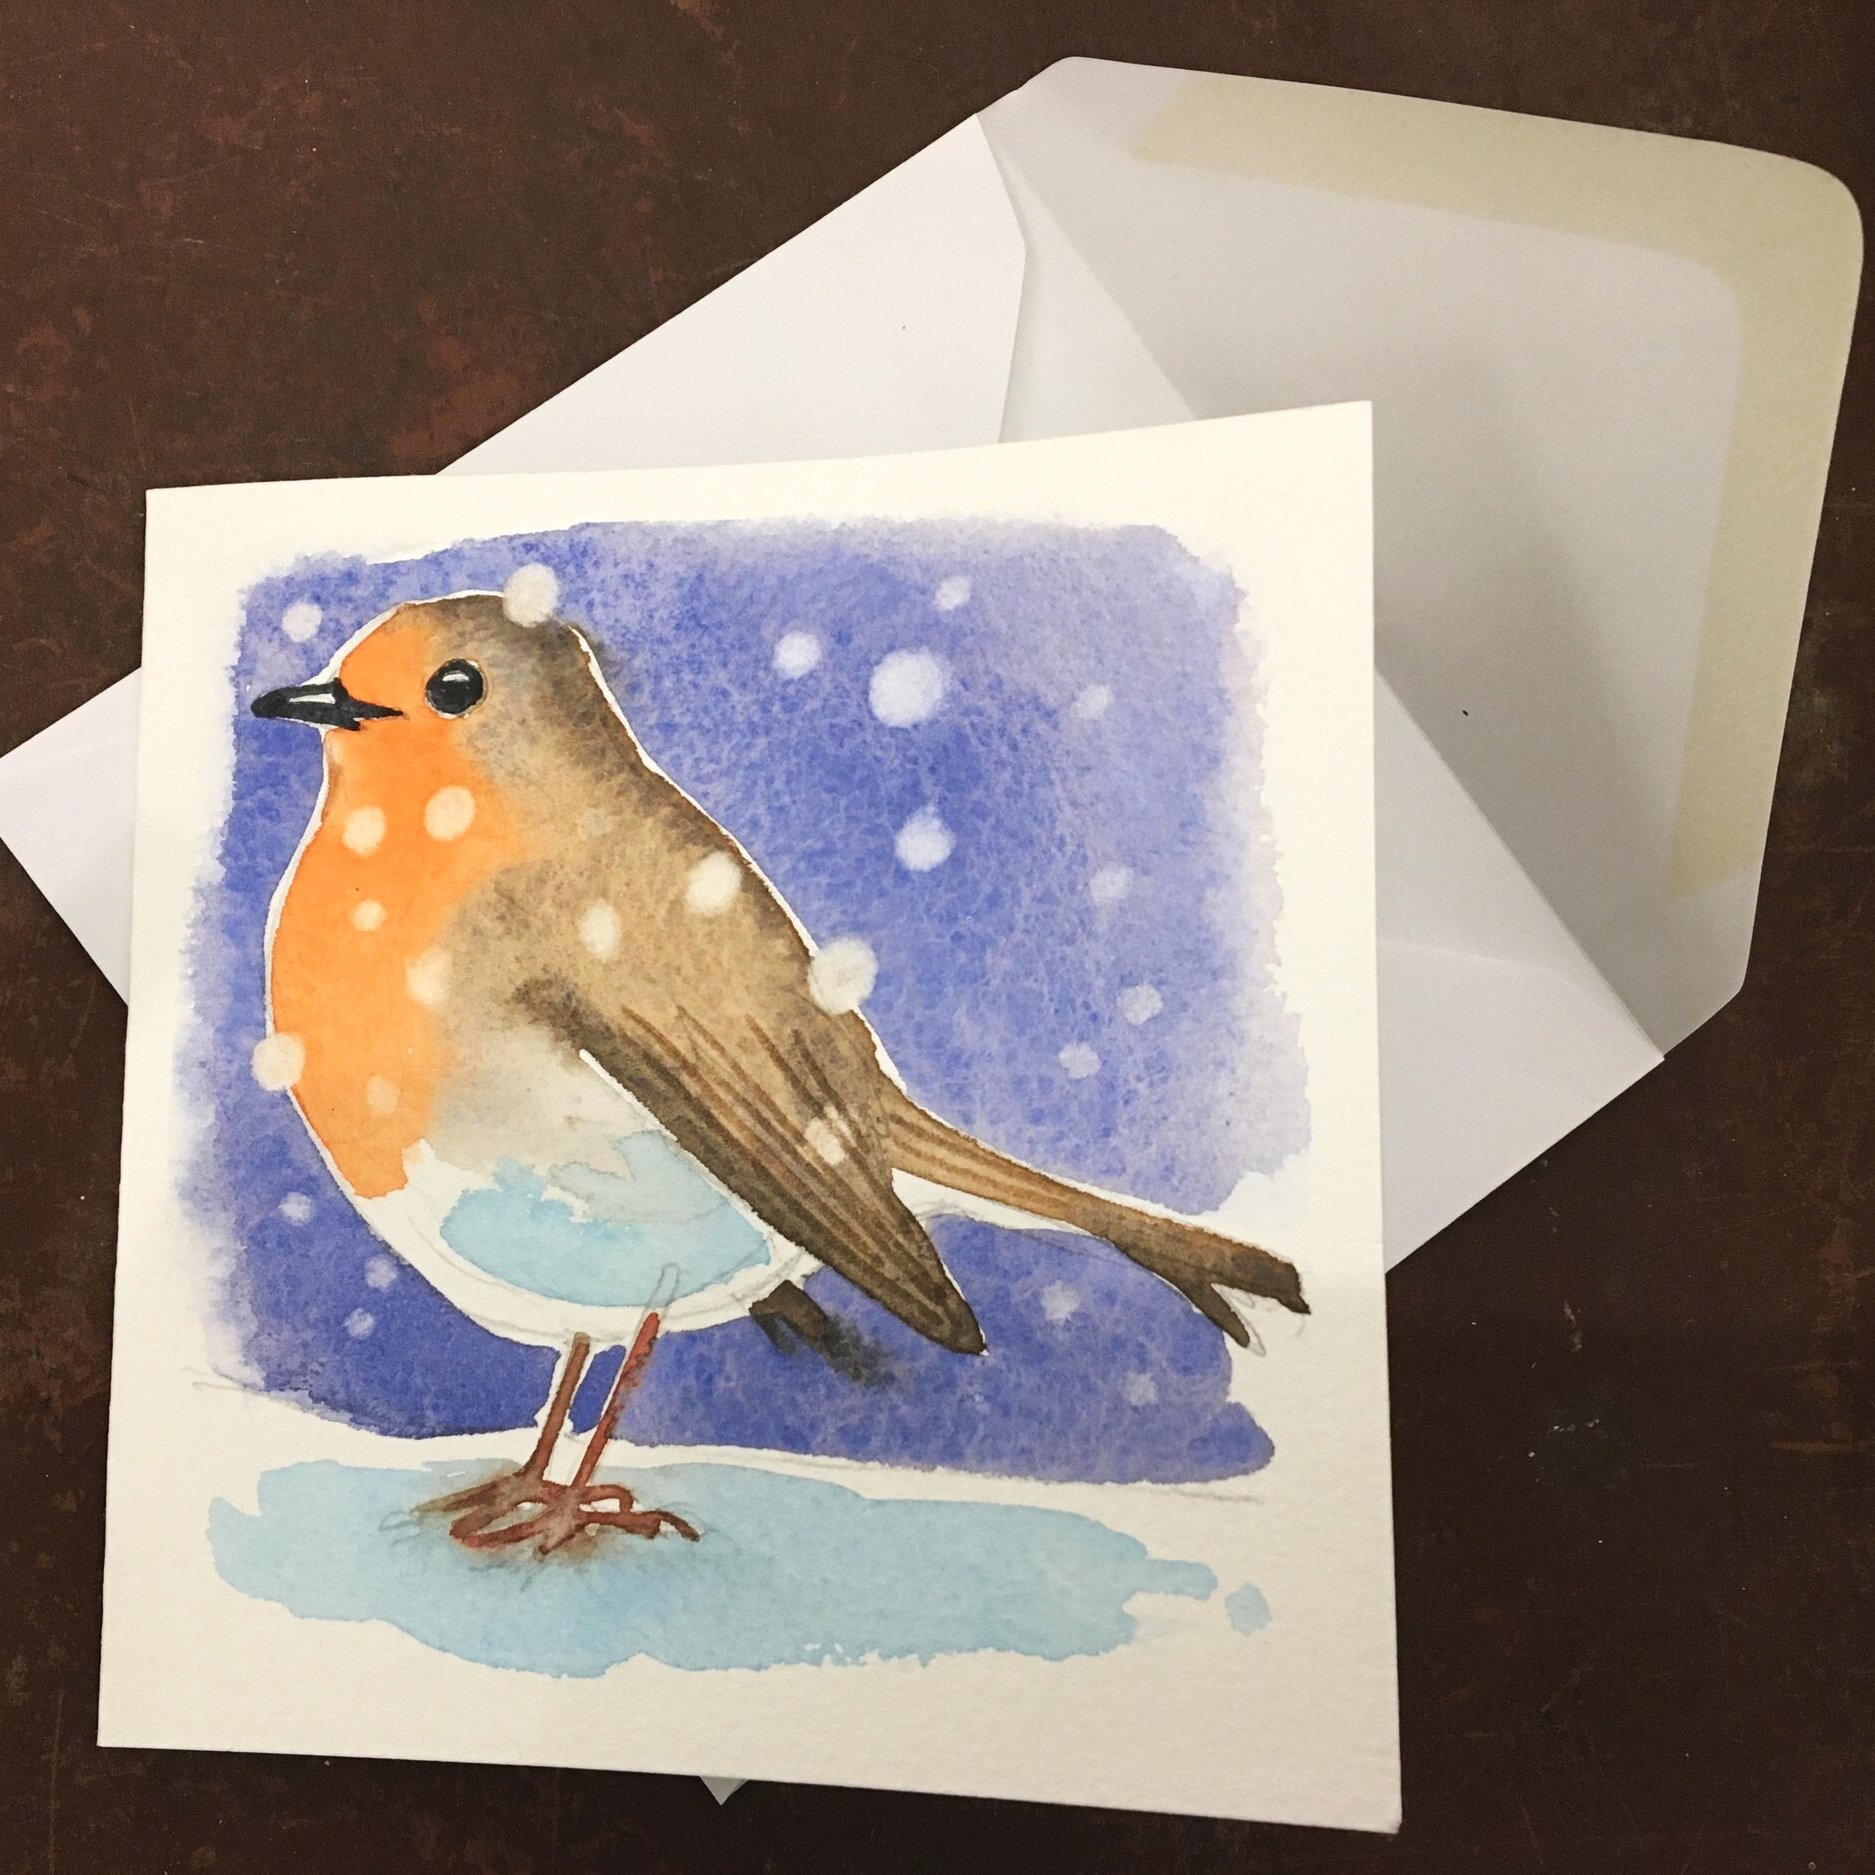
Oh, and don’t forget to write a lovely message inside to your special person and post it off in good time!
I hope you enjoyed this tutorial for a watercolour Christmas Card, and that you receive lots of compliments!
Do leave a comment and let me know how you get on.
Are there any tips that you found particularly useful?